

In this tutorial we’ll be looking into Api.ai, an API that lets us build apps which understand natural language, much like Siri. It can accept either text or speech as input, which it then parses and returns a JSON string that can be interpreted by the code that we write.
All the files we’ll use in this tutorial are available in this Github repository.

Key Takeaways
- API.ai allows developers to create PHP applications that understand natural language inputs, similar to Siri, by processing text or speech and returning actionable data in JSON format.
- Key concepts in API.ai include agents (applications), entities (custom concepts like currencies), intents (actions based on user commands), contexts (user expression context), aliases (entity references in code), and domains (pre-defined knowledge packages).
- The tutorial demonstrates building a PHP app to fetch the current time in any location using API.ai, Google’s Geocoding API, and Timezone API, illustrating how to integrate and convert API data into usable responses.
- API.ai’s domains feature, still in beta, simplifies integration by providing built-in entities and intents that require minimal setup, enabling quick creation of applications like video searches on YouTube.
- The tutorial also covers creating a currency converter PHP app using API.ai, showcasing how to handle user inputs, define intents and entities, and integrate with external APIs like currencylayer for real-time data.
- API.ai supports multiple platforms and languages, offering flexibility for developers to create voice-enabled applications beyond web environments, including mobile and desktop applications.
Concepts
Before we move on to the practical part, it’s important that we first understand the following concepts:
-
agents – agents are applications. We create an agent as a means of grouping individual entities and intents.
-
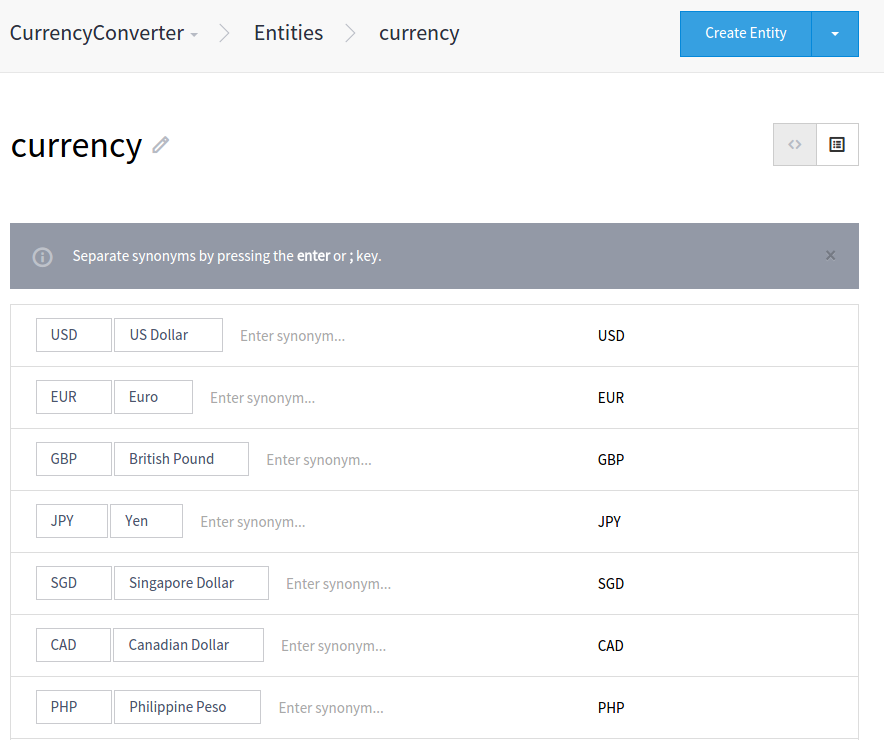
entities – entities are custom concepts that we want to incorporate into our application. They provide a way of giving meaning to a specific concept by means of adding examples. A sample entity would be ‘currency’. We define it by adding synonyms such as ‘USD’, ‘US Dollar’, or just ‘Dollars’. Each synonym is then assigned to a reference value that can be used in the code. It’s just a list of words which can be used to refer to that concept. Api.ai already provides some basic entities such as
@sys.number, which is an entity referring to any number, and@sys.emailwhich is an entity referring to any email address. We can use the built-in entities by specifying@sysas the prefix. -
intents – intents allow us to define which actions the program will execute depending on what a user says. A sample intent would be ‘convert currency’. We then list out all the possible phrases or sentences the user would say if they want to convert currency. For example, a user could say ‘how much is @sys.number:number @currency:fromCurrency in @currency:toCurrency?’. In this example, we’ve used 2 entities:
@sys.numberand@currency. Using the colon after the entity allows us to define an alias for that entity. This alias can then be used in our code to get the value of the entity. We need to give the same entity a different alias so that we could treat them separately in our code. In order for humans to understand the above intent, all we have to do is substitute the entities with actual values. So a user might say ‘How much is 900 US Dollars in Japanese Yen?’ and Api.ai would just map ‘900’ as the value for@sys.number, ‘US Dollar’ for the fromCurrency@currencyand ‘Japanese Yen’ for the toCurrency@currency. -
contexts – contexts represent the current context of a user expression. For example, a user might say ‘How much is 55 US Dollars in Japanese Yen?’ and then follow with ‘what about in Philippine Peso?’. Api.ai, in this case, uses what was previously spoken by the user, ‘How much is 55 US Dollars,’ as the context for the second expression.
-
aliases – aliases provide a way of referring to a specific entity in your code, as we saw earlier in the explanation for the intents.
-
domains – domains are pre-defined knowledge packages. We can think of them as a collection of built-in entities and intents in Api.ai. In other words, they are tricks that Api.ai can perform with little to no setup or coding required. For example, a user can say, ‘Find videos of Pikachu on YouTube.’ and Api.ai would already know how to parse that and returns ‘Pikachu’ as the search term and ‘Youtube’ as the service. From there, we can just use the data returned to navigate to Youtube and search for ‘Pikachu’. In JavaScript, it’s only a matter of setting the
location.hrefto point to Youtube’s search results page:window.location.href = "https://www.youtube.com/results?search_query=pikachu";
To use domains for your agent, select your agent from the console and then click on the domains menu at the top. From there, enable the domains knowledge base and fulfillment. Note that domains are currently in beta, but you can always use the API console to test them.
Enabling the domains knowledge base enables the domains functionality. Enabling the fulfillment enables the use of third-party services such as Small Talk and Weather. This means that we won’t need to make a separate request to a specific API if the service that we need already integrates with Api.ai.
Getting the Current Time in a Specific Place
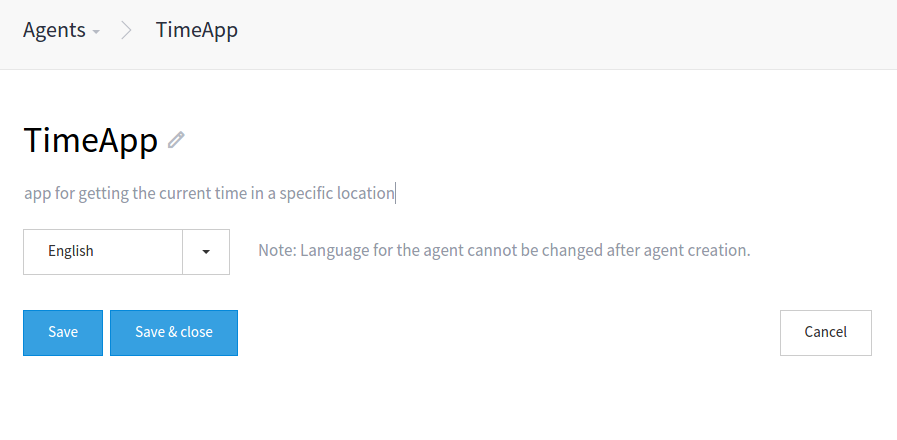
Now that we have an understanding of the main concepts, we can proceed with building a simple app. The first thing that we’re going to build is an app for getting the current time in a specific place.
If you haven’t done so already, sign up for a free account at the Api.ai website, verify your e-mail address and then log on / sign in with your credentials.
Next, go to the agents page and create a new agent by clicking on the ‘Create Agent’ button. Once in the page for creating a new agent, enter the name, description, and language, and save.
This gives you the subscription key, developer access token and client access token. You can use these to make requests to the API, either from the client (browser) or from the server. One advantage of making the requests from the server is keeping your credentials hidden.
The agent that we’ve created will be using domains. This means that we do not need to set up entities and intents. What we need is a little help from two Google APIs: Geocoding API and Timezone API. Geocoding API is used to convert the location that we get from Api.ai into coordinates. We then use these coordinates to query the Timezone API to get the current time for that location. Go to your Google Console and enable the Timezone API. The Geocoding API doesn’t require an API key to be supplied, so we don’t need to enable it.
Next, install Guzzle. We will be using Guzzle 5 to make a request to Api.ai.
composer require guzzlehttp/guzzle:~5.0Then, create a new PHP file (time.php) and add the following code so we can use Guzzle from our file.
<?php
require 'vendor/autoload.php';

use GuzzleHttp\Client;

$client = new Client();
After that, define your API keys:
$google_api_key = 'YOUR_GOOGLE_API_KEY';
$apiai_key = 'YOUR_API_AI_AGENT_DEVELOPER_ACCESS_TOKEN';
$apiai_subscription_key = 'YOUR_API_AI_SUBSCRIPTION_KEY';
Naturally, in a real app, you’d probably keep credentials outside of app logic, in some kind of local configuration file.
We can now make a request to Api.ai. To make a request, we need to pass in the developer access token and subscription key as headers. We then pass in the body of the request as JSON. The request body should contain the query and the lang keys. The query is submitted from the client-side through a POST request. An example of a query for this app would be “What time is it in Barcelona, Spain?” or “What’s the current time in Ikebukuro, Japan?”. The response returned is a JSON string so we convert it to an array by calling the json method on the $response.
$query = $_POST['query']; //the users query

$response = $client->post('https://api.api.ai/v1/query', array(
    'headers' => array(
        'Authorization' => "Bearer {$apiai_key}",
        'ocp-apim-subscription-key' => $apiai_subscription_key,
        'Content-Type' => 'application/json; charset=utf-8'
    ),
    'json' => array(
        "query" => $query,
        "lang" => "en"
    )
));

$result = $response->json();
Here’s a sample response that we get when we make the request above:
Array

(

    [id] => eb69f468-6e1a-41c9-883d-6ac7c71cd187

    1750142601 => 2015-05-16T09:19:47.519Z

    [result] => Array

        (

            [source] => domains

            [resolvedQuery] => What's the current time in Barcelona Spain?

            [speech] =>

            [action] => clock.time

            [parameters] => Array

                (

                    [location] => Barcelona Spain

                )
            [metadata] => Array

                (

                    [inputContexts] => Array

                        (

                        )
                    [outputContexts] => Array

                        (

                        )
                    [contexts] => Array

                        (

                        )
                )
        )
    [status] => Array

        (

            [code] => 200

            [errorType] => success

        )
)
If we get a status code of 200, it means the request was successful. The data that we need are stored in the result item. In this case, we only need to extract the location from the parameters. If a location isn’t returned, then we just tell the user that the location isn’t found.
if(!empty($result['result']) && !empty($result['result']['parameters']['location'])){
    $location = $result['result']['parameters']['location'];

}else{
    echo "Sorry, I could not find that location.";
}
If a location is found, we make a request to the Google Geocoding API to convert the location to coordinates. If the status is OK, this means that we got a result. So we just extract the latitude and longitude values from the first result.
$place_response = $client->get("http://maps.googleapis.com/maps/api/geocode/json?address={$location}&sensor=false");

$place_result = $place_response->json();

if($place_result['status'] == 'OK'){

    $lat = $place_result['results'][0]['geometry']['location']['lat'];
    $lng = $place_result['results'][0]['geometry']['location']['lng'];
}
Next, we get the current unix timestamp. We pass this value along with the latitude and longitude as a query for our request to the Google Timezone API. We then extract the timeZoneId which we can use to temporarily set the timezone using the date_default_timezone_set method. Finally, we just output the formatted time to the user.
$timestamp = time(); //get the current unix timestamp

$time_response = $client->get("https://maps.googleapis.com/maps/api/timezone/json?location={$lat},{$lng}×tamp={$timestamp}&key={$google_api_key}");

$time_result = $time_response->json();

if($time_result['status'] == 'OK'){
    $timezone = $time_result['timeZoneId'];

    date_default_timezone_set($timezone);

    echo 'It's currently ' . date('l, F j, Y g:i A') . ' in ' . $location;
}
Let’s proceed to the client side. Create an index.html file with the following code:
<!DOCTYPE html>
<html lang="en">
<head>
    <meta charset="UTF-8">
    <title>time</title>
    <script src="http://cdnjs.cloudflare.com/ajax/libs/jquery/2.1.4/jquery.min.js"></script>
    <script src="responsive-voice.js"></script>
</head>
<body>
    <div>
        <input type="text" id="query" name="query"> <button id="rec">Speak</button>
    </div>
    <div id="response"></div>
    <script src="speech-recognition.js"></script>
    <script src="main.js"></script>
</body>
</html>
We’re using jQuery (for event handling) and responsive-voice.js. The responsive-voice library allows us to convert text to speech. We use it to speak out the results that we get from the server.
We also have speech-recognition.js, which we use for converting speech to text. This uses the Web Speech API. Sadly, at the time of writing it’s still only partially supported on a few browsers, so this tutorial will assume you’re using Chrome (which does support it).
Let’s explain the above file. First is the global variable that we will use to store the current speech recognition object.
var recognition;Next is the startRecognition method. What this does is create a new speech recognition object. This will ask the user to use the microphone. Next, we set the language to English and start the speech recognition. We then listen for the onstart event. When this event is triggered, it means that the speech recognition has started. We call the updateRec method when this happens, which changes the text of the button for starting and stopping speech recognition. We also listen for the onresult event which is triggered when the user has stopped speaking for a couple of seconds. This contains the results of the speech recognition. We have to loop through the results and use the transcript item in each one to get the text that we need. Once that’s done, we call the setInput method which changes the value of the query text field and calls the send method that submits the query to the server. Next, we call the stopRecognition method to stop the speech recognition and update the UI. We also need to do the same in the onend event.
function startRecognition(){
    recognition = new webkitSpeechRecognition();

    recognition.lang = "en-US";
    recognition.start();

    recognition.onstart = function(event){
        updateRec();
    };

    recognition.onresult = function(event){
        var text = "";
        for(var i = event.resultIndex; i < event.results.length; ++i){
            text += event.results[i][0].transcript;
        }
        setInput(text);
        stopRecognition();
    };

    recognition.onend = function(){
        stopRecognition();
    };
}
Here’s the updateRec method.
function updateRec(){
    $("#rec").text(recognition ? "Stop" : "Speak");
}
setInput method.
function setInput(text){
    $("#query").val(text);
    send();
}
stopRecognition method.
function stopRecognition(){
    if(recognition){
        recognition.stop();
        recognition = null;
    }
    updateRec();
}
Aside from that, we also have the switchRecognition method which is called every time the user clicks on the button for triggering the speech recognition to start or stop.
function switchRecognition(){
    if(recognition){
        stopRecognition();
    }else{
        startRecognition();
    }
}

$("#rec").click(function(event){
    switchRecognition();
});
When the user presses the enter key on the query field, this also triggers the query to be sent to the server.
$("#query").keypress(function(event){
    if(event.which == 13){
        event.preventDefault();
        send();
    }
});
Most of the code in the speech-recognition.js file is from this gist which shows an example of how to use Api.ai on the client-side.
Next is the main.js file where we submit our query to the server. Once we get a response, we use responsive-voice to speak it out and also output it in the response container. That way, we can check the response visually.
function send(){
    var text = $("#query").val();

    $.post(
        'http://localhost/tester/api-ai/time.php',
        {
            'query': text
        },
        function(response){
            responsiveVoice.speak(response);
            $('#response').text(response);
        }
    );
}
Currency Converter
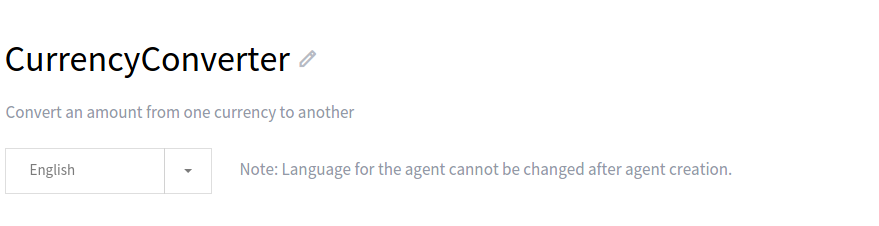
The next app that we’re going to build allows the users to convert a specific amount from one currency to another.
First, create a new agent and call it CurrencyConverter.
Under that agent, create a new entity and call it currency. This will represent the different currencies that we can convert. Define a few currencies that we can use for testing and click on ‘save’.
Next create a new intent and call it convertMoney.
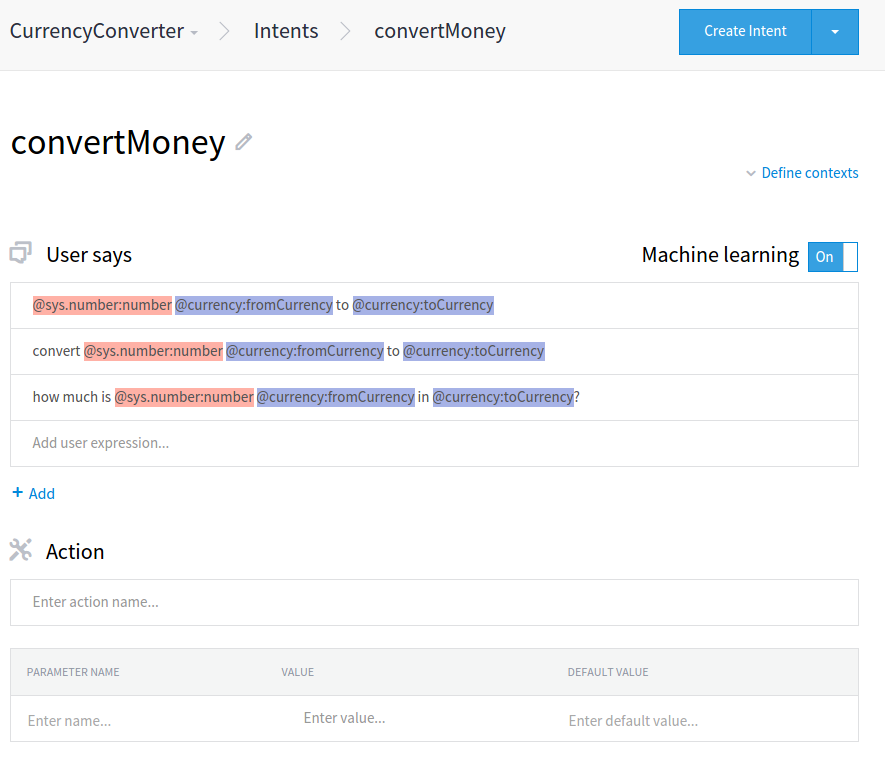
From the screenshot above you can see that we’ve added the following under the ‘user says’ section:
@sys.number:number @currency:fromCurrency to @currency:toCurrency

convert @sys.number:number @currency:fromCurrency to @currency:toCurrency

how much is @sys.number:number @currency:fromCurrency in @currency:toCurrency?
The ‘user says’ section is where we define examples of what the user can say to trigger this specific intent. What we’re doing here is using entities as substitutes for actual values that the user might use. @sys.number can refer to any number. @currency can refer to any currency that we added earlier when we created the currency entity. Using the colon after the entity allows us to assign an alias to it. This alias can then be used to get the value used by the user in the code.
The ‘action’ section is where we define the action or method that we want to execute if this specific intent is used. In this case we won’t define anything because we’re only creating an app which only does one thing.
The ‘fulfillment’ section is where we define a template to the speech that we want to output once the intent is used. For example, we can put the following:
$number $fromCurrency is equivalent to $result $toCurrencyThis will then be available on the speech item in the result that we get. From there, we can perform string replacement to replace those variables with the actual values that we get. But let’s just leave it as blank for this app.
Once you’re done, click on the ‘save’ button to save the intent.
Now we’re ready to proceed with the code. Create an exchange-rate.php file in your working directory then, add the following code:
<?php
require 'vendor/autoload.php';

use GuzzleHttp\Client;

$client = new Client();

$apiai_key = 'YOUR_API_AI_AGENT_DEVELOPER_ACCESS_TOKEN';
$apiai_subscription_key = 'YOUR_API_AI_SUBSCRIPTION_KEY';

$currencylayer_apikey = 'YOUR_CURRENCYLAYER_API_KEY';

$query = $_POST['query'];

$response = $client->post('https://api.api.ai/v1/query', array(
    'headers' => array(
        'Authorization' => "Bearer {$apiai_key}",
        'ocp-apim-subscription-key' => $apiai_subscription_key,
        'Content-Type' => 'application/json; charset=utf-8'
    ),
    'json' => array(
        "query" => $query,
        "lang" => "en"
    )
));

$result = $response->json();
As you can see from the code above, it’s basically the same as we did earlier in our previous app. Only this time we’ve added the $currencylayer_apikey variable. This stores the API key that we got from currencylayer.com, an API which allows us to get the current exchange rate from one currency to another. If you wish to follow along, go ahead and sign up for an API key.
Next, we check if there are any results and extract the data that we need. In this case, we need to get the currency that the user wishes to convert, the currency to convert it to and then the amount.
if(!empty($result['result'])){

    $currency_from = $result['result']['parameters']['fromcurrency'];
    $currency_to = $result['result']['parameters']['tocurrency'];
    $amount = $result['result']['parameters']['number'];
}
We then make a request to the API and extract the exchange rate from the results:
$conversion_response = $client->get("http://apilayer.net/api/live?access_key={$currencylayer_apikey}&source={$currency_from}¤cies={$currency_to}");

$conversion_result = $conversion_response->json();

$rate = $conversion_result['quotes'][$currency_from . $currency_to];
The results that we get from the API look like this:
Array
(
    [success] => 1
    [terms] => https://currencylayer.com/terms
    [privacy] => https://currencylayer.com/privacy
    [timestamp] => 1440296829
    [source] => USD
    [quotes] => Array
        (
            [USDPHP] => 46.655499
        )

)
Now that we have the current exchange rate, all we have to do now is multiply the rate with the amount that the user provided and then output the result.
$converted_amount = $amount * $rate;

$speech = "{$amount} {$currency_from} is equivalent to {$converted_amount} {$currency_to}";
echo $speech;
In the client-side, we still use the same HTML and files that we used earlier on our first app. You can go ahead and put those same files in your working directory if you’re following along.
<!DOCTYPE html>
<html lang="en">
<head>
    <meta charset="UTF-8">
    <title>exchange rate</title>
    <link rel="stylesheet" href="style.css">
    <script src="http://cdnjs.cloudflare.com/ajax/libs/jquery/2.1.4/jquery.min.js"></script>
    <script src="responsive-voice.js"></script>
</head>
<body>
    <div>
        <input type="text" id="query" name="query"> <button id="rec">Speak</button>
    </div>
    <div id="response"></div>
    <script src="speech-recognition.js"></script>
    <script src="main.js"></script>
</body>
</html>
The only difference is the URL to which we are sending the request. Point it to where your exchange-rate.php is being served:
function send(){
    var text = $("#query").val();

    $.post(
        'http://localhost/tester/api-ai/exchange-rate.php',
        {
            'query': text
        },
        function(response){
            responsiveVoice.speak(response);
            $('#response').text(response);
        }
    );
}
Conclusion
In this tutorial, we have learned how to use Api.ai for creating voice-enabled PHP apps. Browser support is still pretty limited because the Web Speech API still isn’t widely implemented. But Api.ai supports other platforms aside from the Web. Android, Cordova, .Net, iOS are a few examples. This means that we can use Api.ai without worrying about support on these platforms. Be sure to check out their docs if you want to learn more. The files that we’ve used in this tutorial are available in this Github repository.
Frequently Asked Questions (FAQs) on Voice-Controlled PHP Apps with API.AI
How can I integrate API.AI with PHP for voice recognition?
Integrating API.AI with PHP for voice recognition involves a few steps. First, you need to create a new agent in API.AI. This agent will be responsible for understanding the user’s voice input and converting it into actionable data. After creating the agent, you need to train it with phrases and responses. Once the agent is trained, you can use the API.AI PHP SDK to integrate the agent into your PHP application. The SDK provides methods for sending voice data to the agent and receiving the processed data back.
What are the prerequisites for building a voice-controlled PHP app with API.AI?
To build a voice-controlled PHP app with API.AI, you need to have a basic understanding of PHP and object-oriented programming. You also need to have a working knowledge of API.AI and how it works. Additionally, you need to have a server where you can host your PHP application. Lastly, you need to have the API.AI PHP SDK installed on your server.
Can I use other voice recognition APIs with PHP?
Yes, you can use other voice recognition APIs with PHP. Some popular alternatives to API.AI include IBM Watson, Microsoft Azure Cognitive Services, and Google Cloud Speech-to-Text. These APIs also provide PHP SDKs that you can use to integrate them into your PHP application.
How can I improve the accuracy of voice recognition in my PHP app?
Improving the accuracy of voice recognition in your PHP app involves training your API.AI agent with more phrases and responses. The more data the agent has, the better it can understand and process voice input. You can also use the agent’s machine learning capabilities to continuously improve its performance over time.
How can I handle different languages in my voice-controlled PHP app?
API.AI supports multiple languages, so you can train your agent to understand and respond to voice input in different languages. When sending voice data to the agent, you can specify the language in the request. The agent will then process the voice input based on the specified language.
Can I use API.AI for text-to-speech in my PHP app?
Yes, you can use API.AI for text-to-speech in your PHP app. API.AI provides methods for converting text into speech. You can use these methods to make your app speak out responses or instructions to the user.
How can I secure the voice data in my PHP app?
Securing the voice data in your PHP app involves encrypting the data before sending it to API.AI. You can use PHP’s built-in encryption functions to encrypt the data. Additionally, you should use HTTPS for all communication between your app and API.AI to prevent data interception.
Can I use API.AI for voice-controlled web apps?
Yes, you can use API.AI for voice-controlled web apps. The API.AI PHP SDK can be used in any PHP application, including web apps. You can use JavaScript to capture the user’s voice input in the browser and then send it to your PHP backend for processing.
How can I test the voice recognition capabilities of my PHP app?
You can test the voice recognition capabilities of your PHP app by creating a set of test phrases and responses. You can then use these tests to check if the app correctly understands and processes the voice input.
Can I use API.AI for voice-controlled mobile apps?
Yes, you can use API.AI for voice-controlled mobile apps. However, you would need to use the API.AI SDK for the specific mobile platform (Android or iOS) instead of the PHP SDK. The mobile SDKs provide methods for capturing the user’s voice input and sending it to API.AI for processing.

