You might be aware of Google Analytics’ Experiments feature, but it can be a little intimidating if you’ve never used it.
There’s no need to be scared, though: Setting up an experiment is actually quite simple. In this article we’ll walk through to how to set up Google Experiments step by step, but first let’s take a minute to review the benefits the tool offers.
What does Google Experiements do?
Google Experiments sends a part of the traffic your page receives from Google to a variation you’ve created, meaning you can compare slightly different versions of your site and see which performs best. Practically speaking, this means you can put anything–website copy, images, layout–to the test and see which gets the best reaction from users in terms of clicks or conversions before commiting yourself to a new design.
Using Google Experiments, it’s impossible to lose–if users don’t react well to the new changes, just flip back to the original version of your site.
And once you’re comfortable with the process, it’s a tool you can use time and time again.
Defining your goals
The first step in any online marketing exercise is to define your goals clearly, and Google Experiments is no different.
What do you aim to achieve with your page changes? More conversions, a greater number of clicks on a specific link in the page, a lower bounce rate?
Defining your aims first and knowing exactly which hypothesis you wish to test is key to running a successful experiment. If you’re struggling to come up with ideas, don’t worry–we’ve got you covered with some suggestions at the end of this post.
Preparing your site for testing
Once you know what your objectives are, the next thing you’ll need in order to set up Google Experiments is two slightly different versions of a page on your site.
To keep the test controlled, it’s a good idea to make as few changes as possible. For some tests, that might mean all you change is the copy on a signup button! That said, make sure the few changes you make are bold enough to be noticeable, as otherwise your results are likely to be inconclusive and you will have wasted your time.
Don’t forget to keep your test page invisible–hide it from the main navigation menu so that users of the rest of your site don’t get confused. And it’s a good idea to include the rel=canonical tag in your modified page (especially when the text is very similar to the original page) to make sure there’s no chance of being penalized for duplicate content. Better safe than sorry!
The good news is that half the battle has already been won by the time you get to this stage. And you haven’t even opened your Analytics account yet!
Configuring a Google Analytics experiment
Got your goggles and lab coat on? Then it’s time to go into Experiments.
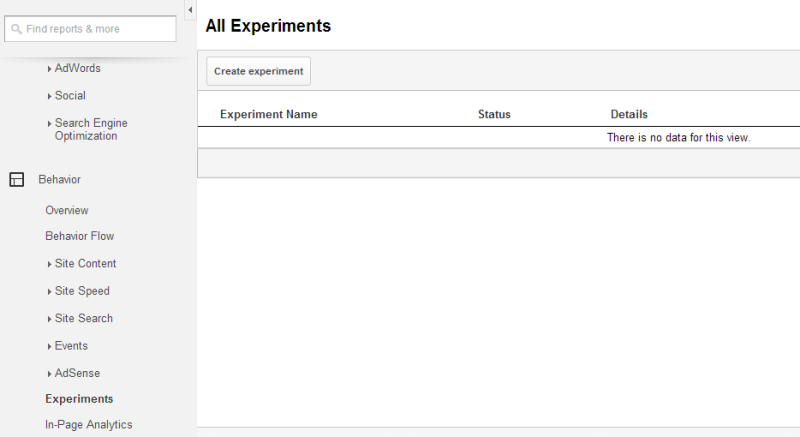
Open Google Analytics > Reporting Page > Behavior > Experiments, and click Create experiment.
Now, Google Analytics will ask you to configure a few options:
1. Choosing an objective and traffic split
Here, you’ll need to tell Analytics what your experiment’s objective is. You can choose from three options: Ecommerce, Site usage or Create a new objective.
If you use a metric from the Ecommerce section (such as revenue or transactions), you’ll need to set up ecommerce tracking in your Analytics account first.
Create a new objective will take you to a page where you’re required to set up a goal. There are four goal types to choose from, which include things like a final destination page, duration on a page, how many pages were viewed or a concrete event that you set. Setting up a goal isn’t difficult, and Google gives advice on how to do so here.
Next you’ll choose a percentage of traffic to send to the new page. If you want to limit risk, keep this percentage low. If you’re operating a low-traffic site, however, a 50:50 split is your best bet so you can ensure your results are based on a decent sample size.
There’s also some interesting stuff in the Advanced Options in this section. You can set parameters like a confidence threshold, which specifies Google Analytics’ level of confidence in the result. Experiments may need slightly more time to attain an increased confidence threshold.
2. Configuring your experiment
This step is straightforward–just add the URLs of your test and control page.
3. Setting up your experiment code
Copy and paste the code provided within the head tag of the control page on your site.
4. Review and start
You’re ready to go!
Whenever you like, you can head back to Behavior > Experiments to see how your test is going.
Acting on your results
There are several possible outcomes of a Google Content Experiment:
It’s all gone horribly wrong!
Is your variation page not working out as you’d planned? Are you losing clicks and conversions? Don’t panic! Simply enter the experiment and click Stop Experiment.
The experiment ends naturally
Experiments last for a maximum of three months. It may be the case that yours comes to a natural end with inconclusive results. In this case, you may wish to try a follow-up experiment or test something entirely different.
We have a winner!
The ideal outcome is the one in which one of the test versions of your site is a clear winner. If this is the new version, it would be wise to consider updating the original page with the new changes (and consider getting the rest of your office to take you out for lunch, perhaps!). You’ll need to do this manually on your site–there’s no way to automatically apply the changes from Google Analytics.
What to test–and what not to test
All clear? Good. To get you started, here are some ideas for modifications you could make to your site that would make for good Google Experiments tests, as well as three things you shouldn’t bother testing at all.
5 ideas for a Google Experiments test
- Call-to-action buttons. Size, position, color … there are plenty of different theories about the kind of signup button you should use on your landing pages. Use Google Experiments to discover which is most likely to grab your readers’ attention.
- Headers and footers. We ran one interesting experiment where we removed the footer entirely from the contact page of our site, thus removing any potential distraction that could get in the way of conversions. And it worked!
- Images. Have you heard that pictures of people make adverts more powerful? With Google Experiments, you can check whether or not this is true.
- Copy. Google Experiments don’t have to be limited to design. Why not try getting your strongest copywriter to take a fresh look at some of the text on your main pages?
- Layout. Should you place a link near the top, bottom or middle of your page to encourage more clicks? Does eliminating content from blind spots and adapting your layout to the way we read a screen have a significant effect on clicks and conversions?
3 things not to test
- Your new logo. Corporate branding should always be kept as consistent as possible. Changing central design elements such as logos in different parts of your site will confuse users and dilute your brand.
- U.K. or U.S. English? The difference between the two on just one page of your site is likely to be just too small to provide conclusive evidence.
- Something that you “know” will work. If you are convinced that changing an element of a page will have a positive impact, you’re likely to come to your own conclusions about regardless of what you read in the data. It’s OK to have hunches and suspicions before you test, but you should try to approach your experiments with an open mind.
Taking smart risks
Trying out new ideas is a vital part of online marketing–you can’t get ahead without taking some risks. That said, it’s always best to do so in a controlled environment where potential damage is limited.
Google Experiments gives you the best of both worlds–a safe space for innovation. All you need to do is learn how to use the tool, but as you’ve seen, that’s not so hard. In fact, you’ll probably find that it takes longer to decide what to test (and get the copy written or graphics created) than it does to configure the experiment in Analytics.
How did your experiment go? Let us know in the comments!
 Penelope Cain
Penelope is currently Online Marketing Manager for web design and development inMotion Real Estate Media, which offers professional digital marketing solutions for the commercial property market.