
- Preliminaries
- Creating a new Next.js App
- Adding a Dockerized PostgreSQL Database
- Adding Chakra UI
- Adding NextAuth
- Adding and Configuring Prisma
- Adding Some Seed Data
- Adding React Query
- Option to View a List of Tweets
- Option to Add a New Tweet
- Option to View the Profile of a User with only Their Tweets
- Conclusion
- Frequently Asked Questions (FAQs) about Building a Twitter Clone with Next.js and Prisma
The best way to learn a tool like React is to build something with it. Next.js is a powerful framework that helps you build for production. In this tutorial, we’ll learn how to build a clone of Twitter using Next.js and Prisma.
Our app will have the following features:
- authentication using NextAuth and Twitter OAuth
- an option to add a new tweet
- an option to view a list of tweets
- an option to view the profile of a user with only their tweets
The code for the app we’ll be building is available on GitHub. We’ll be using TypeScript to build our app.
Preliminaries
Next.js is one of the most popular React.js frameworks. It has a lot of features like server-side rendering, TypeScript support, image optimization, I18n support, file-system routing, and more.
Prisma is an ORM for Node.js and TypeScript. It also provides a lot of features like raw database access, seamless relation API, native database types, and so on.
Software required
We’ll need the following installed for the purposes of running our app:
These technologies will be used in the app:
- Next.js: for building our app
- Prisma: for fetching and saving data into the database
- Chakra UI: for adding styles to our app
- NextAuth: for handling authentication
- React Query: for fetching and updating data in our app
Creating a new Next.js App
Now, let’s get started! We’ll first create a new Next.js app by running the following command from our terminal:
yarn create next-app
We’ll need to enter the name of the app when the command prompts for it. We can name it anything we want. However, in this case, I’ll name it twitter-clone. We should be able to see a similar output on our terminal:
$ yarn create next-app

yarn create v1.22.5
[1/4] 🔍  Resolving packages...
[2/4] 🚚  Fetching packages...
[3/4] 🔗  Linking dependencies...
[4/4] 🔨  Building fresh packages...

success Installed "create-next-app@10.0.4" with binaries:
      - create-next-app
✔ What is your project named? twitter-clone
Creating a new Next.js app in /twitter-clone.

....

Initialized a git repository.

Success! Created twitter-clone at /twitter-clone
Inside that directory, you can run several commands:

  yarn dev
    Starts the development server.

  yarn build
    Builds the app for production.

  yarn start
    Runs the built app in production mode.

We suggest that you begin by typing:

  cd twitter-clone
  yarn dev
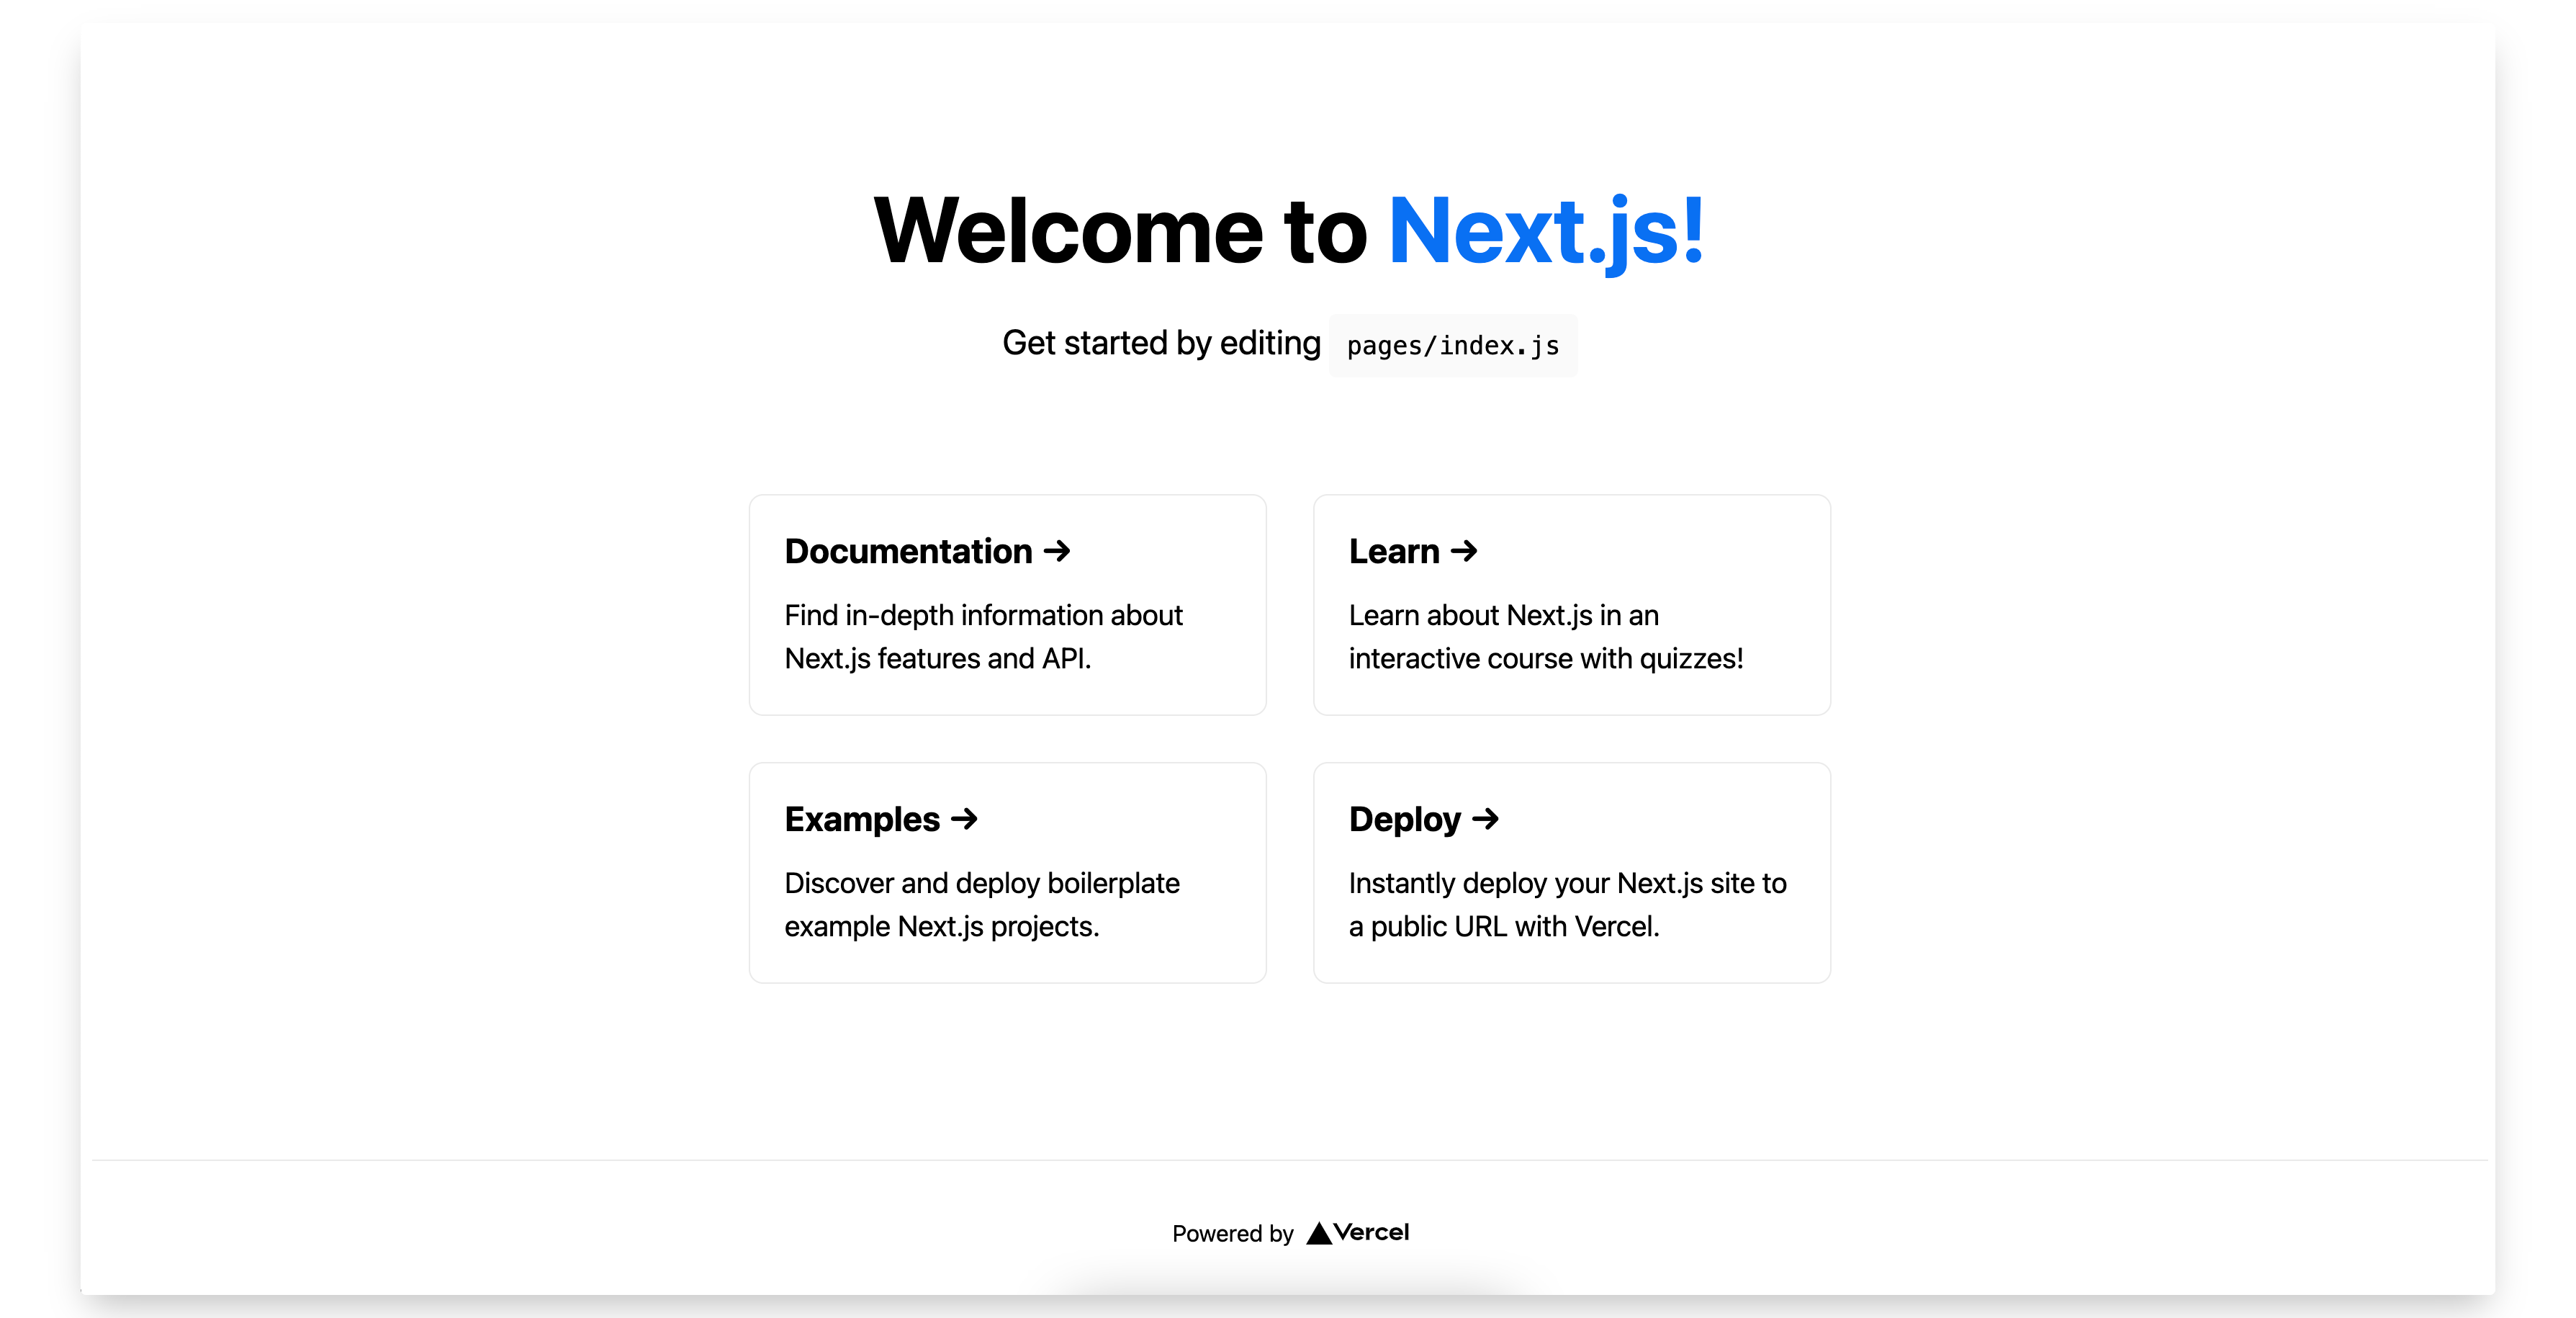
We can now go inside the twitter-clone directory and start our app by running the following command:
cd twitter-clone && yarn dev
Our Next.js app should be up and running on http://localhost:3000. We should be able to see the following screen:
Adding a Dockerized PostgreSQL Database
Next, let’s add a Dockerized PostgreSQL database so that we can save the users and tweets into it. We can create a new docker-compose.yml file in the root of our app with the following content:
version: "3"

services:
  db:
    container_name: db
    image: postgres:11.3-alpine
    ports:
      - "5432:5432"
    volumes:
      - db_data:/var/lib/postgresql/data
    restart: unless-stopped

volumes:
  db_data:
If Docker is running on our machine, we can execute the following command from the root of our app to start our PostgreSQL container:
docker-compose up
The above command will start the PostgreSQL container and it can be accessed on postgresql://postgres:@localhost:5432/postgres. Note that you can also use a local installation of Postgres instead of a Dockerized one.
Adding Chakra UI
Chakra UI is a very simple React.js component library. It’s very popular and has the features like accessibility, support for both light and dark mode, and more. We’ll be using Chakra UI for styling our user interface. We can install that package by running the following command from the root of our app:
yarn add @chakra-ui/react @emotion/react @emotion/styled framer-motion
Let’s rename our _app.js file to _app.tsx inside the pages directory and replace its content with the following:
// pages/_app.tsx

import { ChakraProvider } from "@chakra-ui/react";
import { AppProps } from "next/app";
import Head from "next/head";
import React from "react";

const App = ({ Component, pageProps }: AppProps) => {
  return (
    <>
      <Head>
        <link rel="shortcut icon" href="/images/favicon.ico" />
      </Head>
      <ChakraProvider>
        <Component {...pageProps} />
      </ChakraProvider>
    </>
  );
};

export default App;
Since we added a new TypeScript file, we’ll need to restart our Next.js server. Once we restart our server, we’ll get the following error:
$ yarn dev

yarn run v1.22.5
$ next dev
ready - started server on http://localhost:3000
It looks like you're trying to use TypeScript but do not have the required package(s) installed.

Please install typescript, @types/react, and @types/node by running:

  yarn add --dev typescript @types/react @types/node

If you are not trying to use TypeScript, please remove the tsconfig.json file from your package root (and any TypeScript files in your pages directory).
This is because we added a new TypeScript file but didn’t add the necessary dependencies that are required to run them. We can fix that by installing the missing dependencies. From the root of our app, we can execute the following command to install the missing dependencies:
yarn add --dev typescript @types/react @types/node
Now, if we start our Next.js server, our app should compile:
$ yarn dev

yarn run v1.22.5
$ next dev
ready - started server on http://localhost:3000
We detected TypeScript in your project and created a tsconfig.json file for you.

event - compiled successfully
Adding NextAuth
NextAuth is an authentication library for Next.js. It’s simple and easy to understand, flexible and secure by default. To set up NextAuth in our app, we’ll need to install it by running the following command from the root of our app:
yarn add next-auth
Next, we’ll have to update our pages/_app.tsx file with the following content:
// pages/_app.tsx

import { ChakraProvider } from "@chakra-ui/react";
import { Provider as NextAuthProvider } from "next-auth/client";
import { AppProps } from "next/app";
import Head from "next/head";
import React from "react";

const App = ({ Component, pageProps }: AppProps) => {
  return (
    <>
      <Head>
        <link rel="shortcut icon" href="/images/favicon.ico" />
      </Head>
      <NextAuthProvider session={pageProps.session}>
        <ChakraProvider>
          <Component {...pageProps} />
        </ChakraProvider>
      </NextAuthProvider>
    </>
  );
};

export default App;
Here, we’re wrapping our app with NextAuthProvider. Next, we’ll have to create a new file named [...nextauth].ts inside the pages/api/auth directory with the following content:
// pages/api/auth/[...nextauth].ts

import { NextApiRequest, NextApiResponse } from "next";
import NextAuth from "next-auth";
import Providers from "next-auth/providers";

const options = {
  providers: [
    Providers.Twitter({
      clientId: process.env.TWITTER_KEY,
      clientSecret: process.env.TWITTER_SECRET,
    }),
  ],
};

export default NextAuth(options);
The above file will be responsible for handling our authentication using Next.js API routes. Next, we’ll create a new filed named .env in the root of our app to store all our environment variables with the following content:
DATABASE_URL="postgresql://postgres:@localhost:5432/postgres?synchronize=true"
NEXTAUTH_URL=http://localhost:3000
NEXT_PUBLIC_API_URL=http://localhost:3000
TWITTER_KEY=""
TWITTER_SECRET=""
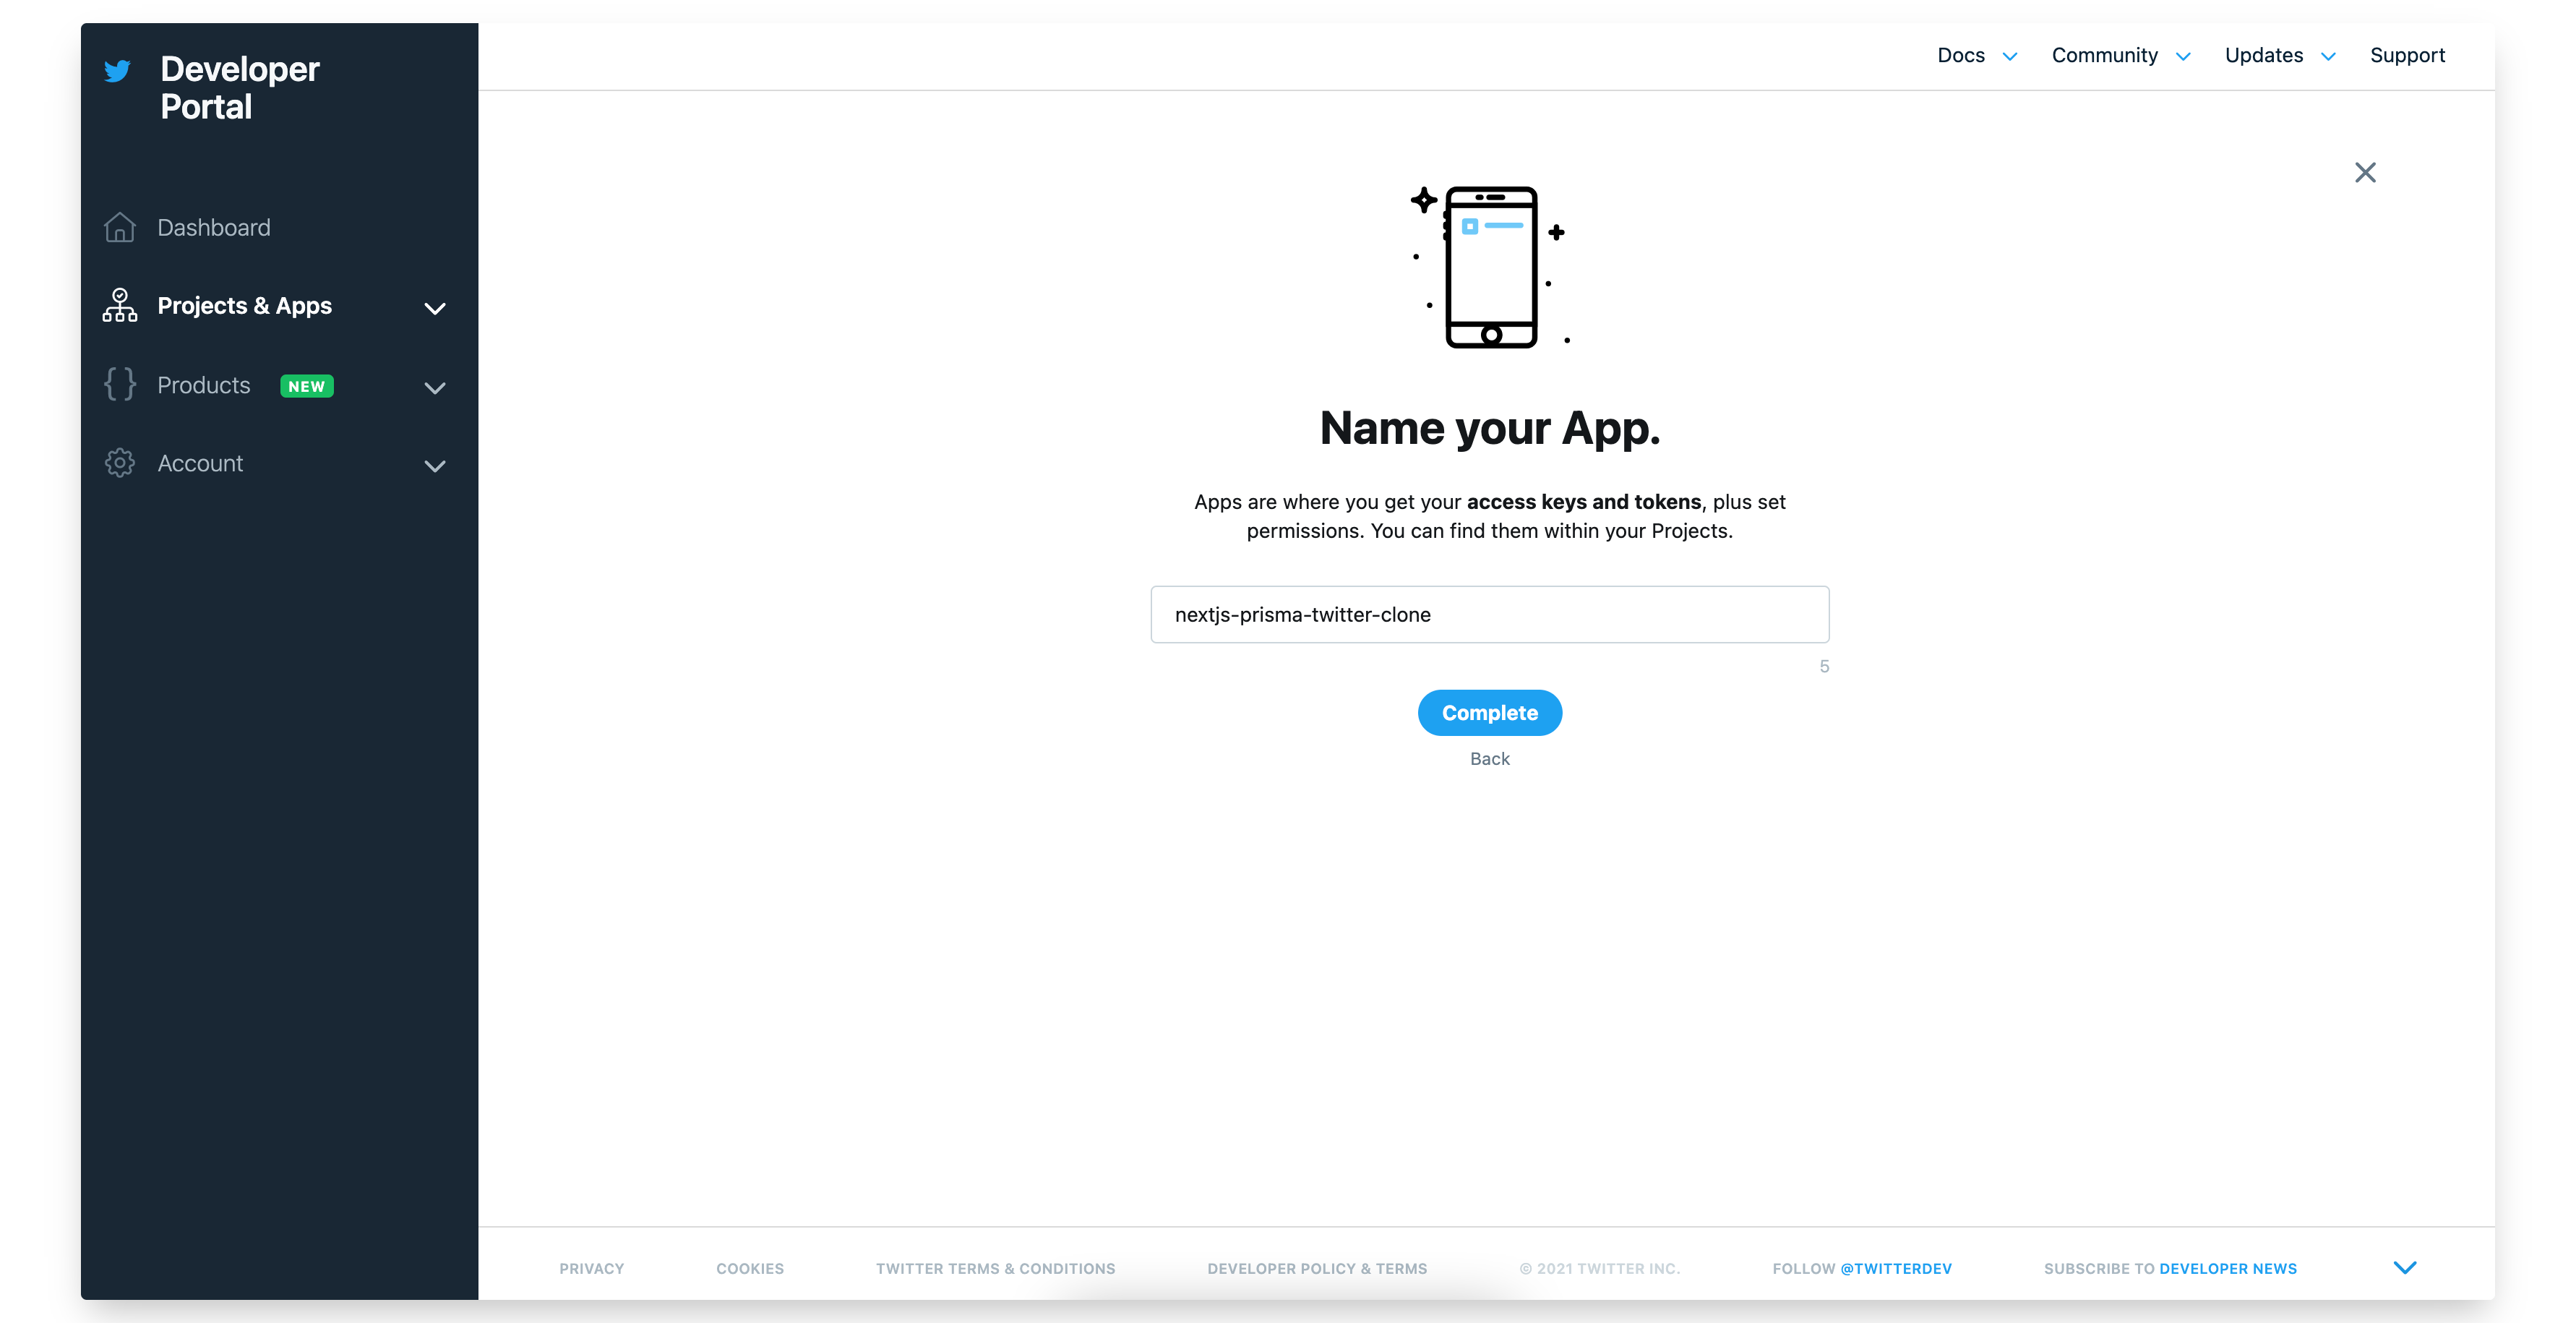
The Twitter environment variables will be generated from the Twitter API. We’ll be doing that next. We can create a new Twitter app from the Twitter Developer dashboard.
Create a new Twitter app by entering its name and click on the Complete button.
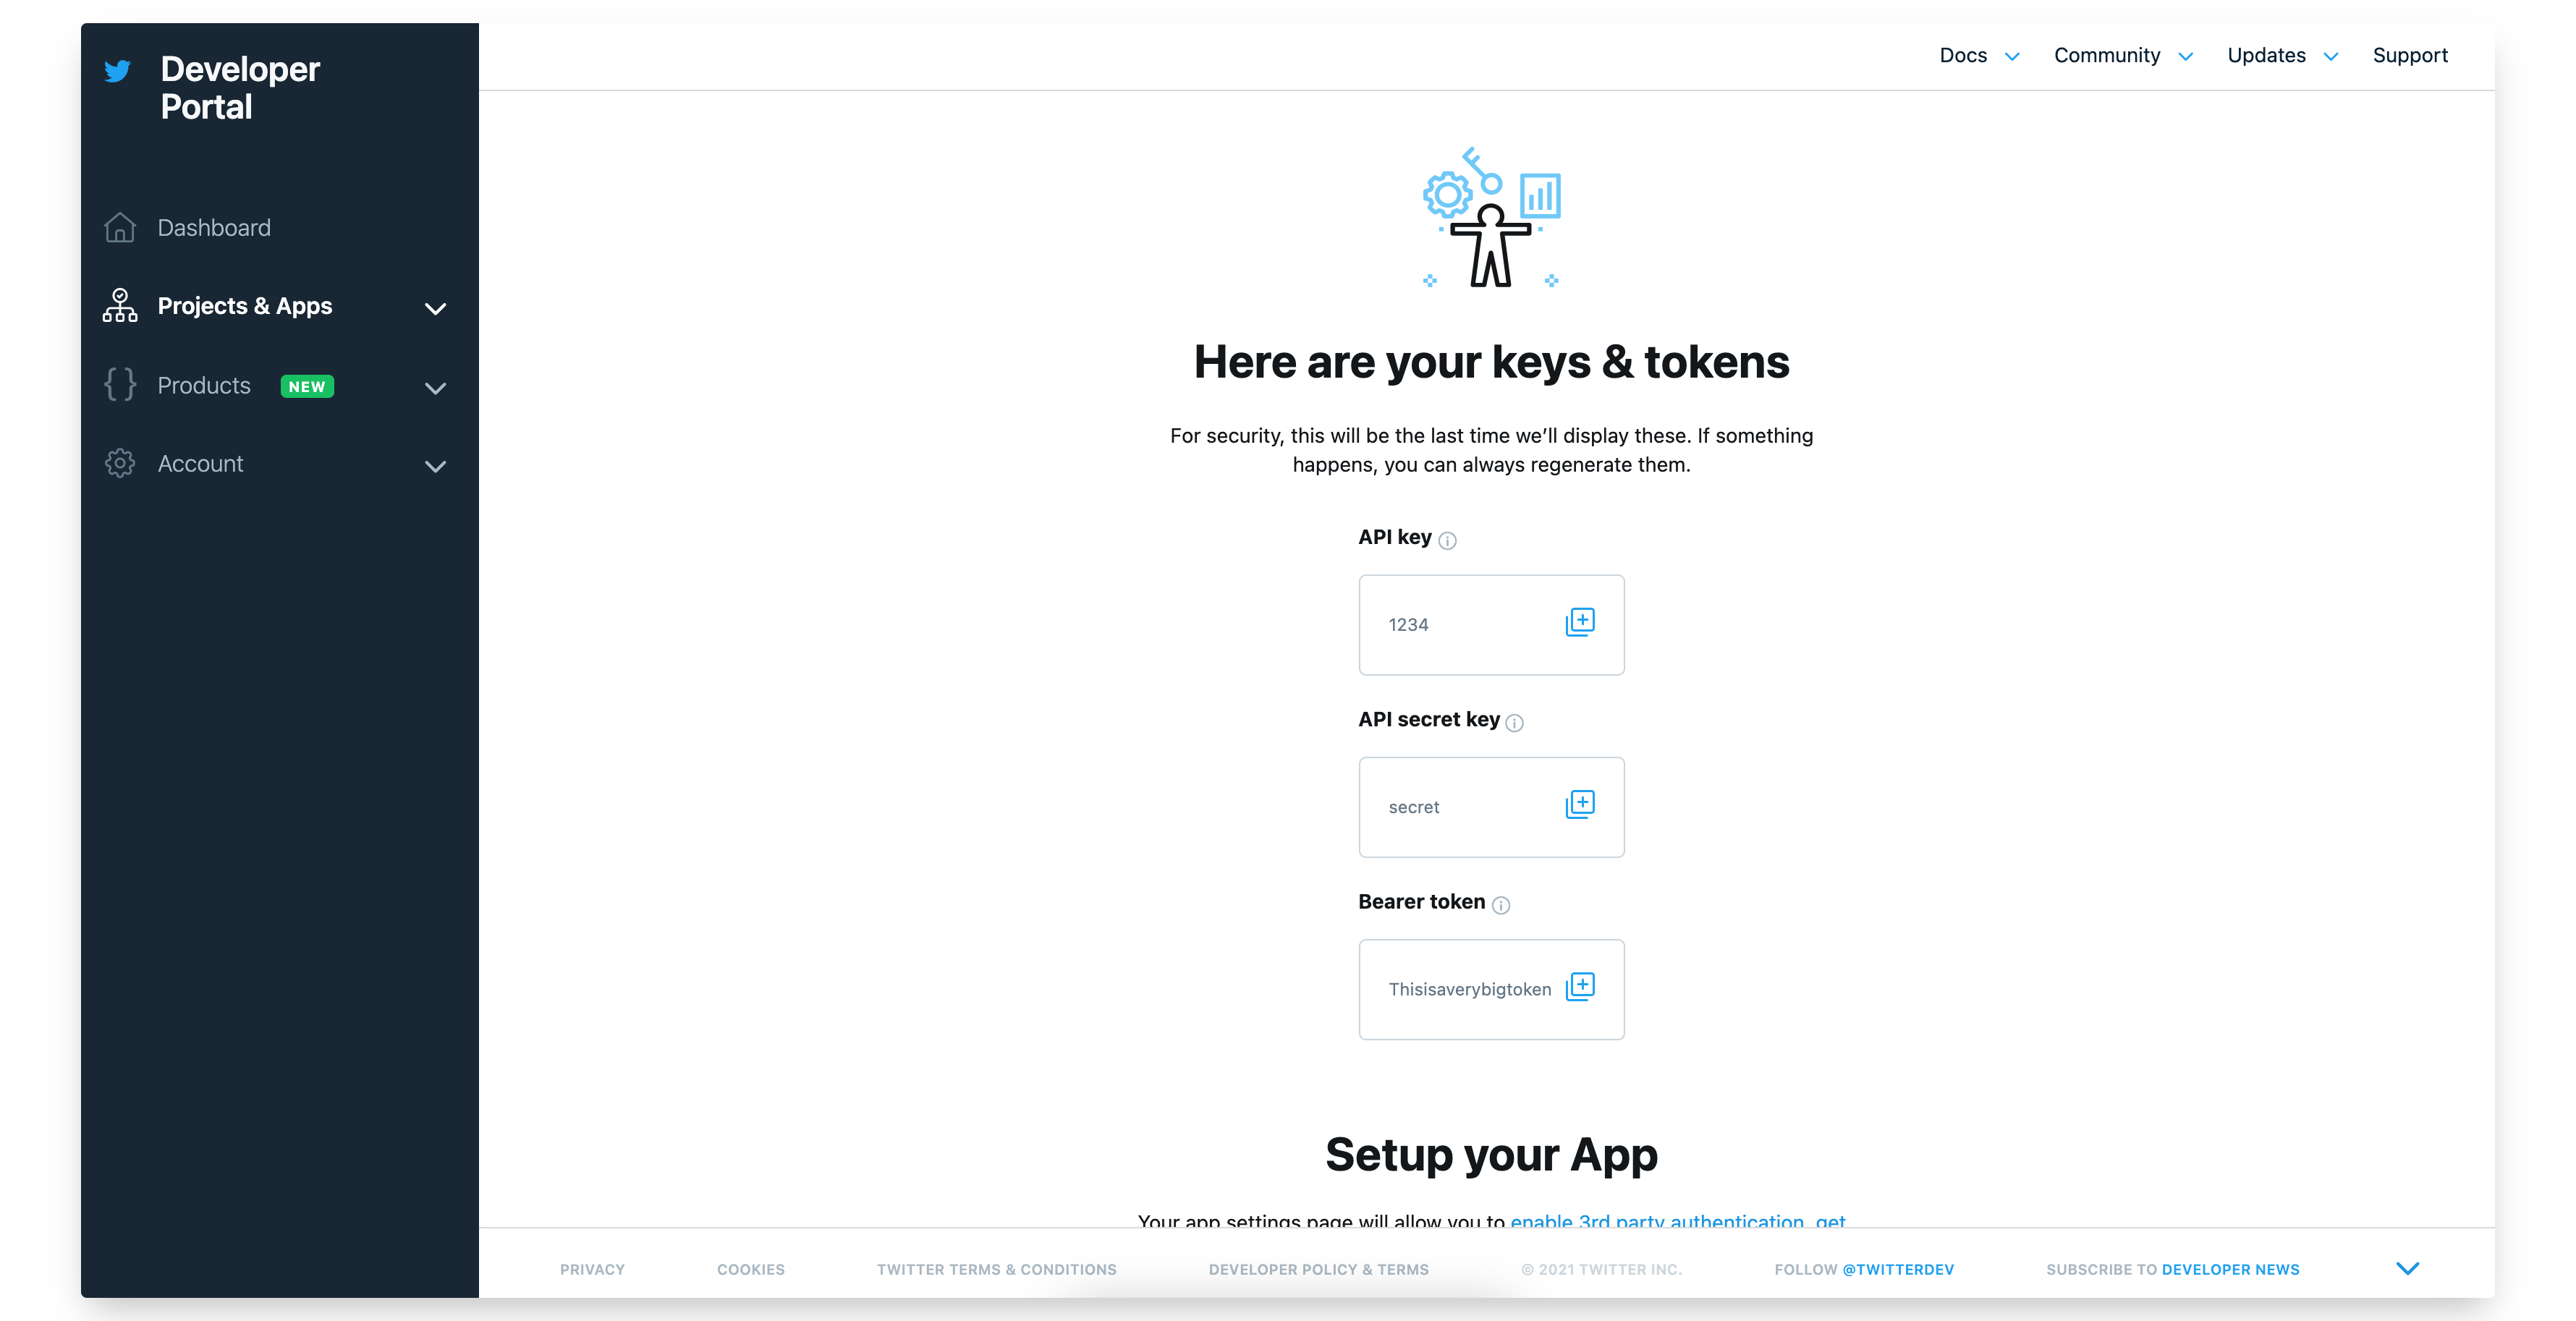
Copy the API key, API secret key and Bearer token in the next screen.
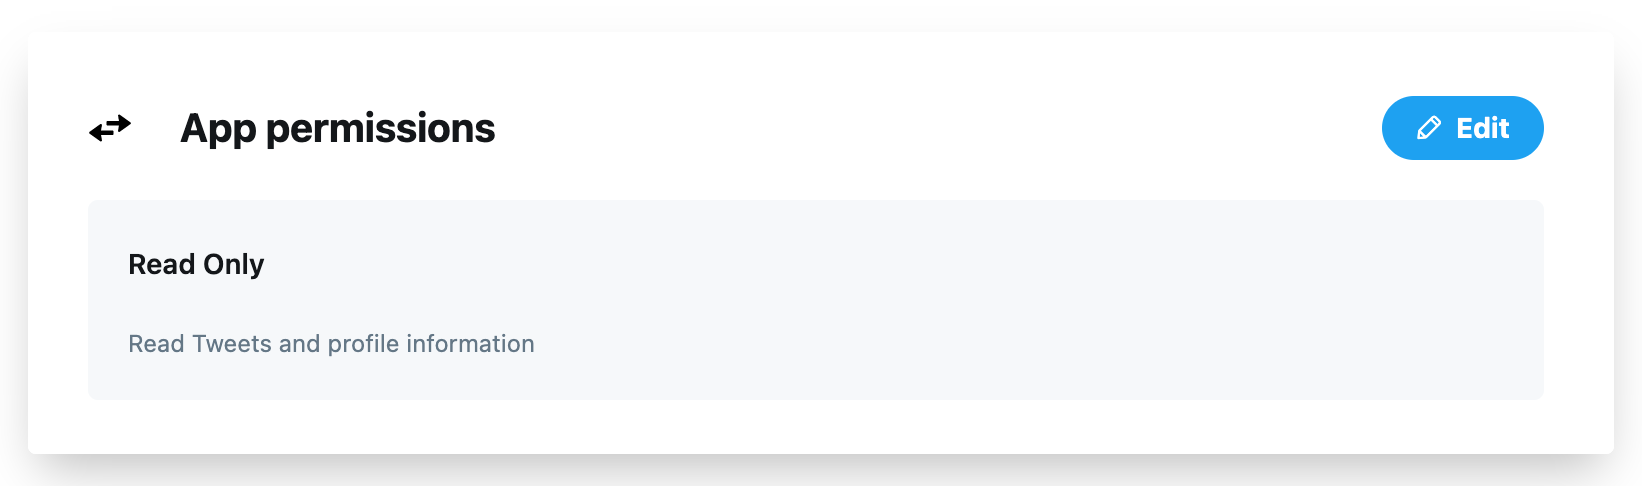
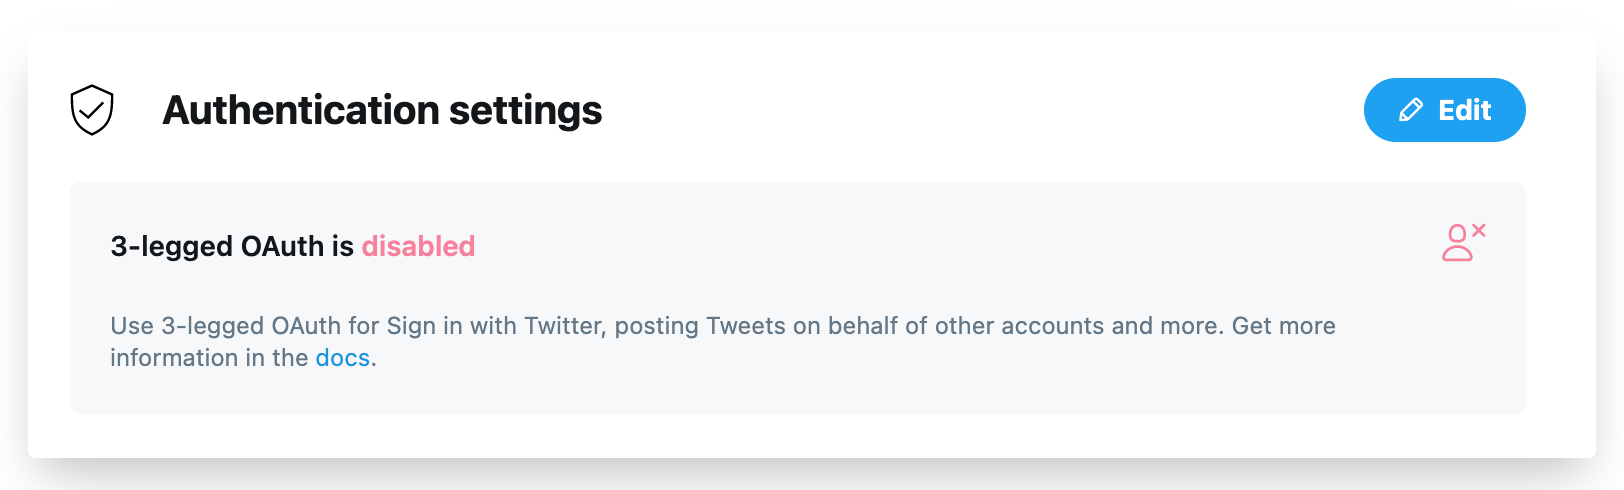
Change the App permissions from Read Only to Read and Write in the next screen.
Click on the Edit button next to the Authentication settings to enable 3-legged OAuth.
Enable 3-legged OAuth and Request email address from users and add http://localhost:3000/api/auth/callback/twitter as a Callback URL.
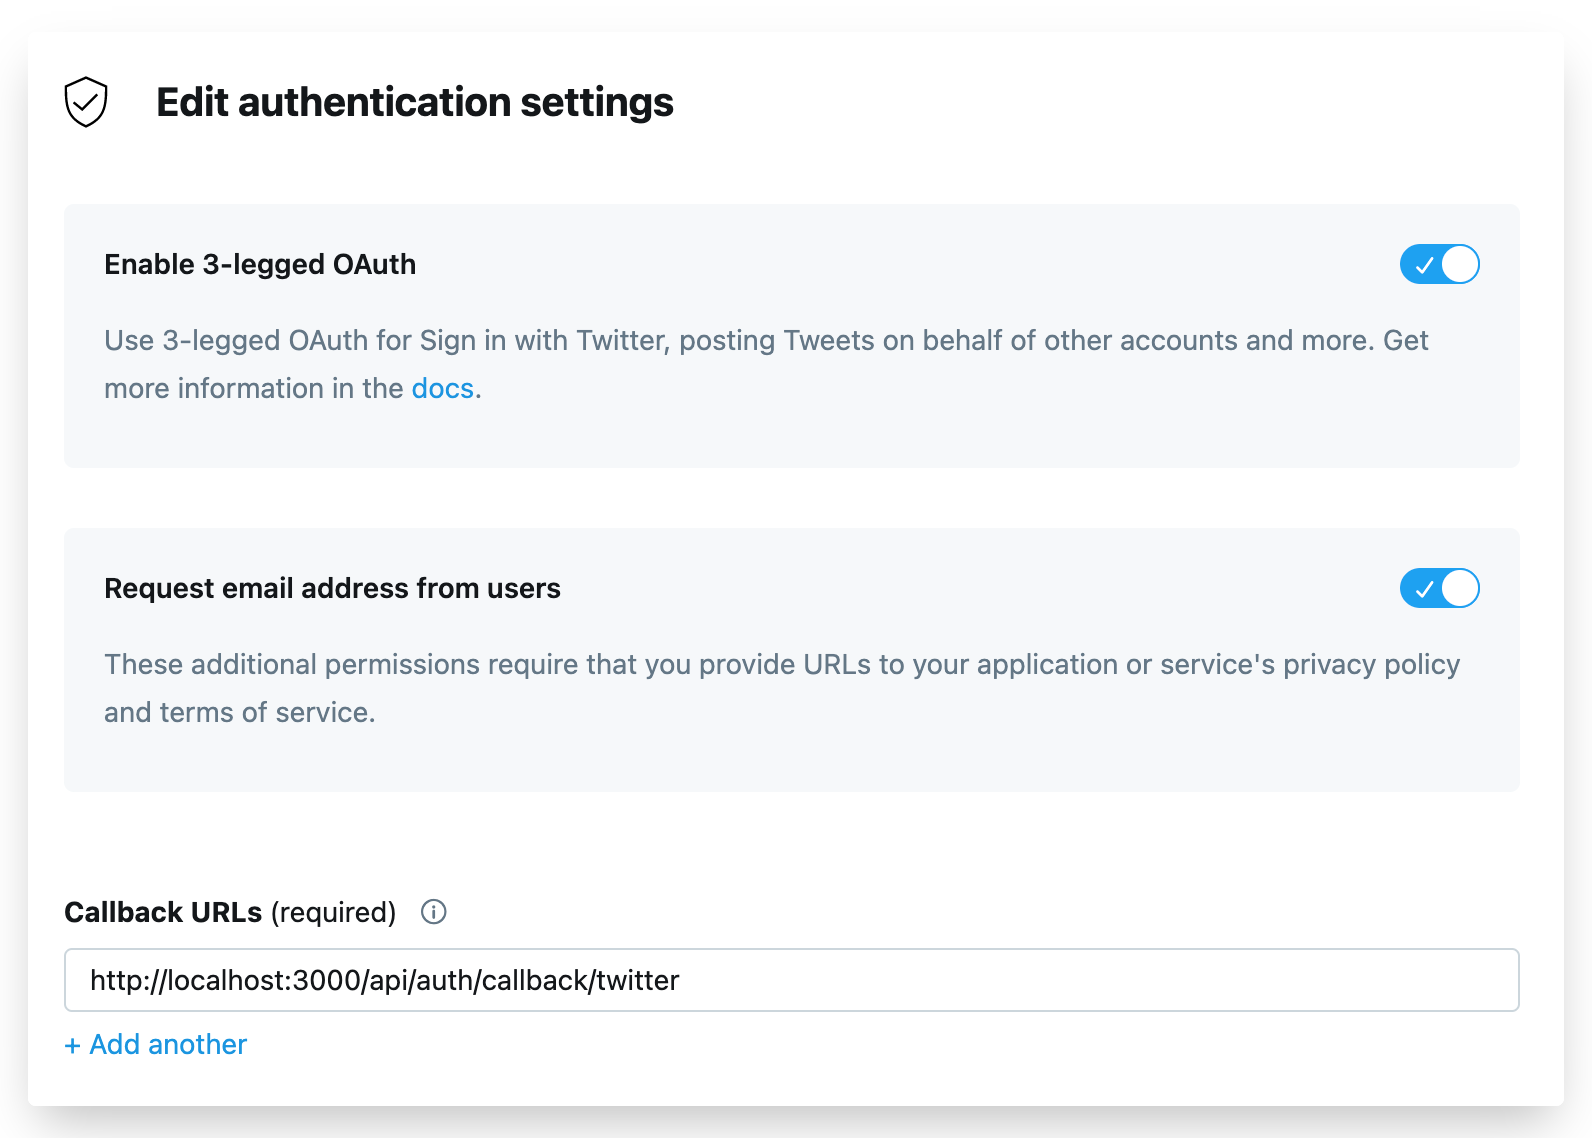
The Website URL, Terms of service and Privacy policy files can be anything (such as
https://yourwebsite.com,https://yourwebsite.com/termsandhttps://yourwebsite.com/privacyrespectively).
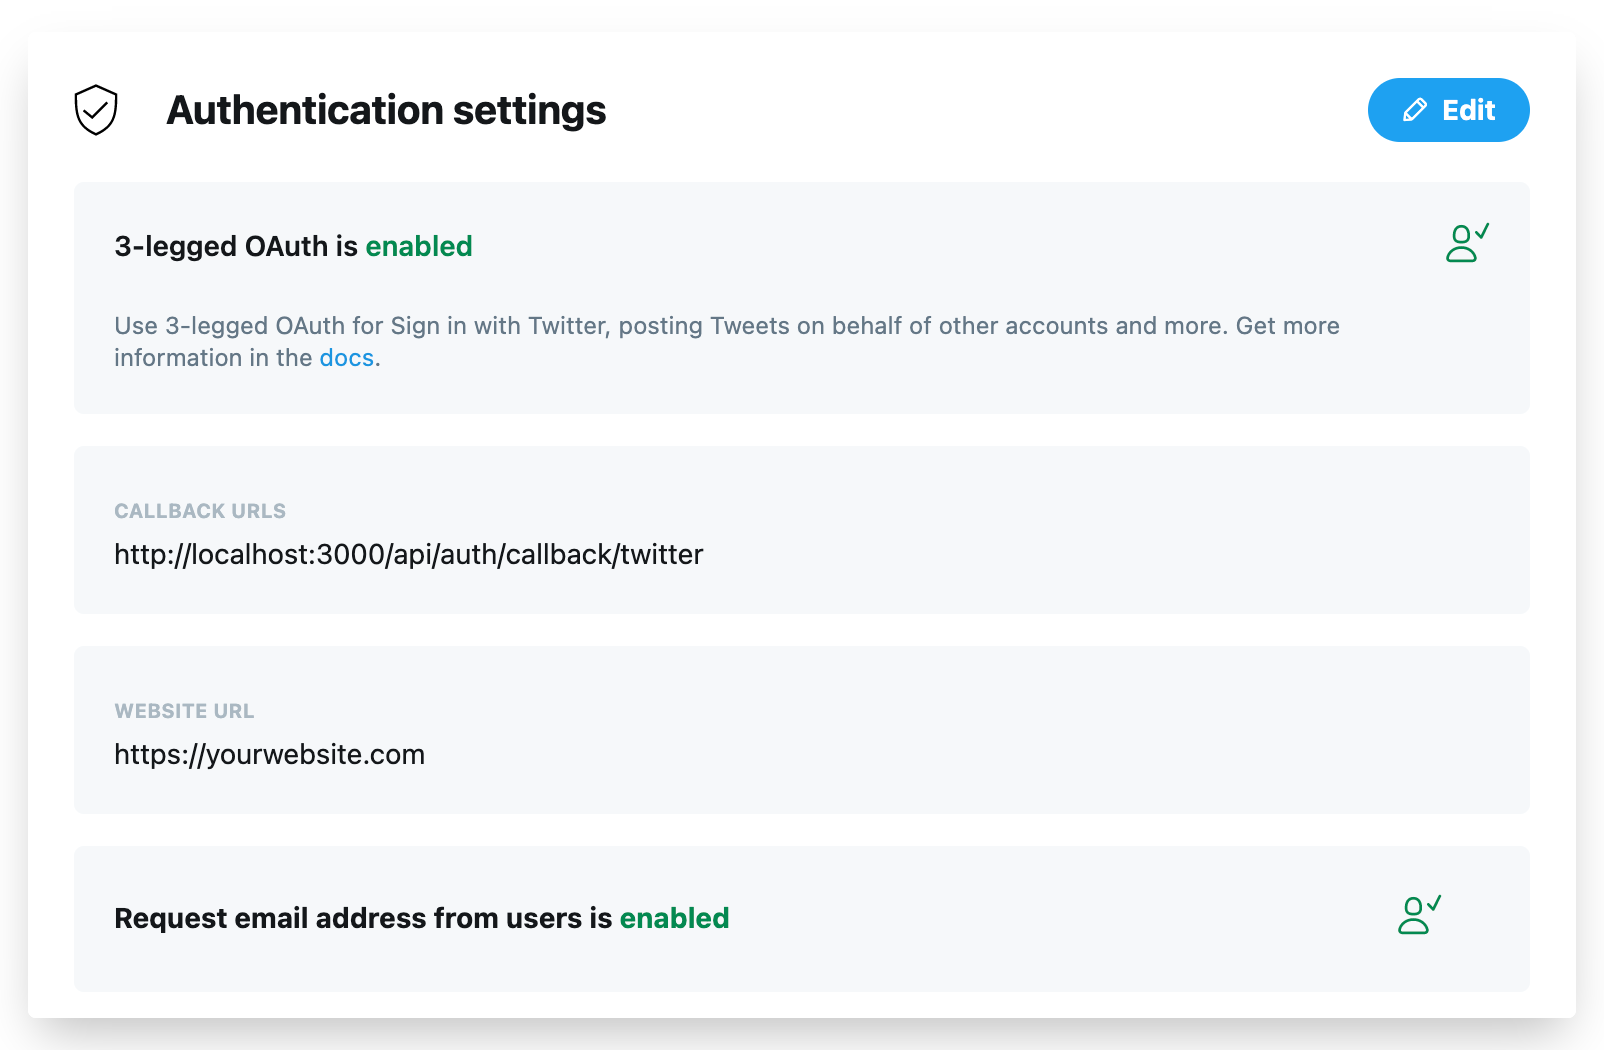
Our 3-legged OAuth should be enabled now.
Paste the value of the API key from Step 2 into the TWITTER_KEY environment variable and the value of API secret key into the TWITTER_SECRET environment variable.
Our .env file should look like this now:
DATABASE_URL="postgresql://postgres:@localhost:5432/postgres"
NEXTAUTH_URL=http://localhost:3000
NEXT_PUBLIC_API_URL=http://localhost:3000
TWITTER_KEY="1234" // Replace this with your own API key
TWITTER_SECRET="secret" // Replaces this with your own API secret key
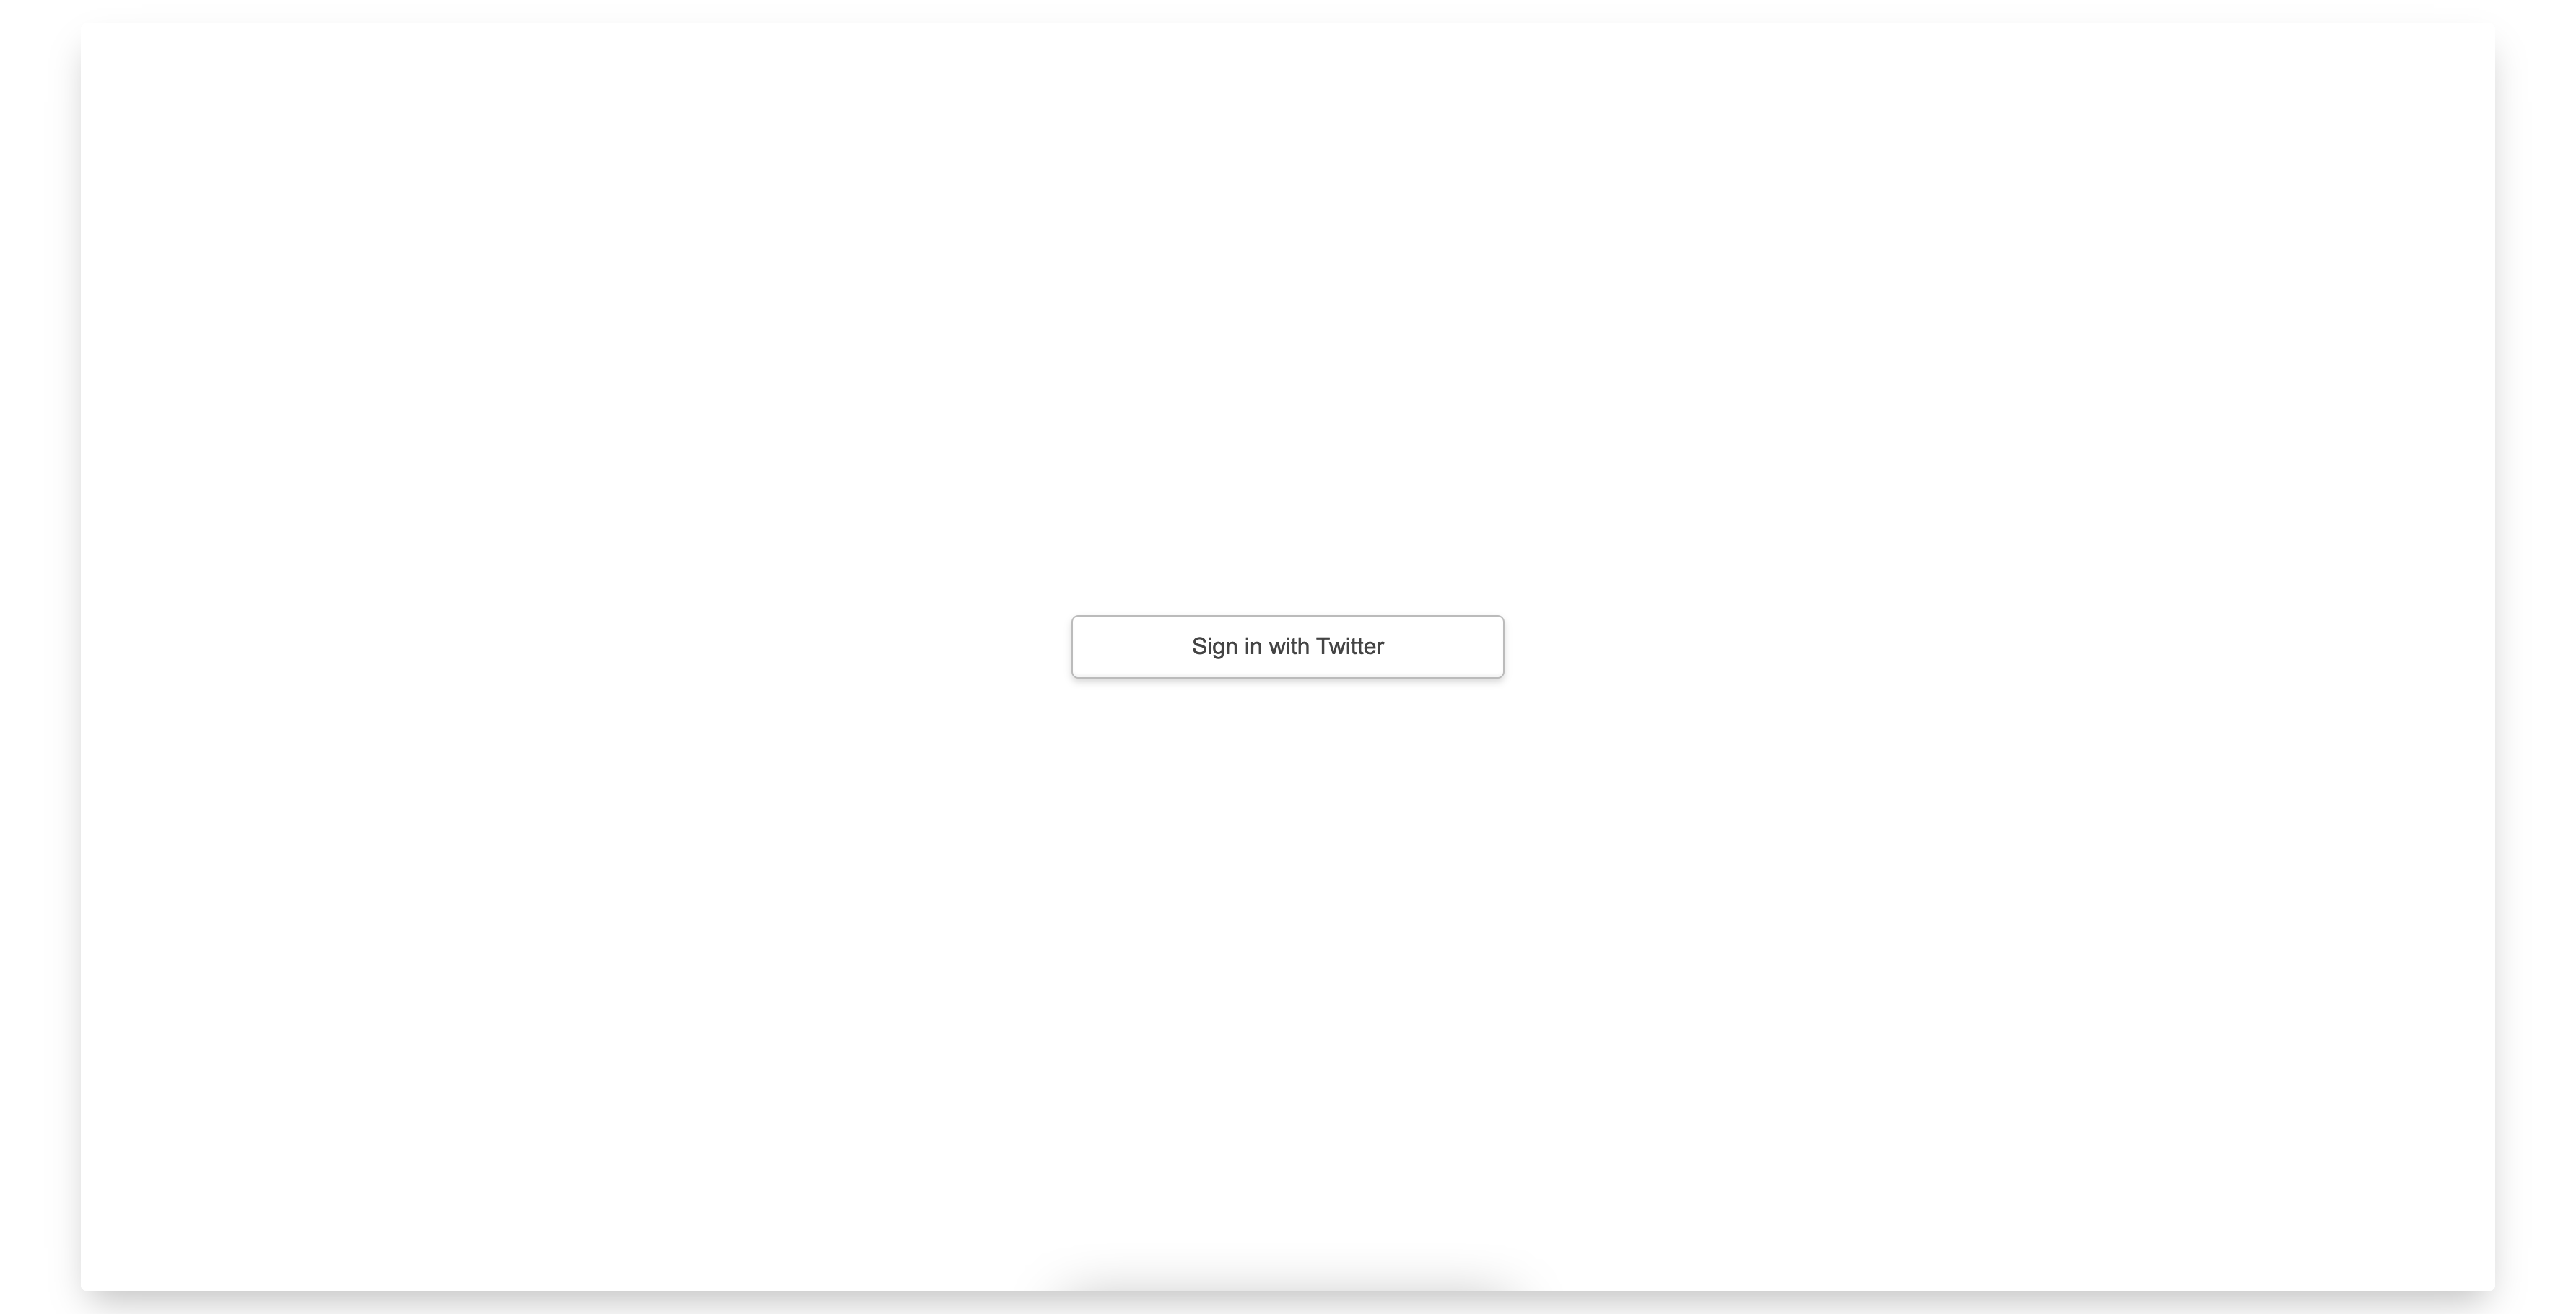
Now, if we restart our Next.js server and visit http://localhost:3000/api/auth/signin, we should be able to see the Sign in with Twitter button:
If we click on that button, we’ll be able to authorize our Twitter app but we won’t be able to log in to our app. Our terminal will show the following error:
[next-auth][warn][jwt_auto_generated_signing_key]
https://next-auth.js.org/warnings#jwt_auto_generated_signing_key
We’ll fix this issue next when we’ll be adding and configuring Prisma.
Adding and Configuring Prisma
First, we need to install all the necessary dependencies. We can do that by running the following command from the root of our app:
yarn add prisma @prisma/client
Next, let’s create a new file named prisma.ts inside the lib/clients directory with the following content:
// lib/clients/prisma.ts

import { PrismaClient } from "@prisma/client";

const prisma = new PrismaClient();

export default prisma;
This PrismaClient will be re-used across multiple files. Next, we’ll have to update our pages/api/auth/[...nextauth].ts file with the following content:
....

import prisma from "../../../lib/clients/prisma";
import Adapters from "next-auth/adapters";

....

const options = {
  providers: [
    ....
  ],
  adapter: Adapters.Prisma.Adapter({ prisma }),
};

....
Now, if we visit http://localhost:3000/api/auth/signin, we’ll get the following error on our terminal:
Error: @prisma/client did not initialize yet. Please run "prisma generate" and try to import it again.
To fix this issue, we’ll have to do the following:
- Run
npx prisma initfrom the root of our app:
   $ npx prisma init

   Environment variables loaded from .env

   ✔ Your Prisma schema was created at prisma/schema.prisma.
     You can now open it in your favorite editor.

   warn Prisma would have added DATABASE_URL="postgresql://johndoe:randompassword@localhost:5432/mydb?schema=public" but it already exists in .env

   Next steps:
   1. Set the DATABASE_URL in the .env file to point to your existing database. If your database has no tables yet, read https://pris.ly/d/getting-started.
   2. Set the provider of the datasource block in schema.prisma to match your database: postgresql, mysql or sqlite.
   3. Run prisma introspect to turn your database schema into a Prisma data model.
   4. Run prisma generate to install Prisma Client. You can then start querying your database.

   More information in our documentation:
   https://pris.ly/d/getting-started
- Run
npx prisma generatefrom the root of our app:
   $ npx prisma generate
                               4s
   Environment variables loaded from .env
   Prisma schema loaded from prisma/schema.prisma
   Error:
   You don't have any models defined in your schema.prisma, so nothing will be generated.
   You can define a model like this:

   model User {
     id    Int     @id @default(autoincrement())
     email String  @unique
     name  String?
   }

   More information in our documentation:
   https://pris.ly/d/prisma-schema
- Update the
prisma/schema.prismafile with the schema that NextAuth expects:
   // prisma/schema.prisma

   generator client {
     provider = "prisma-client-js"
   }

   datasource db {
     provider = "postgresql"
     url      = env("DATABASE_URL")
   }

   model Account {
     id                 Int       @id @default(autoincrement())
     compoundId         String    @unique @map("compound_id")
     userId             Int       @map("user_id")
     providerType       String    @map("provider_type")
     providerId         String    @map("provider_id")
     providerAccountId  String    @map("provider_account_id")
     refreshToken       String?   @map("refresh_token")
     accessToken        String?   @map("access_token")
     accessTokenExpires DateTime? @map("access_token_expires")
     createdAt          DateTime  @default(now()) @map("created_at")
     updatedAt          DateTime  @default(now()) @map("updated_at")

     @@index([providerAccountId], name: "providerAccountId")
     @@index([providerId], name: "providerId")
     @@index([userId], name: "userId")
     @@map("accounts")
   }

   model Session {
     id           Int      @id @default(autoincrement())
     userId       Int      @map("user_id")
     expires      DateTime
     sessionToken String   @unique @map("session_token")
     accessToken  String   @unique @map("access_token")
     createdAt    DateTime @default(now()) @map("created_at")
     updatedAt    DateTime @default(now()) @map("updated_at")

     @@map("sessions")
   }

   model User {
     id            Int       @id @default(autoincrement())
     name          String?
     email         String?   @unique
     emailVerified DateTime? @map("email_verified")
     image         String?
     createdAt     DateTime  @default(now()) @map("created_at")
     updatedAt     DateTime  @default(now()) @map("updated_at")
     tweets        Tweet[]

     @@map("users")
   }

   model VerificationRequest {
     id         Int      @id @default(autoincrement())
     identifier String
     token      String   @unique
     expires    DateTime
     createdAt  DateTime @default(now()) @map("created_at")
     updatedAt  DateTime @default(now()) @map("updated_at")

     @@map("verification_requests")
   }
- Add the schema for Tweet in the
prisma/schema.prismafile:
   // prisma/schema.prisma

   ....

   model Tweet {
     id        Int      @id @default(autoincrement())
     body      String
     userId    Int
     createdAt DateTime @default(now()) @map("created_at")
     updatedAt DateTime @default(now()) @map("updated_at")
     author    User     @relation(fields: [userId], references: [id])

     @@map("tweets")
   }
- Run
npx prisma migrate dev --preview-featurefrom the root of our app to create a new migration. Enter the name of the migration (such as init-database) when prompted.
Now, if we visit http://localhost:3000/api/auth/signin and click on the Sign in with Twitter button, we’ll be logged in to our app using Twitter.
Adding Some Seed Data
So that the UI isn’t completely bare as we work on the app, let’s add some seed data.
Let’s start off by installing a couple of dependencies:
yarn add -D faker ts-node
This pulls in faker.js, which will aid us in generating fake data, as well as its ts-node dependency.
Next, create a new seed.ts file in the prisma folder, and add the following content:
import faker from "faker";
import prisma from "../lib/clients/prisma";

async function main() {
  const listOfNewUsers = [...new Array(5)].map(() => {
    return {
      email: faker.internet.email(),
      name: faker.name.findName(),
      image: faker.image.image(),
      tweets: {
        create: {
          body: faker.lorem.sentence(),
        },
      },
    };
  });

  for (let data of listOfNewUsers) {
    const user = await prisma.user.create({
      data,
    });

    console.log(user);
  }
}

main()
  .catch((e) => {
    console.error(e);
    process.exit(1);
  })
  .finally(async () => {
    await prisma.$disconnect();
  });
We’ll also need to update our tsconfig.json file, as shown:
{
  "compilerOptions": {
    "target": "es5",
    "lib": [
      "dom",
      "dom.iterable",
      "esnext"
    ],
    "allowJs": true,
    "skipLibCheck": true,
    "strict": false,
    "forceConsistentCasingInFileNames": true,
    "noEmit": true,
    "esModuleInterop": true,
    "module": "commonjs",
    "moduleResolution": "node",
    "resolveJsonModule": true,
    "isolatedModules": true,
    "jsx": "preserve",
    "baseUrl": ".",
    "paths": {
      "*": [
        "/*"
      ],
      "components/*": [
        "components/*"
      ],
      "pages/*": [
        "pages/*"
      ],
      "types/*": [
        "types/*"
      ],
      "lib/*": [
        "lib/*"
      ],
    },
  },
  "include": [
    "next-env.d.ts",
    "**/*.ts",
    "**/*.tsx"
  ],
  "exclude": [
    "node_modules"
  ]
}
Finally, we can run npx prisma db seed --preview-feature to seed our database with some test data.
Adding React Query
React Query is a very popular and performant way of fetching data in React.js apps. Let’s add React Query to our app. We can install React Query by running the following command from the root of our app:
yarn add react-query
Next, let’s create a new file named react-query.ts inside the lib/clients directory with the following content:
// lib/clients/react-query.ts

import { QueryClient } from "react-query";

const queryClient = new QueryClient();

export default queryClient;
We’ll also need to update our pages/_app.tsx file with the following content:
// pages/_app.tsx

....

import { QueryClientProvider } from "react-query";
import { Hydrate } from "react-query/hydration";
import queryClient from "../lib/clients/react-query";

const App = ({ Component, pageProps }: AppProps) => {
  return (
    <QueryClientProvider client={queryClient}>
      <Hydrate state={pageProps.dehydratedState}>
        <Head>
          <link rel="shortcut icon" href="/images/favicon.ico" />
        </Head>
        <NextAuthProvider session={pageProps.session}>
          <ChakraProvider>
            <Component {...pageProps} />
          </ChakraProvider>
        </NextAuthProvider>
      </Hydrate>
    </QueryClientProvider>
  );
};

export default App;
Here, we’re wrapping our app with QueryClientProvider, which will provide a QueryClient to our app.
Option to View a List of Tweets
Let’s create a new file called fetch-tweets.ts inside the lib/queries directory, with the following content:
// lib/queries/fetch-tweets.ts

const fetchTweets = async () => {
  const res = await fetch(`${process.env.NEXT_PUBLIC_API_URL}/api/tweets`);
  const data = await res.json();

  return data;
};

export default fetchTweets;
This function will be responsible for fetching all the tweets in our app. Next, create a new file called tweets.tsx inside the pages directory with the following content:
// pages/tweets.tsx
import fetchTweets from "../lib/queries/fetch-tweets";
import queryClient from "../lib/clients/react-query";
import { GetServerSideProps, InferGetServerSidePropsType } from "next";
import { useSession } from "next-auth/client";
import Head from "next/head";
import React from "react";
import { useQuery } from "react-query";
import { dehydrate } from "react-query/hydration";
const TweetsPage: InferGetServerSidePropsType<
typeof getServerSideProps
> = ({}) => {
const { data } = useQuery("tweets", fetchTweets);
const [session] = useSession();
if (!session) {
return <div>Not authenticated.</div>;
}
return (
<>
<Head>
<title>All tweets</title>
</Head>
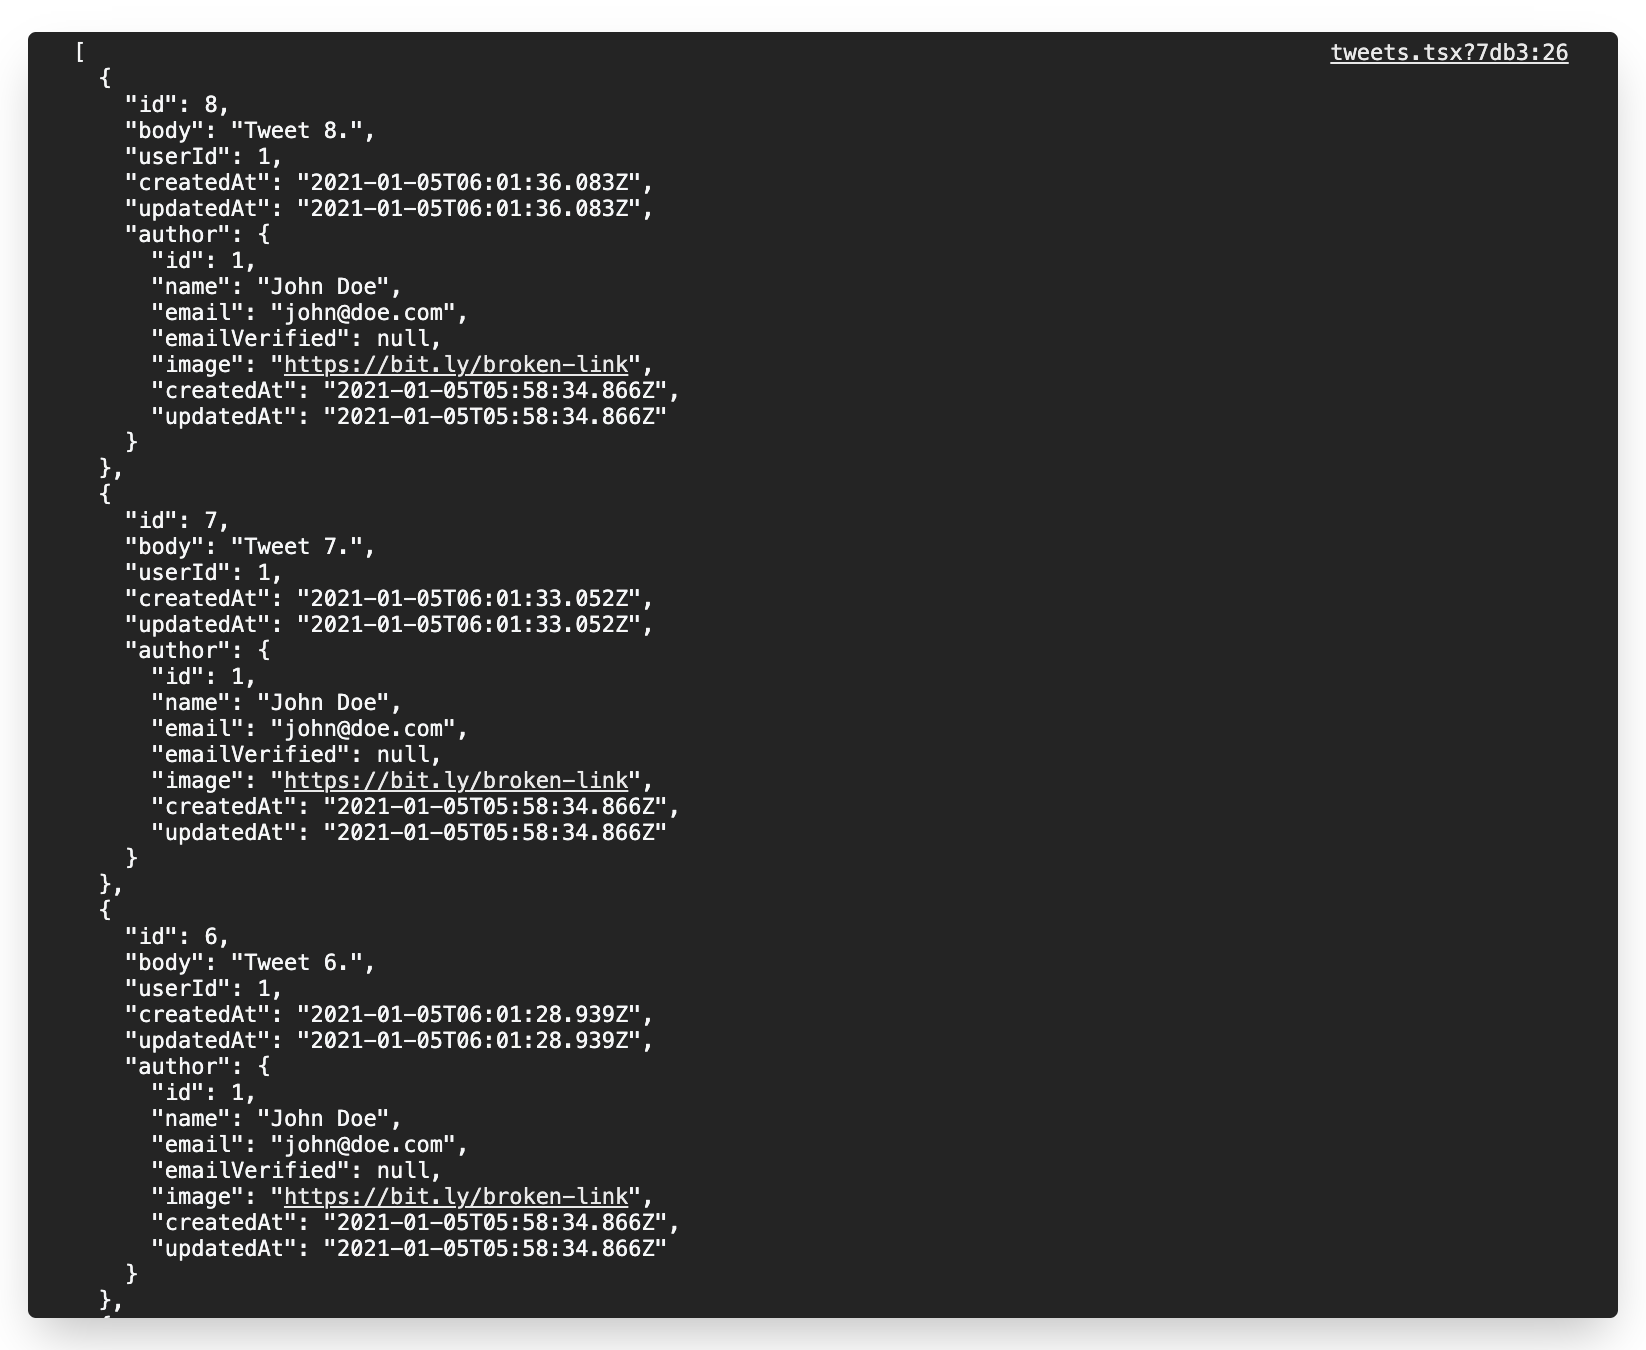
{console.log(JSON.stringify(data, null, 2))}
</>
);
};
export const getServerSideProps: GetServerSideProps = async ({ req }) => {
await queryClient.prefetchQuery("tweets", fetchTweets);
return {
props: {
dehydratedState: dehydrate(queryClient),
},
};
};
export default TweetsPage;
getServerSideProps is a Next.js function that helps in fetching data on the server. Let’s also create a new file named index.ts inside the pages/api/tweets directory with the following content:
// pages/api/tweets/index.ts

import prisma from "../../../lib/clients/prisma";
import type { NextApiRequest, NextApiResponse } from "next";

export default async (req: NextApiRequest, res: NextApiResponse) => {
  if (req.method === "POST") {
    try {
      const { body } = req;
      const tweet = await prisma.tweet.create({ data: JSON.parse(body) });

      return res.status(200).json(tweet);
    } catch (error) {
      return res.status(422).json(error);
    }
  } else if (req.method === "GET") {
    try {
      const tweets = await prisma.tweet.findMany({
        include: {
          author: true,
        },
        orderBy: [
          {
            createdAt: "desc",
          },
        ],
      });

      return res.status(200).json(tweets);
    } catch (error) {
      return res.status(422).json(error);
    }
  }

  res.end();
};
Here, we’re checking the request. If it’s a POST request, we’re creating a new tweet. If it’s a GET request, we’re sending all the tweets with the details of author. Now, if we visit http://localhost:3000/tweets, we’ll view all the tweets in our browser’s console.
Note that, as faker.js generates random data, what you see logged to your browser’s console will vary from the screenshot. We’ll add the option to add a tweet later.
Next, let’s build the user interface for showing the list of tweets. We can create a new file named index.tsx inside the components/pages/tweets directory with the following content:
// components/pages/tweets/index.tsx

import { Box, Grid, Stack } from "@chakra-ui/react";
import Tweet from "./tweet";
import React from "react";
import ITweet from "types/tweet";

const TweetsPageComponent = ({ tweets }) => {
  return (
    <Stack spacing={8}>
      <Grid templateColumns={["1fr", "1fr", "repeat(2, 1fr)"]} gap={8}>
        {tweets?.map((tweet: ITweet) => {
          return (
            <Box key={tweet.id}>
              <Tweet tweet={tweet} />
            </Box>
          );
        })}
      </Grid>
    </Stack>
  );
};

export default TweetsPageComponent;
Let’s also create a new file named tweet.tsx inside the same directory (components/pages/tweets) with the following content:
// components/pages/tweets/tweet.tsx

import { Avatar, Box, Stack, Text } from "@chakra-ui/react";
import React, { FC } from "react";

const Tweet: FC = ({ tweet }) => {
  const authorNode = () => {
    return (
      <Stack
        spacing={4}
        isInline
        alignItems="center"
        p={4}
        borderBottomWidth={1}
      >
        <Avatar name={tweet.author.name} src={tweet.author.image} />
        <Stack>
          <Text fontWeight="bold">{tweet.author.name}</Text>
        </Stack>
      </Stack>
    );
  };

  const bodyNode = () => {
    return (
      <Text fontSize="md" p={4}>
        {tweet.body}
      </Text>
    );
  };

  return (
    <Box shadow="lg" rounded="lg">
      <Stack spacing={0}>
        {authorNode()}
        {bodyNode()}
      </Stack>
    </Box>
  );
};

export default Tweet;
Next, let’s update our pages/tweets.tsx file with the following content:
// pages/tweets.tsx

....

import Page from "../components/pages/tweets";

....

const TweetsPage: InferGetServerSidePropsType<
  typeof getServerSideProps
> = ({}) => {

....

  return (
    <>
      <Head>
        <title>All tweets</title>
      </Head>
      <Page tweets={data} />
    </>
  );

....

}

....
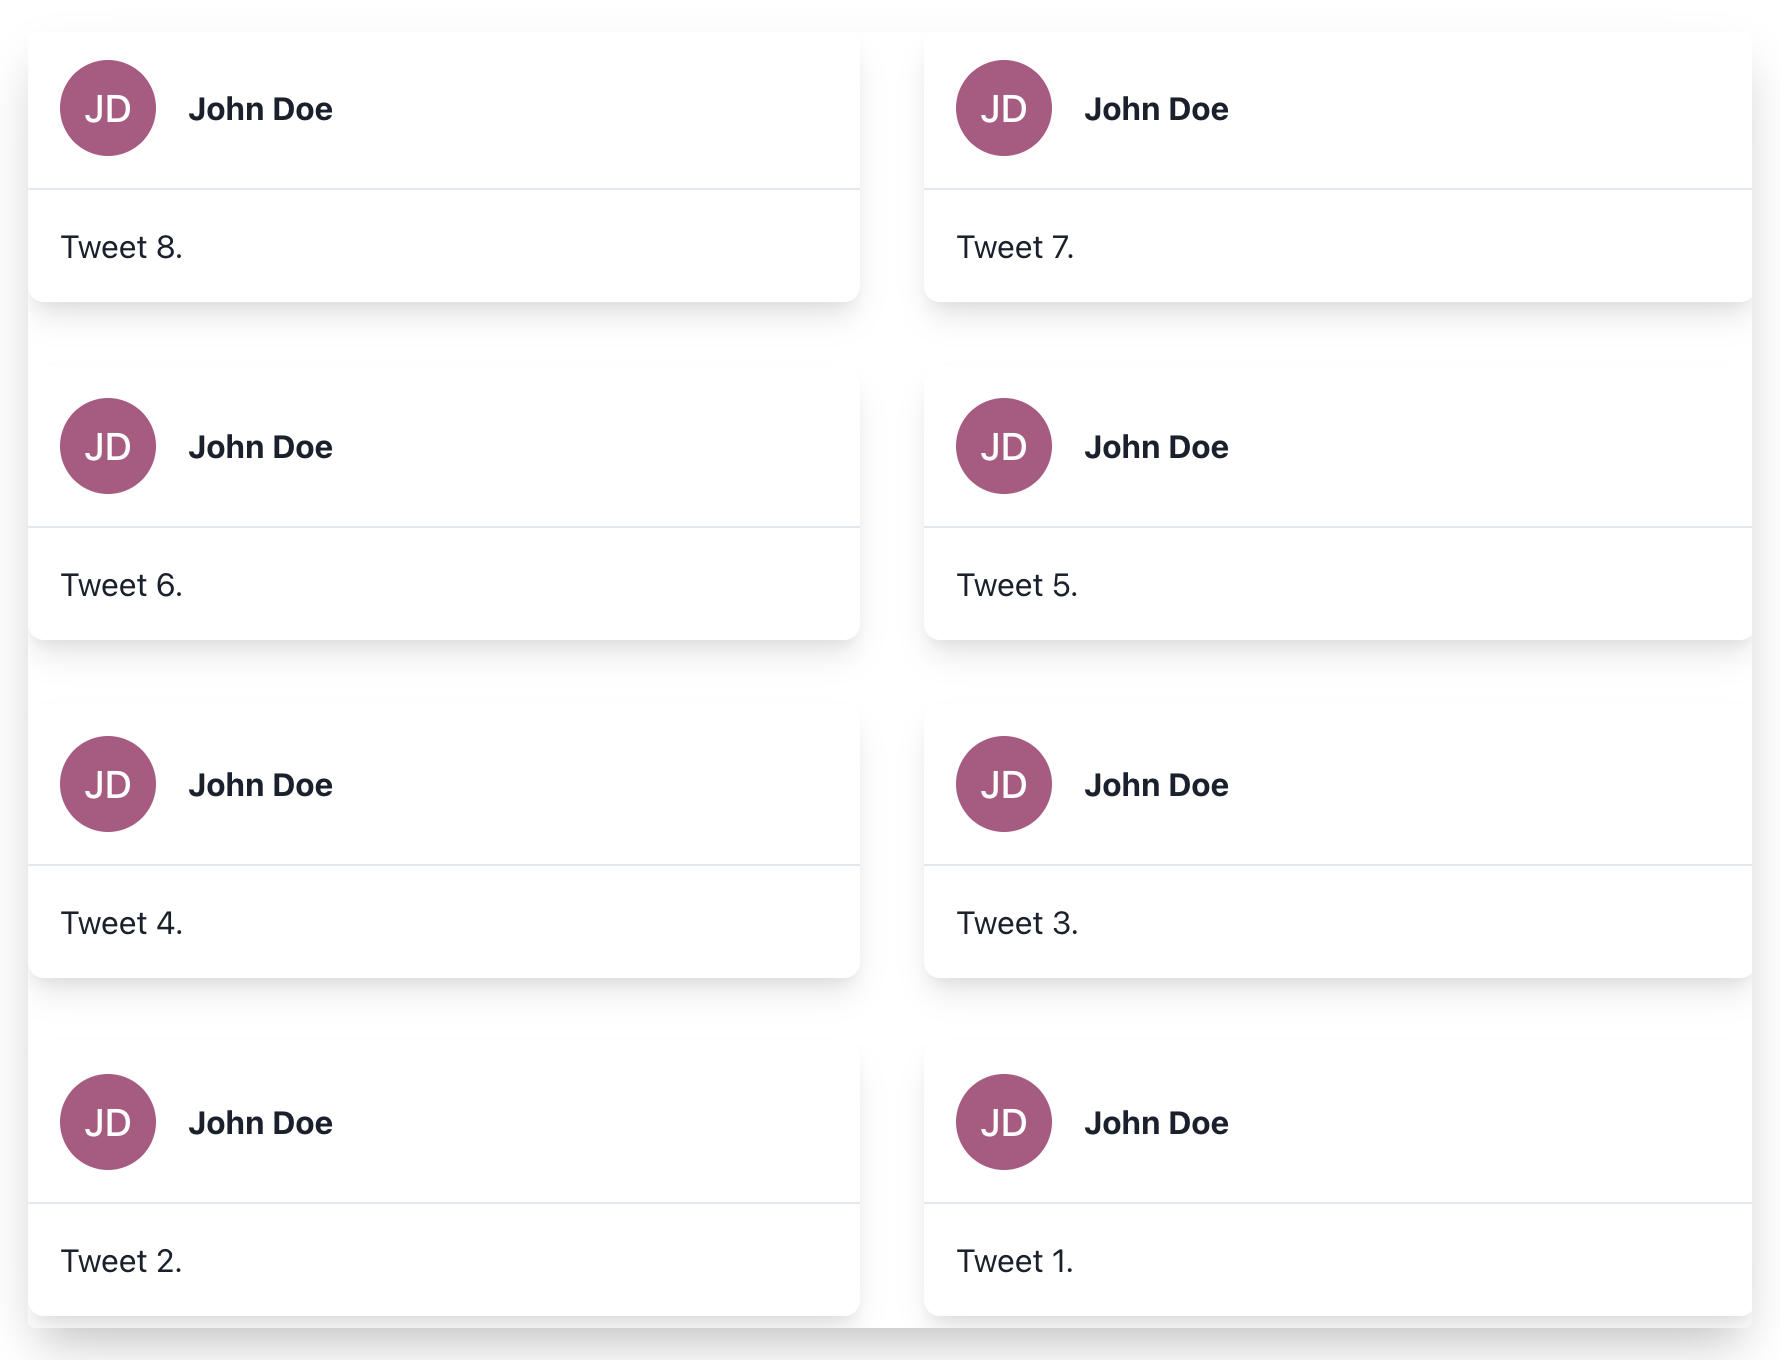
Here, we’ve modified the interface of our app. Now, if we visit http://localhost:3000/tweets, we should be able to see the following:
Option to Add a New Tweet
Let’s add a text area through which we can add a new tweet. To do that, let’s create a new file named add-new-tweet-form.tsx inside the components/pages/tweets directory with the following content:
// components/pages/tweets/add-new-tweet-form.tsx

import {
  Box,
  Button,
  FormControl,
  FormLabel,
  Stack,
  Textarea,
} from "@chakra-ui/react";
import saveTweet from "../../../lib/mutations/save-tweet";
import fetchTweets from "../../../lib/queries/fetch-tweets";
import queryClient from "../../../lib/clients/react-query";
import { useSession } from "next-auth/client";
import React, { ChangeEvent, useState } from "react";
import { useMutation, useQuery } from "react-query";

const AddNewTweetForm = () => {
  const [body, setBody] = useState("");
  const [session] = useSession();
  const { refetch } = useQuery("tweets", fetchTweets);
  const mutation = useMutation(saveTweet, {
    onSuccess: async () => {
      await queryClient.invalidateQueries("tweets");

      refetch();
    },
  });

  if (!session) {
    return <div>Not authenticated.</div>;
  }

  const handleSubmit = () => {
    const data = {
      body,
      author: {
        connect: { email: session.user.email },
      },
    };

    mutation.mutate(data);

    if (!mutation.error) {
      setBody("");
    }
  };

  return (
    <Stack spacing={4}>
      <Box p={4} shadow="lg" rounded="lg">
        <Stack spacing={4}>
          <FormControl isRequired>
            <FormLabel htmlFor="body">What's on your mind?</FormLabel>
            <Textarea
              id="body"
              value={body}
              onChange={(e: ChangeEvent<HTMLTextAreaElement>) =>
                setBody(e.currentTarget.value)
              }
            />
          </FormControl>
          <FormControl>
            <Button
              loadingText="Posting..."
              onClick={handleSubmit}
              isDisabled={!body.trim()}
            >
              Post
            </Button>
          </FormControl>
        </Stack>
      </Box>
    </Stack>
  );
};

export default AddNewTweetForm;
The mutation function is responsible for doing the POST request to the server. It also re-fetches the data once the request is successful. Also, let’s create a new file named save-tweet.ts inside the lib/mutations directory with the following content:
// lib/mutations/save-tweet.ts

const saveTweet = async (body: any) => {
  const res = await fetch(`${process.env.NEXT_PUBLIC_API_URL}/api/tweets`, {
    method: "POST",
    body: JSON.stringify(body),
  });
  const data = await res.json();

  return data;
};

export default saveTweet;
We also need to modify our components/pages/tweets/index.tsx file with following content:
// components/pages/tweets/index.tsx

....

import AddNewTweetForm from "./add-new-tweet-form";

....

const TweetsPageComponent = ({ tweets }) => {
  return (
    <Stack spacing={8}>
      <Box>
        <AddNewTweetForm />
      </Box>

      ....

    </Stack>
  );
};

export default TweetsPageComponent;
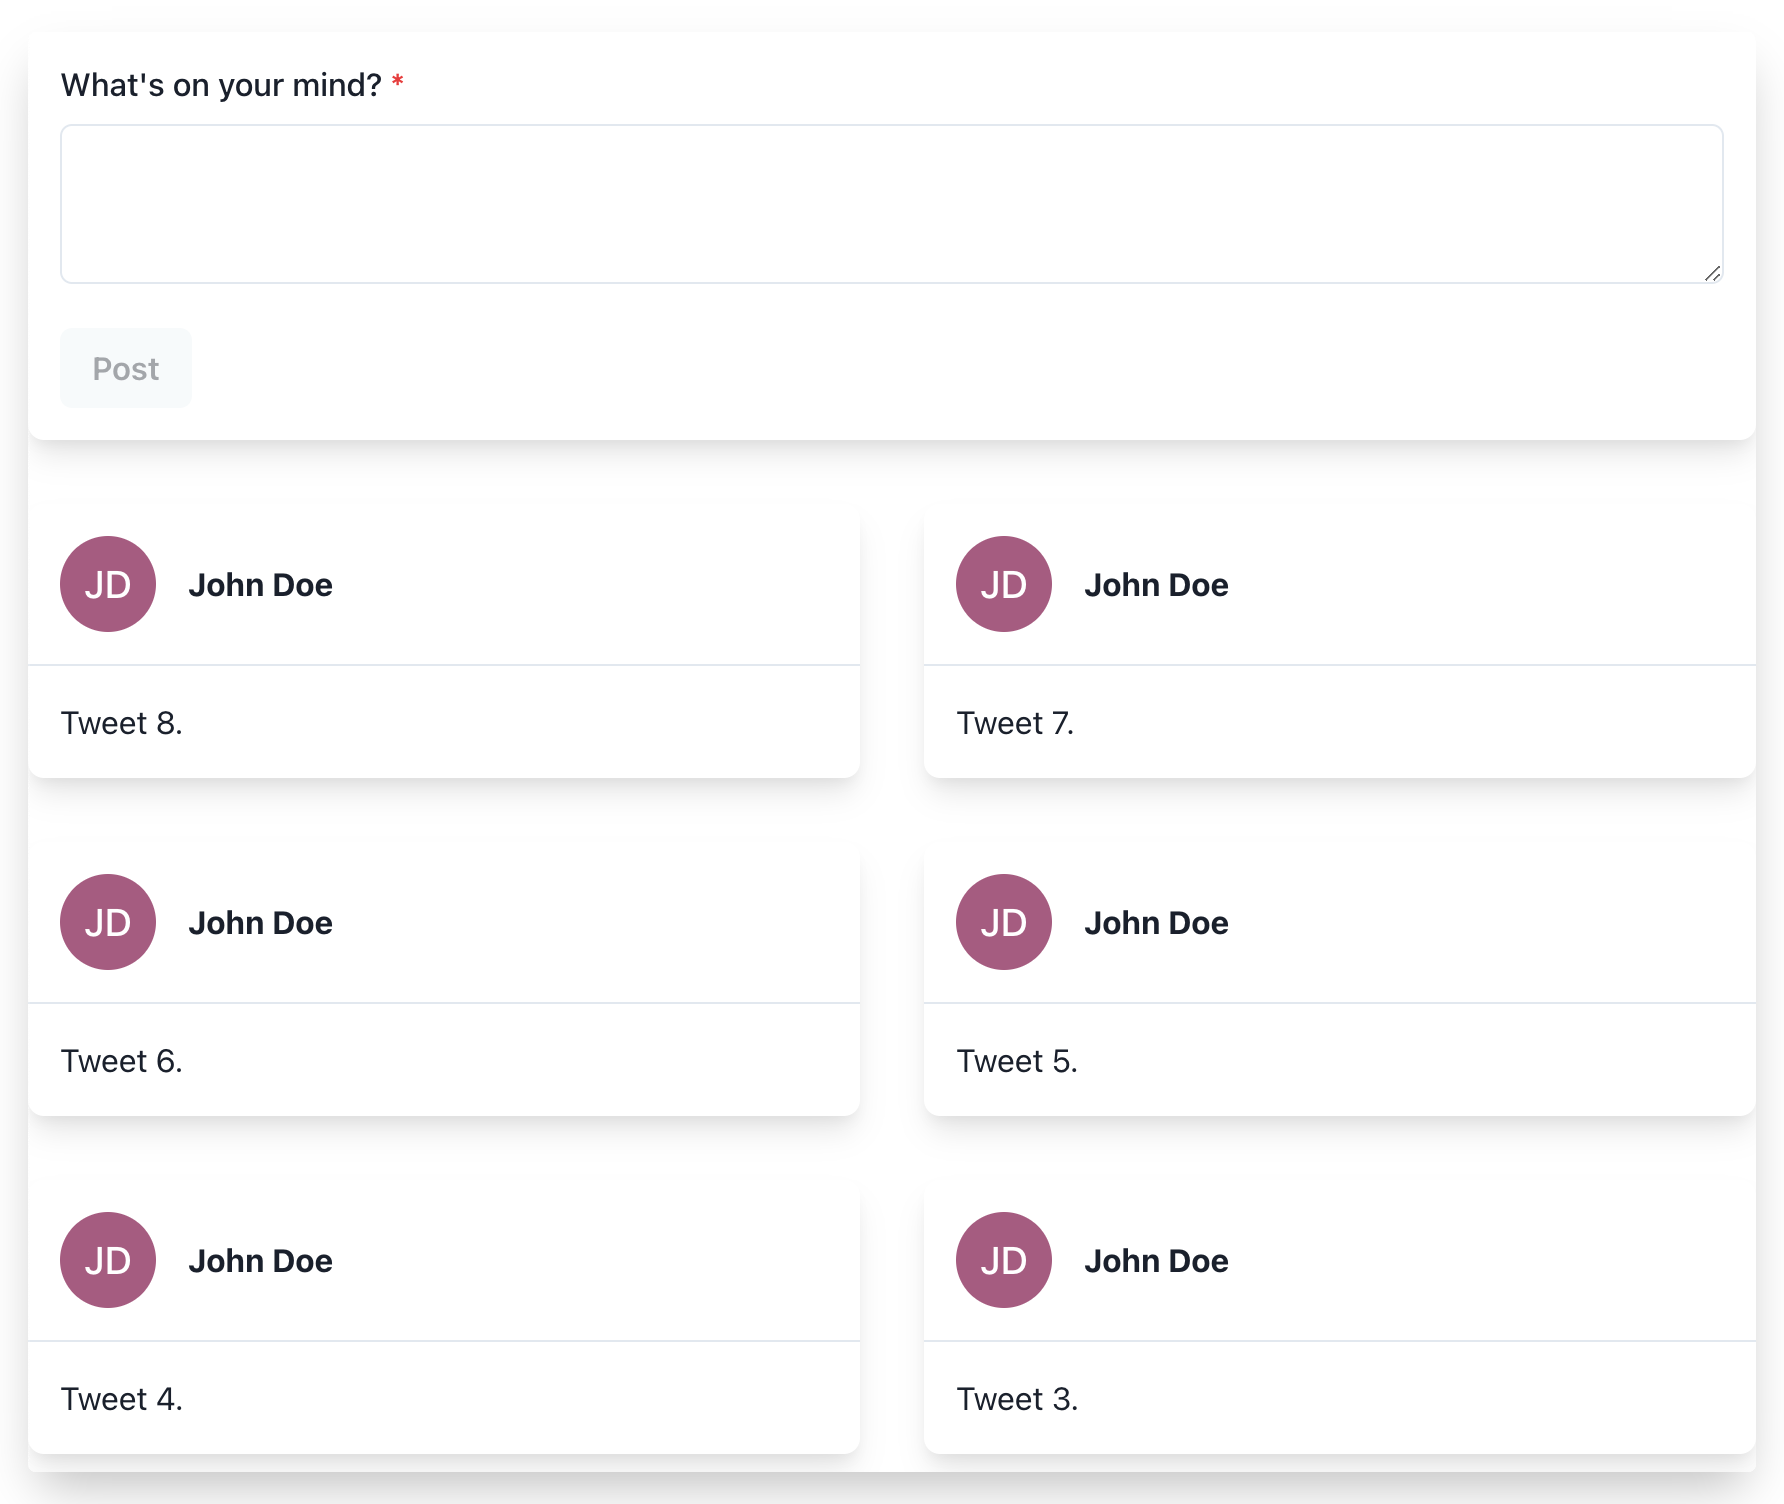
Now, we should be able to view a textarea if we visit http://localhost:3000/tweets:
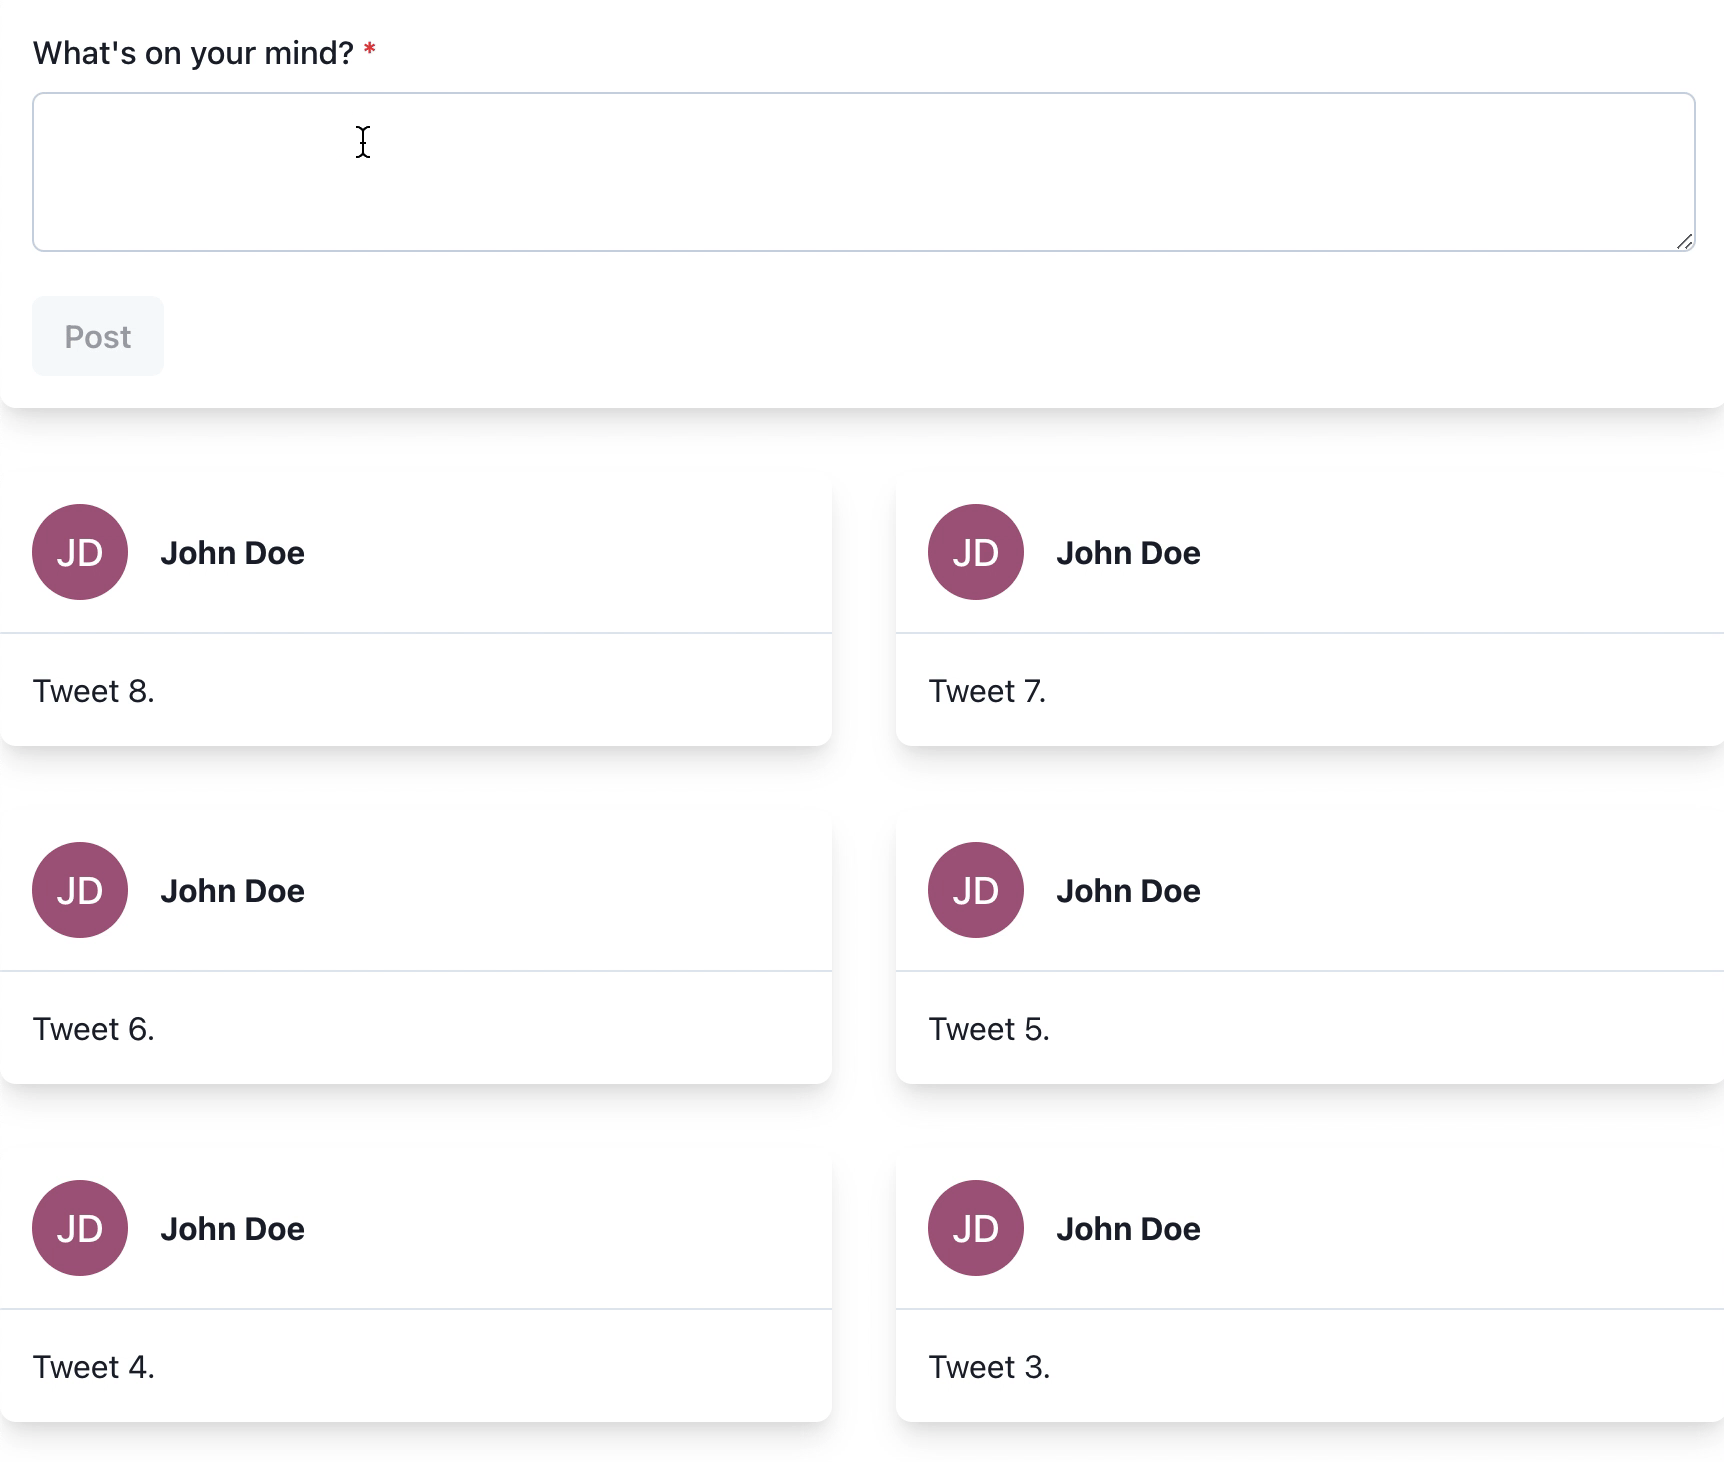
We should also be able to add a new tweet using the textarea (this won’t tweet to your actual account!):
Next, we’ll add the option to view the profile of a user which shows only the tweets posted by that user.
Option to View the Profile of a User with only Their Tweets
First, we’ll create a page that will show a list of all the users. To do that, we’ll need to create a new file named index.tsx inside the pages/users directory with the following content:
// pages/users/index.tsx

import { GetServerSideProps, InferGetServerSidePropsType } from "next";
import { useSession } from "next-auth/client";
import Head from "next/head";
import React from "react";
import { useQuery } from "react-query";
import { dehydrate } from "react-query/hydration";
import Page from "../../components/pages/users";
import queryClient from "../../lib/clients/react-query";
import fetchUsers from "../../lib/queries/fetch-users";

const MyAccountPage: InferGetServerSidePropsType<
  typeof getServerSideProps
> = ({}) => {
  const { data } = useQuery("users", fetchUsers);
  const [session] = useSession();

  if (!session) {
    return <div>Not authenticated.</div>;
  }

  return (
    <>
      <Head>
        <title>All users</title>
      </Head>
      <Page users={data} />
    </>
  );
};

export const getServerSideProps: GetServerSideProps = async ({ req }) => {
  await queryClient.prefetchQuery("users", fetchUsers);

  return {
    props: {
      dehydratedState: dehydrate(queryClient),
    },
  };
};

export default MyAccountPage;
We’ll also need to create a new file named fetch-users.ts inside the lib/queries directory with the following content:
// lib/queries/fetch-users.ts

const fetchUsers = async () => {
  const res = await fetch(`${process.env.NEXT_PUBLIC_API_URL}/api/users`);
  const data = await res.json();

  return data;
};

export default fetchUsers;
This function will be responsible for fetching all the users from the API endpoint. We’ll also need to create a new file named index.tsx inside the components/pages/users directory with the following content:
// components/pages/users/index.tsx

import { Box, Grid, Stack } from "@chakra-ui/react";
import React from "react";
import User from "./user";

const UsersPageComponent = ({ users }) => {
  return (
    <Stack spacing={8}>
      <Grid templateColumns={["1fr", "1fr", "repeat(2, 1fr)"]} gap={8}>
        {users?.map((user) => {
          return (
            <Box key={user.id}>
              <User user={user} />
            </Box>
          );
        })}
      </Grid>
    </Stack>
  );
};

export default UsersPageComponent;
Next, let’s create a file named user.tsx inside the same directory (components/pages/users) with the following content:
// components/pages/users/user.tsx

import { Avatar, Box, Stack, Text, Button } from "@chakra-ui/react";
import Link from "next/link";
import React, { FC } from "react";

const User: FC = ({ user }) => {
  const authorNode = () => {
    return (
      <Stack
        spacing={4}
        isInline
        alignItems="center"
        p={4}
        borderBottomWidth={1}
      >
        <Avatar name={user.name} src={user.image} />
        <Stack>
          <Text fontWeight="bold">{user.name}</Text>
        </Stack>
      </Stack>
    );
  };

  const bodyNode = () => {
    return (
      <Text fontSize="md" p={4}>
        {user.email}
      </Text>
    );
  };

  const buttonNode = () => {
    return (
      <Box p={4} borderTopWidth={1}>
        <Link href={`/users/${user.id}`}>
          <Button>View profile</Button>
        </Link>
      </Box>
    );
  };

  return (
    <Box shadow="lg" rounded="lg">
      <Stack spacing={0}>
        {authorNode()}
        {bodyNode()}
        {buttonNode()}
      </Stack>
    </Box>
  );
};

export default User;
And one more file named index.ts inside the pages/api/users directory with the following content:
// pages/api/users/index.ts

import prisma from "../../../lib/clients/prisma";
import type { NextApiRequest, NextApiResponse } from "next";

export default async (req: NextApiRequest, res: NextApiResponse) => {
  if (req.method === "GET") {
    try {
      const users = await prisma.user.findMany({
        orderBy: [
          {
            createdAt: "desc",
          },
        ],
      });

      return res.status(200).json(users);
    } catch (error) {
      return res.status(422).json(error);
    }
  }

  res.end();
};
The above function is responsible for sending the details of all the users. Now, if we visit http://localhost:3000/users, we should be able to see a list of users:
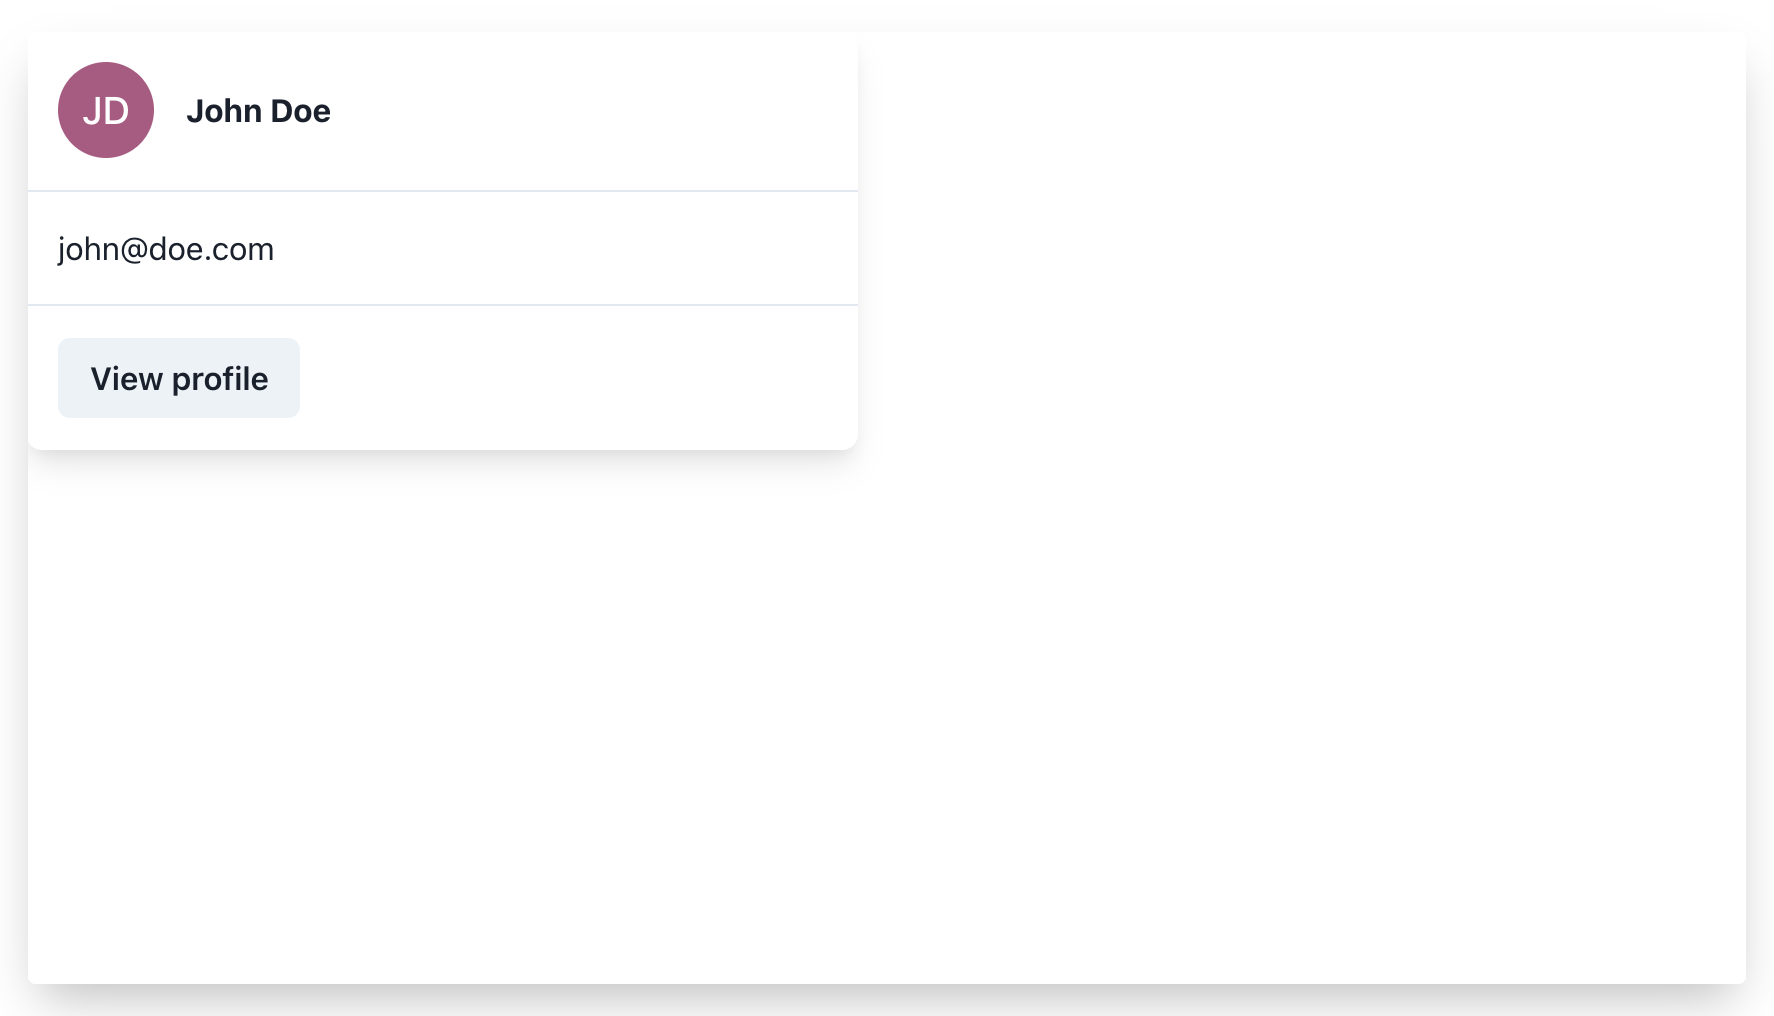
Now, let’s create the page to show the details for a single user. To do that, we’ll need to create a new file named [id].tsx inside the pages/users directory with the following content:
// pages/users/[id].tsx

import Page from "../../components/pages/users/[id]";
import queryClient from "../../lib/clients/react-query";
import fetchUser from "../../lib/queries/fetch-user";
import { GetServerSideProps, InferGetServerSidePropsType } from "next";
import { getSession, useSession } from "next-auth/client";
import Head from "next/head";
import React from "react";
import { useQuery } from "react-query";
import { dehydrate } from "react-query/hydration";

const MyAccountPage: InferGetServerSidePropsType<typeof getServerSideProps> = ({
  id,
}) => {
  const { data } = useQuery("user", () => fetchUser(parseInt(id as string)));
  const [session] = useSession();

  if (!session) {
    return <div>Not authenticated.</div>;
  }

  return (
    <>
      <Head>
        <title>{session.user.name}'s profile</title>
      </Head>
      <Page user={data} />
    </>
  );
};

export const getServerSideProps: GetServerSideProps = async ({ query }) => {
  await queryClient.prefetchQuery("user", () =>
    fetchUser(parseInt(query.id as string))
  );

  return {
    props: {
      dehydratedState: dehydrate(queryClient),
      id: query.id,
    },
  };
};

export default MyAccountPage;
The value of query.id determines the id of the current user. We’ll also need to create a new file named fetch-user.ts inside the lib/queries directory with the following content:
// lib/queries/fetch-user.ts

const fetchUser = async (userId: number) => {
  const res = await fetch(
    `${process.env.NEXT_PUBLIC_API_URL}/api/users/${userId}`
  );
  const data = await res.json();

  return data;
};

export default fetchUser;
The above function will be responsible for doing the GET request to the API endpoint. Next, we’ll need to create a new file named index.tsx inside the components/pages/users/[id] directory with the following content:
// components/pages/users/[id]/index.tsx

import { Avatar, Box, Grid, Stack, Text } from "@chakra-ui/react";
import Tweet from "./tweet";
import React, { FC } from "react";

const UsersPageComponent: FC = ({ user }) => {
  const authorNode = () => {
    return (
      <Stack spacing={4} isInline alignItems="center">
        <Avatar name={user?.name} src={user?.image} />
        <Stack>
          <Text fontWeight="bold" fontSize="4xl">
            {user?.name}
          </Text>
        </Stack>
      </Stack>
    );
  };

  return (
    <Stack spacing={8}>
      {authorNode()}
      <Grid templateColumns={["1fr", "1fr", "repeat(2, 1fr)"]} gap={8}>
        {user?.tweets.map((tweet) => {
          return (
            <Box key={tweet.id}>
              <Tweet tweet={tweet} />
            </Box>
          );
        })}
      </Grid>
    </Stack>
  );
};

export default UsersPageComponent;
Next, we’ll need to create one more file named tweet.tsx inside the same directory (components/pages/users/[id]) with the following content:
// components/pages/users/[id]/tweet.tsx

import { Box, Stack, Text } from "@chakra-ui/react";
import React, { FC } from "react";

const Tweet: FC = ({ tweet }) => {
  const bodyNode = () => {
    return (
      <Text fontSize="md" p={4}>
        {tweet.body}
      </Text>
    );
  };

  return (
    <Box shadow="lg" rounded="lg">
      <Stack spacing={0}>{bodyNode()}</Stack>
    </Box>
  );
};

export default Tweet;
Finally, we’ll need to create one more file named [id].ts inside the pages/api/users directory with the following content:
// pages/api/users/[id].ts

import prisma from "../../../lib/clients/prisma";
import type { NextApiRequest, NextApiResponse } from "next";

export default async (req: NextApiRequest, res: NextApiResponse) => {
  if (req.method === "GET") {
    const userId = parseInt(req.query.id as string);

    try {
      const tweets = await prisma.user.findUnique({
        include: {
          tweets: true,
        },
        where: {
          id: userId,
        },
      });

      return res.status(200).json(tweets);
    } catch (error) {
      console.log(error);

      return res.status(422).json(error);
    }
  }

  res.end();
};
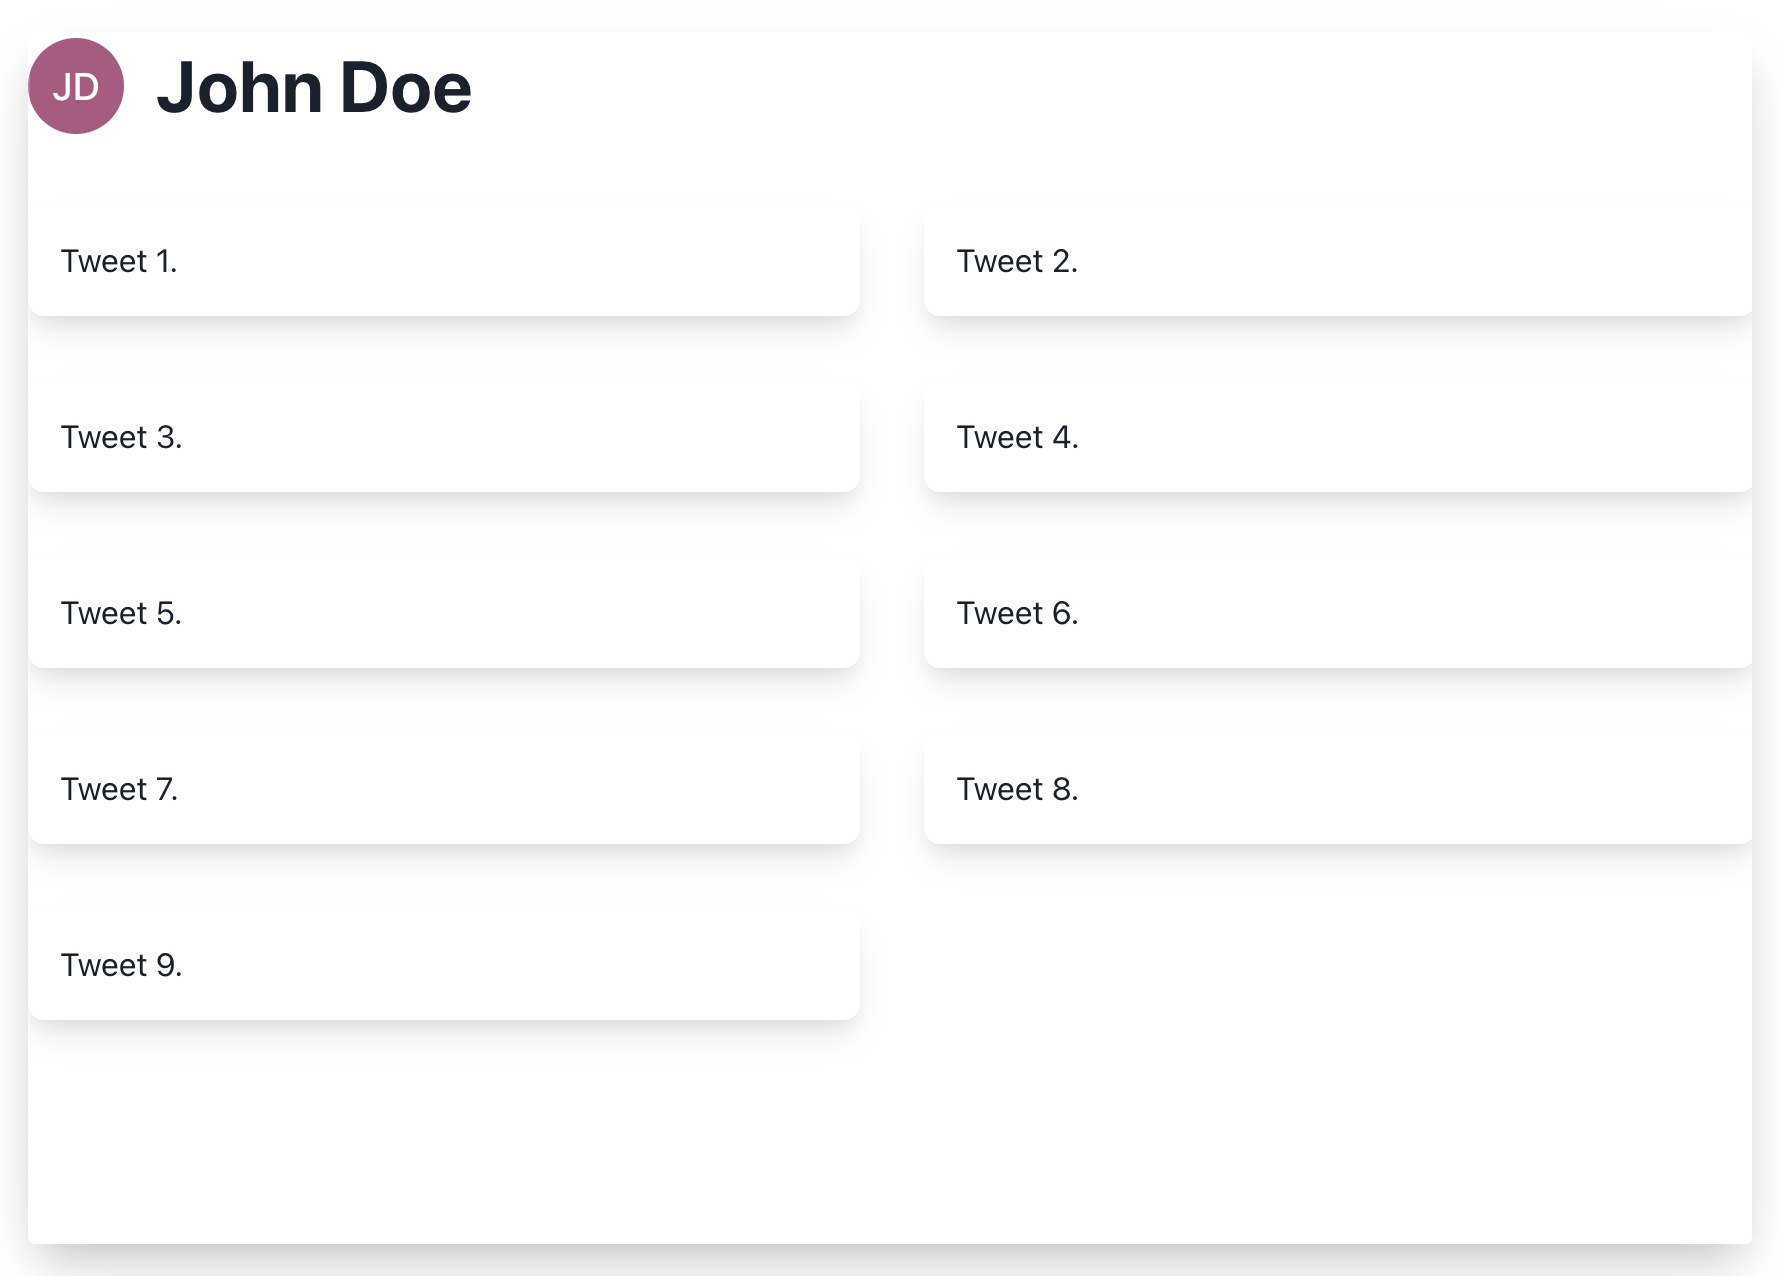
The above function will be responsible for sending the details of the user whose id is the same as req.query.id. We’re converting it to a number, as Prisma requires it to be numeric. Now, if we visit http://localhost:3000/users and click on the View profile button for a user, we’ll be able to see a list of tweets posted by that user.
Conclusion
In this tutorial, we’ve learned how we can use Next.js and Prisma together to build a clone of Twitter. Obviously, Twitter consists of a lot of other features like retweet, comment and sharing functionalities for each tweet. However, this tutorial should provide the base for building such features.
The code for the app we built is available on GitHub. Feel free to check it out. You can also check out a live demo of the app we’ve been building here.
Frequently Asked Questions (FAQs) about Building a Twitter Clone with Next.js and Prisma
How Can I Implement User Authentication in My Twitter Clone?
User authentication is a crucial part of any application that involves user interaction. In the context of a Twitter clone, you can use Next.js API routes together with Passport.js, a popular middleware for handling user authentication in Node.js applications. You can create a new API route (e.g., /api/auth) and use Passport.js strategies for handling signup, login, and logout functionalities.
How Can I Add Real-Time Features to My Twitter Clone?
Real-time features such as instant messaging or live updates can be implemented using WebSockets. Socket.IO is a popular library for real-time web applications. It enables real-time, bidirectional, and event-based communication between the browser and the server. You can integrate Socket.IO with your Next.js and Prisma application to add real-time features.
How Can I Deploy My Twitter Clone?
There are several platforms for deploying your Next.js and Prisma application. Vercel, the company behind Next.js, provides a platform for deploying Next.js applications with zero configuration. You can also use platforms like Heroku or Netlify. For the database, you can use a cloud database service like Prisma Cloud.
How Can I Implement Pagination in My Twitter Clone?
Pagination is a common feature in applications that display a large amount of data. In Prisma, you can use the skip and take parameters in your queries to implement pagination. The take parameter defines how many records you want to retrieve, and the skip parameter defines how many records to skip.
How Can I Add Image Upload Functionality to My Twitter Clone?
You can add image upload functionality to your Twitter clone using Multer, a middleware for handling multipart/form-data, which is primarily used for uploading files. You can create a new API route (e.g., /api/upload) and use Multer to handle the file upload. For storing the images, you can use a cloud storage service like AWS S3.
How Can I Add a Like Feature to My Twitter Clone?
A like feature can be implemented by creating a new model in your Prisma schema. This model can have a many-to-many relationship with the User and Tweet models. When a user likes a tweet, you can create a new record in the Like model.
How Can I Add a Retweet Feature to My Twitter Clone?
A retweet feature can be implemented similarly to the like feature. You can create a new model in your Prisma schema that represents a retweet. This model can have a many-to-many relationship with the User and Tweet models.
How Can I Add a Comment Feature to My Twitter Clone?
A comment feature can be implemented by creating a new model in your Prisma schema. This model can have a one-to-many relationship with the User and Tweet models. When a user comments on a tweet, you can create a new record in the Comment model.
How Can I Add a Search Feature to My Twitter Clone?
A search feature can be implemented using Prisma’s filtering capabilities. You can create a new API route (e.g., /api/search) and use Prisma’s findMany method with the where parameter to filter tweets based on the search query.
How Can I Add a Follow Feature to My Twitter Clone?
A follow feature can be implemented by creating a new model in your Prisma schema. This model can represent a follow relationship between two users. When a user follows another user, you can create a new record in the Follow model.
 Nirmalya Ghosh
I'm a computer science engineer specializing in web design and development with an eye for detail. I love working with React.js.