Puppet Warp is one of the much talked-about new features in Photoshop CS5. Puppet Warp is a little bit like the Liquify filter. It works by placing a mesh over an image. You’ll use the mesh to place pins where you want to control movement or to ensure there is no movement – literally pinning part of the image to the document window. Puppet warp can be applied to “normal” layers, type layers, shape layers, Smart Objects and vector masks and the good news is, and it’s fairly simple to use. The results from this command can range from subtle reshaping or retouching to extreme distortion.
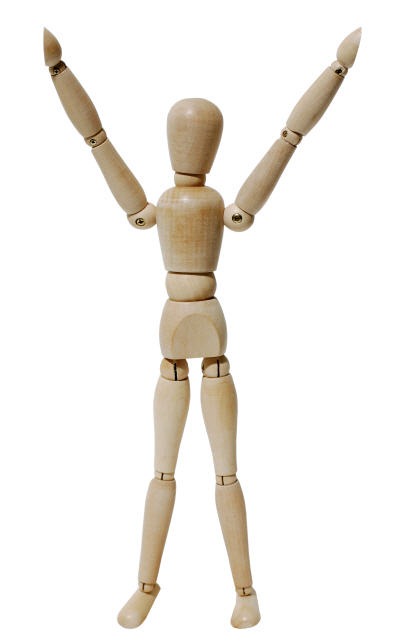
1. Open up an image that you want to apply a warp to. I’m using this image which I downloaded for free from Stock Xchng. You can get it here. It’s a huge image so I’ve cropped it and removed a large chunk of white space on the left side of the dummy.
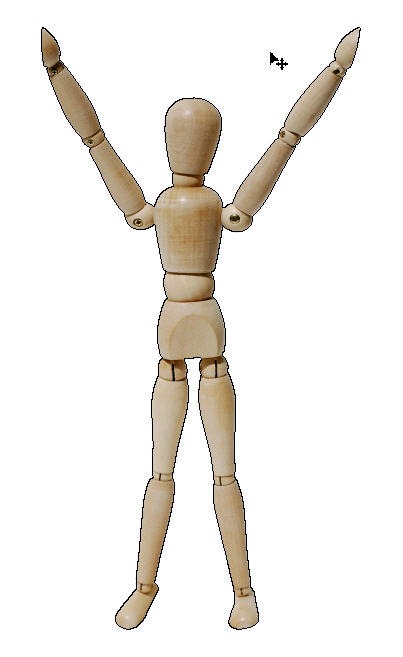
2. As mentioned previously, Puppet Warp works on nearly every type of layer, but it will not work on a background layer. You will also get a better result if the object you want to warp is isolated on its own layer, so that’s what we’ll do now. Select the white area around the dummy using the Magic Wand tool (W), then press Shift + Ctrl + I (Windows) or Shift + Cmd + I (Mac) to invert the selection so that the dummy is selected.
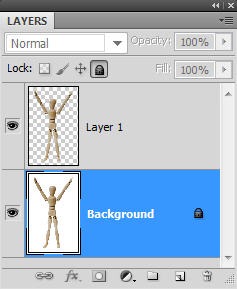
3. Now to put the selection on its own layer, press Ctrl + J (Windows) or Cmd + J (Mac). In the Layers palette you should now see the dummy on it’s own layer with transparency around it.
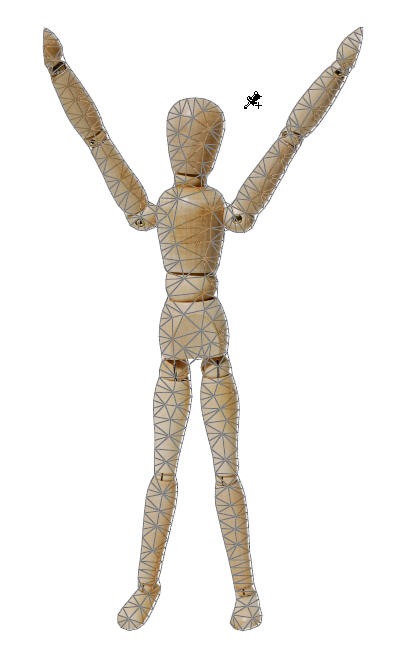
3. Make sure your new dummy layer is selected (not the background layer), then choose Edit > Puppet Warp. A mesh appears over the dummy.
There are several options available in the Options bar at the top of the screen.
• Mode: Determines how elastic the mesh is. Rigid, as the name suggests is not very stretchy, while Distort will give you an ultra-stretchy mesh. Normal lies somewhere in between.
• Density: Sets the spacing of the mesh, where small changes in moving the pins result in larger warps. Also a good mode for larger images. Rigid is the opposite and recommended when your object is
more stiff, as with human appendages.
• Expansion: Expand or contract the outer edges of the mesh.
• Show Mesh: Deselect to display only the pins, and not the mesh.
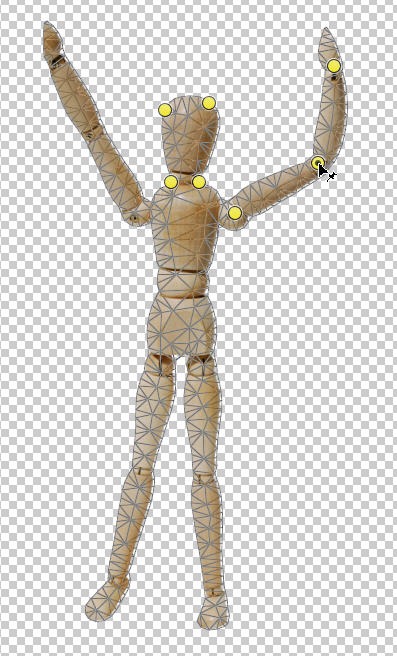
4. Turn off the visibility on the background layer. Simply click to add a pin to the areas of the image that you want to anchor. I want to bend the dummy’s left elbow, so I’ve put down pins around the head, upper body and shoulder and wrist as anchors which will not move. Then click on the elbow joint to add another point and drag to distort this point. When you’re finished dragging hit Enter/Return on the keyboard to commit the puppet warp.
If you want to cancel a puppet mesh, just hit the Esc key. If you want to remove a pin, click on it and then hit the Backspace key.
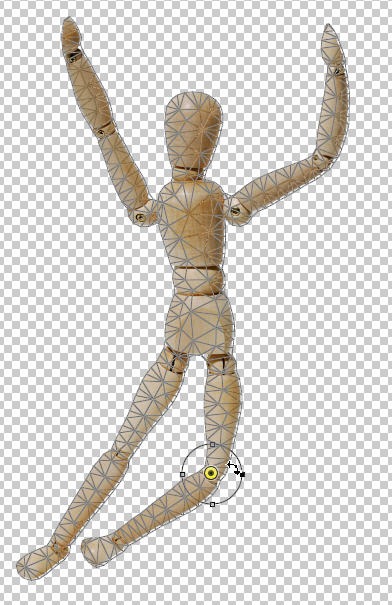
5. As well as dragging pin points, you can also rotate around a pin. Choose Edit > Puppet Warp again to put the mesh over the dummy again. Click on the dummy’s left knee to add another pin, then hold down the Alt (Option on the Mac) key and position your cursor near, but not over, the pin. Drag to rotate. Your degree of rotation appears on the Options bar.
And that’s Puppet Warp. It’s probably not something you’ll use everyday but it is a very useful tool for distorting images and easier to manipulate than the Liquify Filter.
Frequently Asked Questions about Manipulating Images with Puppet Warp in Photoshop CS5
How can I use Puppet Warp in Photoshop CS5 to manipulate complex shapes?
Puppet Warp is a powerful tool in Photoshop CS5 that allows you to distort images by moving a set of points you define. For complex shapes, start by selecting the object you want to manipulate. Then, go to Edit > Puppet Warp. Add pins to the areas you want to control. These pins act like pivot points or joints; moving one will affect the position of the others. For complex shapes, you may need to add more pins to achieve the desired effect. Remember, the more pins you add, the more control you have over the distortion.
Can I use Puppet Warp on text layers in Photoshop CS5?
Yes, you can use Puppet Warp on text layers, but you need to rasterize the text layer first. To do this, right-click on the text layer and select ‘Rasterize Type’. Once rasterized, you can use Puppet Warp on the text as you would with any other layer. However, keep in mind that once a text layer is rasterized, it can no longer be edited as text.
How can I achieve realistic distortions with Puppet Warp in Photoshop CS5?
Achieving realistic distortions with Puppet Warp requires careful placement of pins and subtle movements. Start by placing pins at the joints or areas of the object where movement would naturally occur. Then, make small, gradual adjustments. Remember, less is often more when it comes to creating realistic distortions.
Can I use Puppet Warp to create animations in Photoshop CS5?
While Puppet Warp is not designed for creating animations, you can use it to create different frames of an animation. You would need to save each distorted image as a separate frame and then use another program to compile these frames into an animation.
What should I do if the Puppet Warp tool is not available in my Photoshop CS5?
If the Puppet Warp tool is not available, it may be because the layer you are trying to use it on is locked or hidden. Make sure the layer is visible and not locked. Also, Puppet Warp cannot be used on text layers unless they are rasterized first.
How can I use Puppet Warp to change the perspective of an object in Photoshop CS5?
Puppet Warp can be used to subtly change the perspective of an object. Place pins on the object where you want to control the distortion. Then, move the pins to adjust the perspective. This can be particularly useful for making objects appear to be viewed from a different angle.
Can I use Puppet Warp on multiple layers at once in Photoshop CS5?
Puppet Warp can only be used on one layer at a time. If you want to apply the same distortion to multiple layers, you would need to apply the Puppet Warp to each layer individually.
How can I undo or reset changes made with Puppet Warp in Photoshop CS5?
If you want to undo changes made with Puppet Warp, simply press Ctrl+Z (or Command+Z on a Mac) to undo the last change. If you want to reset all changes made with Puppet Warp, go to Edit > Puppet Warp and then click on the ‘Reset’ button in the options bar.
Can I save my Puppet Warp settings in Photoshop CS5?
Unfortunately, Photoshop CS5 does not allow you to save Puppet Warp settings. However, you can save the image with the Puppet Warp applied as a PSD file, which will allow you to return to it later and make further adjustments if needed.
How can I improve my skills with Puppet Warp in Photoshop CS5?
The best way to improve your skills with Puppet Warp is through practice. Try using it on a variety of images and shapes to see how it affects them. You can also watch tutorials or read articles online to learn new techniques and tips.
