This article was sponsored by Webydo. Thank you for supporting the sponsors who make SitePoint possible.
Webydo is a professional web-based application for designers who want to create and manage web and mobile sites for their clients, without writing code. We’ve written about Webydo before on SitePoint, but a lot has changed in the product since then. Last week, Webydo announced their new platform which includes an all-new interface, improved stability and performance, and all the tools needed to create fast and responsive websites. What’s more, Webydo’s website received a complete overhaul by Hello Monday, a world-renowned design agency.
I knew of Webydo long before I tried it out for myself because I follow their customer’s web experiments on Behance, but when I saw this Game Of Thrones -inspired website by Sarit Evrani – a well known Israeli digital artist – which tests the capabilities of Webydo’s parallax tools, I had to try it for myself.
Parallax scrolling is when a background (either the whole website body, or a specific section) is moving at a slower rate than the foreground elements, creating a 3D effect as you scroll down the page. Despite a degree of backlash from critics regarding its user experience, it looks wonderful when executed correctly.
Getting Started
Head over to the Webydo website and start a free trial. You’ll be asked to either start from scratch, start with an already-defined structure of your choosing, or else choose an entire template (with minimal faffing around!).
Choose Design, and then select the Maddog Sound “Parallax” theme . Parallax has already been activated in this template, and we’ll use it to quickly understand how it works before trying out our own example. Right away you’ll notice the rulers and floating Layers interface. If you’ve used any kind of design tool before, then Webydo will feel familiar to you.
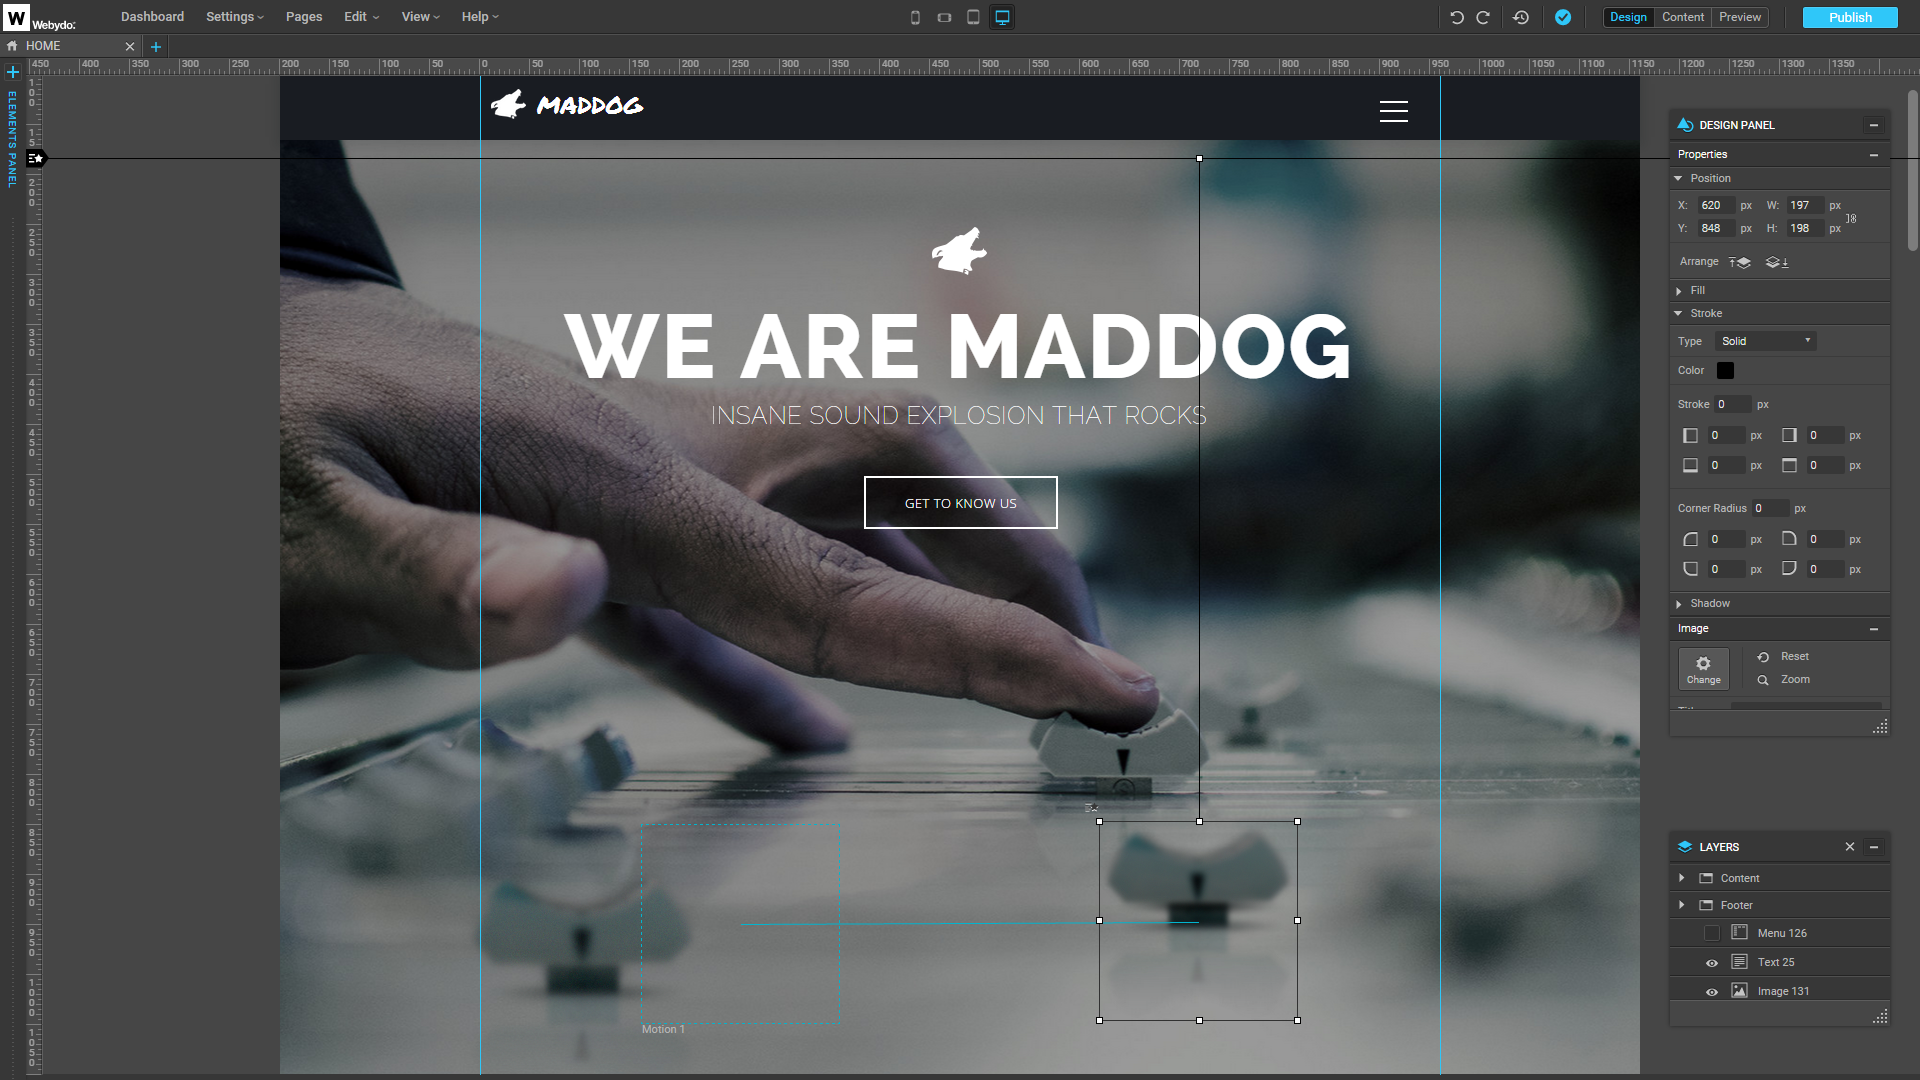
When you select the knob image in the layout, two things will happen. A box will surround it, signalling that you’ve selected it, and the Properties Panel will open up. Under “Parallax Scrolling Animation”; the first setting is Target, which is where the image will end up at the end of the scroll.
You can change the top and left offset values to customise the animation’s direction, but I find it easier to simply drag the blue-bordered box (adjacent to our selection) instead. We won’t change anything here – simply click “Publish” in the top-right corner to see the animation in action. From A to B, easy right?
Here’s a gif showing off this method:

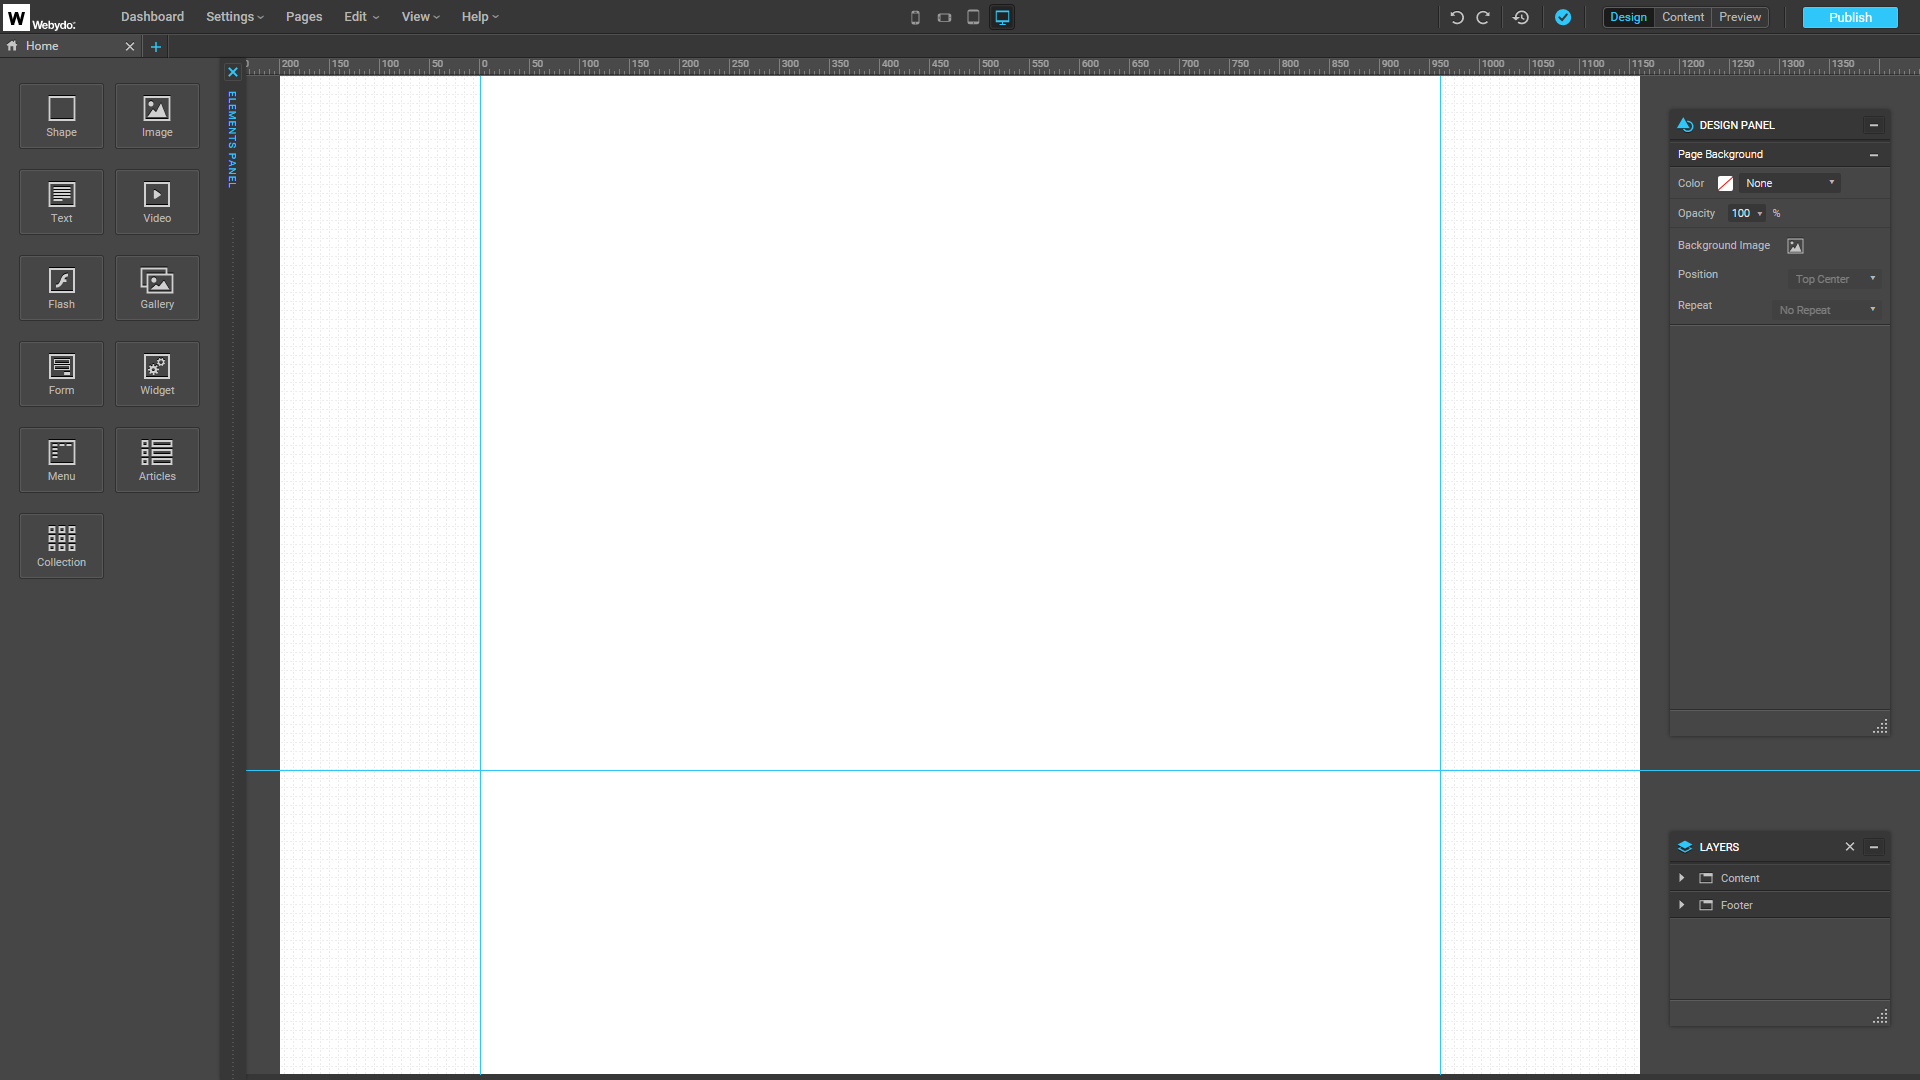
Lets start a new design from scratch
Creating Parallax Scrolling Images
For this test-drive, I decided to try something ambitious. Among other things, Terry Gilliam is famous for the animations he made for Monty Python’s Flying Circus. His work often used a mish-mash of cutout vintage photos and artwork mashed together in an irreverent, slapstick fashion.
I wanted to pay tribute to that style.
To begin, I collected some an old-timey stage graphic that suited the tone. After I imported it, I moved it to the front of the composition. Right-clicking on any image lets you set its position to either fixed (‘Pin it) or parallax scrolling.
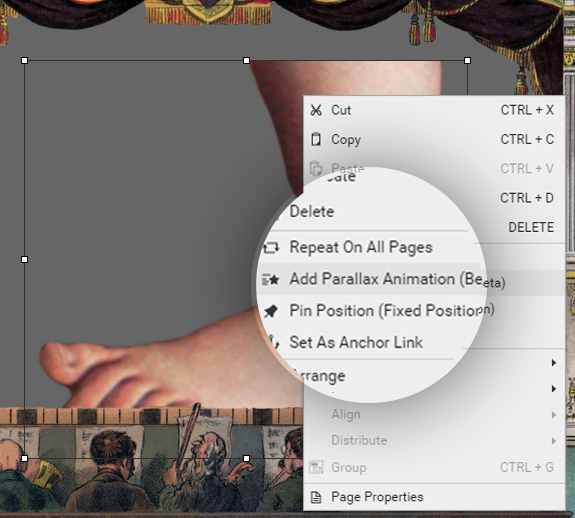
I pinned the stage in position, locking it off from any scrollwheel action. I also found it good practice to keep it out of the way by temporarily hiding it using the layers panel.
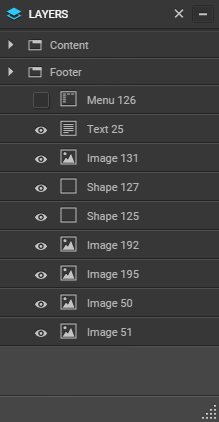
I Want to Ride My Bicycle
Next I imported an Edwardian bicycle lady image and set it to parallax scrolling. You’ll now see graphic has a line leading to a blue dotted line box – this is the animation path and finishing position of your image.
Offset the position of the secondary box a little, and hit the ‘publish’ button at the top right and a live demo will be launched. Scroll the page and the image should move between its original position and the position of that blue box.
If you’re accustomed to standard timeline-based animation suites, this might take some adjustment at first.
I wanted my cyclist to travel across the stage so I stretched the finishing position box from right to left.
As we’re scrolling the screen, to keep the cycle path horizontal, we need to compensate by angling the path down as well as across.
Getting this angle correct did take some trial and error and you’ll have to Hit ‘Publish’ each time to test your work.
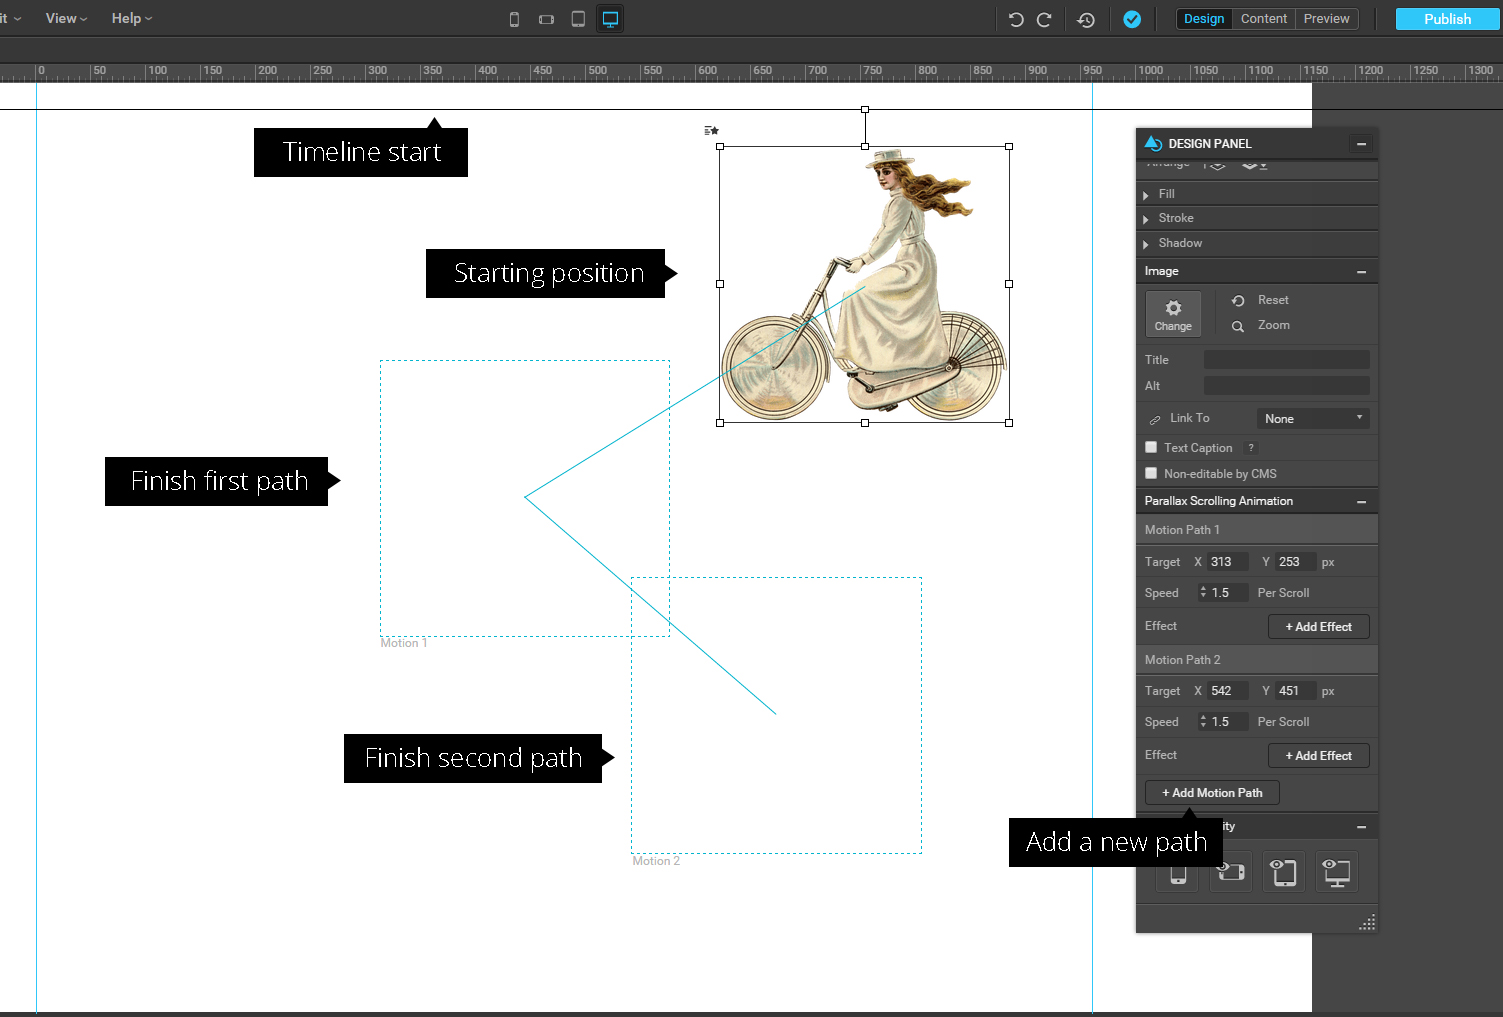
On the right there is a properties panel that lets you control your animation. At the bottom of the panel there’s an ‘Add Motion Path’ button that lets you chain simpler animation parts into a more complex sequence.
The other major controls include:
Speed
This control how much motion is generated by each scroll unit. The default is 1.5.
Add Effect
Along with the position change, you can add apply separate effects to each motion including:
- Delay before
- Delay after
- Fade to
- Rotate
- Scale
I applied the rotate filter to my cyclist to get the bike up on one wheel.
Timing
The final important component to understand is the timing control. Each parallax image has a black horizontal line attached to its top edge (see screenshot above).
By default this line sits level with the top of the window, and while it does this, the animation will begin with the first scroll detected.
However if you drag this line down the screen you’ll be delaying that animation until that line hits the upper edge of the screen. This took me a little time to wrap my head around, but parallax effects are a different kind of animation and so require a slightly different approach.
After making a few duplicates of the cyclist, but with differing speeds and paths, I imported the famous Monty Python foot, amongst some other themed images.
The animation process is similar for the newly-imported items. Rather than stepping through each step, I think it’s more useful to go through some general tips I discovered along the way.
Tips
- Sometimes it’s easy to select the wrong object, so it’s generally a good idea to temporarily hide objects when you’re not working with them.
- Currently you can’t rename layers, so it’s a good idea to keep your ‘cast’ of objects to a manageable number. I actually made a few notes to help me remember which object was which.
- Getting the timing right is a little navigating at sea – it’s useful to use other objects as landmarks to orient yourself.
- The app felt smoother and faster in Firefox than Chrome, probably due to differences between the browsers in how they respond to scrolling.
And here’s a gif to show off the quick demo we came up with.
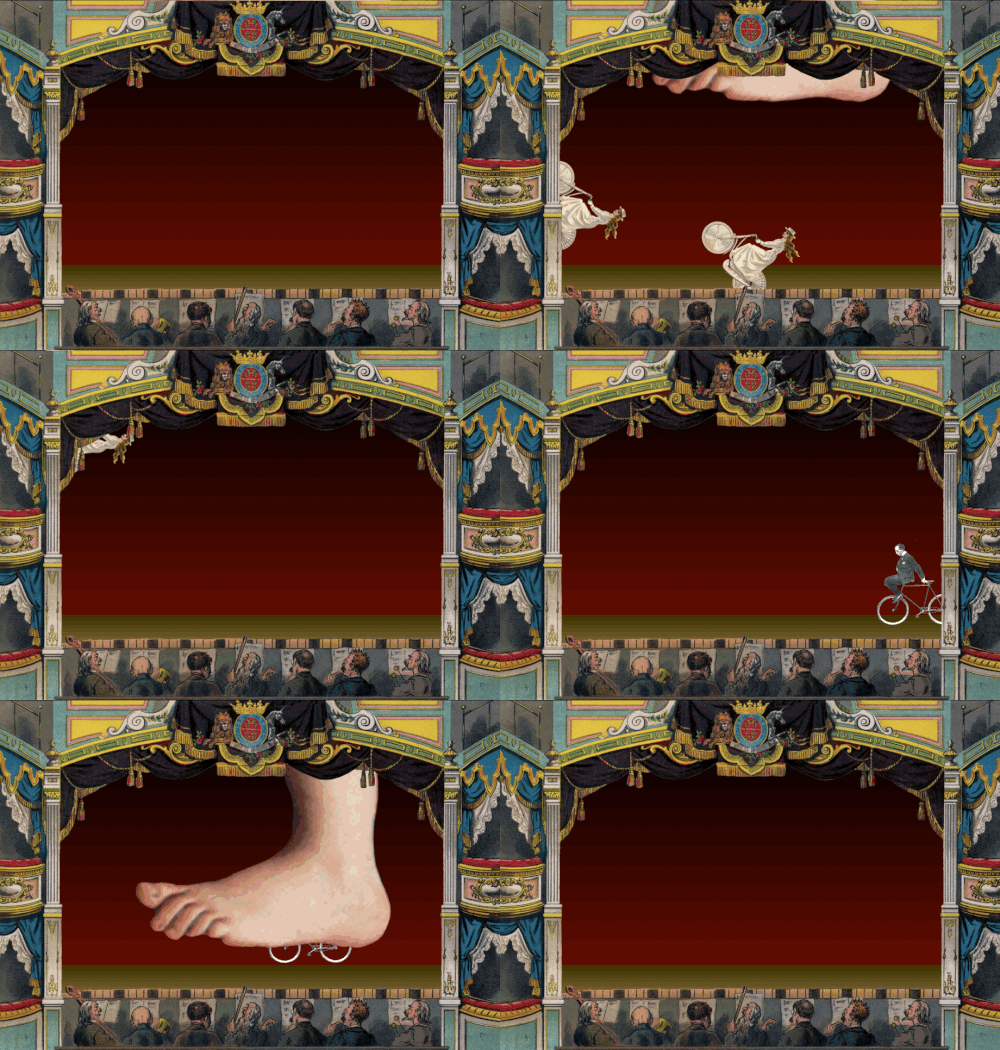
Here’s a link to the site (works best on Firefox)
Final Thoughts
So, there it is. Is it time to load it up and start producing the next South Park feature film?
Hopefully, one day. There was quite a lot of trial and error to get complex timed sequences to play out — but this will hopefully change soon. This tool is under active development, remember.
On the other hand, if you’re looking to integrate more subtle parallax effects with your standard CMS content, this might be just the thing you’re looking for. With a little practice, you can produce the kind of tasty little sequences that would usually require a more in-depth HTML5 knowledge to pull off.
Webydo’s visual interface is definitely a suitable solution for professional designers who find lines of code to be a headache. In only a few clicks we can create otherwise complex features, like complex, pixel-perfect parallax effects, and publish them in a flash. Give it a try, what do you have to lose?
 Daniel Schwarz
Previously, design blog editor at Toptal and SitePoint. Now Daniel advocates for better UX design alongside industry leaders such as Adobe, InVision, Marvel, Wix, Net Magazine, LogRocket, CSS-Tricks, and more.


