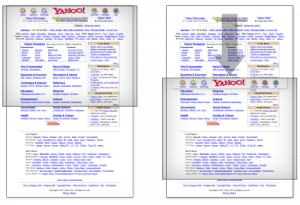
Sticky boxes are boxes that stay visible on your browser no matter where you scroll on the page. They are most often used in side bars and header bars to keep the branding and navigation menus visible and reachable at all times. In the old days, sticky boxes were pretty basic and were only stationary on one part of the viewport no matter where you scrolled, as shown in this screenshot of the Yahoo! homepage.
 And they were pretty easy to implement with CSS too, as shown in the following IE6 workaround.
<style>
  #header {
    position: fixed;
    top: 0px;
  }
  * html #header {
    position: absolute;
    top: expression(document.body.scrollTop);
  }
</style>The Plan
First, we’ll need a function that gets called whenever the page is scrolled. This function must loop through each of the sticky elements on the page to determine whether the element is:- Below the top edge of the viewport.
- Above the top edge of the viewport, and
- Not touching the bottom edge of its boundary.
- Touching the bottom edge of its boundary.
document.onscroll = onScroll;

function onScroll() {
  var list = getAllStickies();

  for (var i = 0, item; item = list[i]; i++) {
    var bound = getBoundary(item);
    var edge = bound.getBoundingClientRect().bottom;
    var height = item.offsetHeight;
    var top = item.getBoundingClientRect().top;

    if (top < 0) {
      // above the top edge of the viewport
      if (edge > height) {
        // not touching the bottom edge of its boundary
        item.style.position = "fixed";
        item.style.top = "0px";
      } else {
        // touching the bottom edge of its boundary
        item.style.position = "relative";
        item.style.top = -((top - edge) + height) + "px";
      }
    } else {
      // below the top edge of the viewport
      item.style.position = "relative";
      item.style.top = "auto";
    }
  }
}getAllStickies() and getBoundary() haven’t been defined yet. We’ll revisit them a little later. The getBoundingClientRect() function is a convenient and fast function for returning the position of an element relative to the viewport. Elements above the viewport are negative numbers. By using this function, we only need to check whether the top value is a positive or a negative number.
Our function detects three scenarios for each sticky element:
- If the element is below the top edge of the viewport, the element is still part of the page and should be in its natural position so that it scrolls with the page.
- If the element is above the top edge of the viewport (i.e., hidden), and is not touching the bottom edge of its boundary, the element should be moved to the top of the viewport and its
positionset tofixed. - If the element is above the top edge of the viewport (i.e., hidden), and is touching the bottom edge of its boundary, the element should be moved to be just above the boundary edge. In this case, its
positionis set torelativeso that it can scroll with the page.
The Mark
We’ll define a sticky element as an element containing ax-sticky attribute. The sticky is a child or descendant of a boundary element identified with a x-sticky-boundary attribute. The sticky is free to move within the confines of the boundary element. An example sticky and boundary is shown below.
<div x-sticky-boundary="">
  <div x-sticky="">I am a sticky confined within a boundary</div>
</div>getAllStickies() and getBoundary() functions we mentioned earlier. We can replace getAllStickies() with:
var list = document.querySelectorAll("[x-sticky]");getBoundary() to return the first ancestor element with the x-sticky-boundary attribute (or return the body element):
function getBoundary(n) {
  while (n = n.parentNode) {
    if (n.hasAttribute("x-sticky-boundary")) {
      return n;
    }
  }

  return document.body || document.documentElement;
}var edge = bound.getBoundingClientRect().bottom;
var nextItem = findNextInBoundary(list, i, bound);
if (nextItem) {
edge = nextItem.getBoundingClientRect().top;
}findNextInBoundary(), that loops through an array, starting at a defined index, looking for the next sticky that shares a boundary element with the current sticky.
The Drop
There is one major scenario which we haven’t considered so far. After the page has scrolled, we have dynamically moved a sticky element to another position on the page. This means the original position of the sticky element is not preserved, which means we cannot restore it’s original position when the user scrolls back upwards. Also, when we make the sticky into a fixed position element, it is pulled out of the document flow, which means the content below it will shift upwards. We want to preserve the space it occupied, so that the content below it doesn’t jump around. To work around this, we need to put a placeholder element in the original position of the sticky. We will also put the sticky inside the placeholder so that it doesn’t affect thenth-child pseudo selector of the placeholder’s siblings. Then whenever we need to restore the sticky’s position, we replace the placeholder with the sticky and discard the placeholder.
One thing to remember is that if we want to get the initial position of a sticky, we should instead get the current position of it’s placeholder. Here’s our updated function:
document.onscroll = onScroll;

function onScroll() {
  var list = document.querySelectorAll("[x-sticky]");

  for (var i = 0, item; item = list[i]; i++) {
    var bound = getBoundary(item);
    var edge = bound.getBoundingClientRect().bottom;
    var nextItem = findNextInBoundary(list, i, bound);

    if (nextItem) {
      if(nextItem.parentNode.hasAttribute("x-sticky-placeholder")) {
        nextItem = nextItem.parentNode;
      }

      edge = nextItem.getBoundingClientRect().top;
    }

    // check if the current sticky is already inside a placeholder
    var hasHolder = item.parentNode.hasAttribute("x-sticky-placeholder");
    var rect = item.getBoundingClientRect();
    var height = rect.bottom - rect.top; // get the height and width
    var width = rect.right - rect.left;
    var top = hasHolder ? item.parentNode.getBoundingClientRect().top : rect.top;

    if (top < 0) {
      if(edge > height) {
        item.style.position = "fixed";
        item.style.top = "0px";
      } else {
        item.style.position = "relative";
        item.style.top = -((top - edge) + height) + "px";
      }

      if (!hasHolder) {  //create the placeholder
        var d = document.createElement("div");

        d.setAttribute("x-sticky-placeholder", "");
        d.style.height = height + "px";  //set the height and width
        d.style.width = width + "px";
        item.parentNode.insertBefore(d, item);
        d.appendChild(item);
      }
    } else {
      item.style.position = "relative";
      item.style.top = "auto";

      if (hasHolder) {  //remove the placeholder
        item = item.parentNode;
        item.parentNode.insertBefore(item.firstChild, item);
        item.parentNode.removeChild(item);
      }
    }
  }
}

function findNextInBoundary(arr, i, boundary) {
  i++;

  for (var item; item = arr[i]; i++) {
    if (getBoundary(item) == boundary) {
      return item;
    }
  }
}

function getBoundary(n) {
  while (n = n.parentNode) {
    if (n.hasAttribute("x-sticky-boundary")) {
      return n;
    }
  }

  return document.body || document.documentElement;
}
The Decoy
To maximize the usefulness of the placeholder, we will also need to copy several CSS properties from the sticky element to the placeholder. For example, we’ll want the margins to be the same so that it occupies exactly the same amount of space. We’ll also want thefloat property to be preserved, so that it doesn’t mess up floating based grid layouts.
Let’s introduce a function, copyLayoutStyles(), which is called as soon as the placeholder is created to copy the styles over to the placeholder:
function copyLayoutStyles(to, from) {
  var props = {
    marginTop: 1,
    marginRight: 1,
    marginBottom: 1,
    marginLeft: 1
  };

  if (from.currentStyle) {
    props.styleFloat = 1;

    for (var s in props) {
      to.style[s] = from.currentStyle[s];
    }
  } else {
    props.cssFloat = 1;

    for (var s in props) {
      to.style[s] = getComputedStyle(from, null)[s];
    }
  }
}
The Clean Up
Currently we’re setting the element’sposition property directly to fixed or relative. Let’s move that call into a CSS stylesheet and use selectors to apply the property. This allows other programmers to override the default behavior if necessary. The CSS stylesheet will look like this:
<style>
  [x-sticky] {margin:0}
  [x-sticky-placeholder] {padding:0; margin:0; border:0}
  [x-sticky-placeholder] > [x-sticky] {position:relative; margin:0 !important}
  [x-sticky-placeholder] > [x-sticky-active] {position:fixed}
</style>innerHTML with the stylesheet. Then, we can append the result to the document, as shown below.
var css = document.createElement("div");
css.innerHTML = ".<style>" +
  "[x-sticky] {margin:0}" +
  "[x-sticky-placeholder] {padding:0; margin:0; border:0}" +
  "[x-sticky-placeholder] > [x-sticky] {position:relative; margin:0 !important}" +
  "[x-sticky-placeholder] > [x-sticky-active] {position:fixed}" +
  "<\/style>";
var s = document.querySelector("script");
s.parentNode.insertBefore(css.childNodes[1], s);item.style.position = "fixed", with item.setAttribute("x-sticky-active", ""), so that the CSS selector can match the attribute. In order to make this code shippable, we also need to wrap everything up in a closure to keep the private variables private. We’ll also need to use addEventListener() rather than assigning to document.onscroll to avoid possible clashes. And, while we’re at it, let’s add an API check (shown below), so that our function won’t run in older browsers.
if (document.querySelectorAll &&
    document.createElement("b").getBoundingClientRect)
(function(doc) {
"use strict";

init();

function init() {
  if(window.addEventListener) {
    addEventListener("scroll", onScroll, false);
  } else {
    attachEvent("onscroll", onScroll);
  }

  var css = doc.createElement("div");

  css.innerHTML = ".<style>" +
    "[x-sticky] {margin:0}" +
    "[x-sticky-placeholder] {padding:0; margin:0; border:0}" +
    "[x-sticky-placeholder] > [x-sticky] {position:relative; margin:0!important}" +
    "[x-sticky-placeholder] > [x-sticky-active] {position:fixed}<\/style>";

  var s = doc.querySelector("script");
  s.parentNode.insertBefore(css.childNodes[1], s);
}

function onScroll() {
  var list = doc.querySelectorAll("[x-sticky]");

  for (var i = 0, item; item = list[i]; i++) {
    var bound = getBoundary(item);
    var edge = bound.getBoundingClientRect().bottom;
    var nextItem = findNextInBoundary(list, i, bound);

    if (nextItem) {
      if (nextItem.parentNode.hasAttribute("x-sticky-placeholder")) {
        nextItem = nextItem.parentNode;
      }

      edge = nextItem.getBoundingClientRect().top;
    }

    var hasHolder = item.parentNode.hasAttribute("x-sticky-placeholder");
    var rect = item.getBoundingClientRect();
    var height = rect.bottom - rect.top;
    var width = rect.right - rect.left;
    var top = hasHolder ? item.parentNode.getBoundingClientRect().top : rect.top;

    if (top < 0) {
      if (edge > height) {
        if (!item.hasAttribute("x-sticky-active")) {
          item.setAttribute("x-sticky-active", "");
        }

        item.style.top = "0px";
      } else {
        if (item.hasAttribute("x-sticky-active")) {
          item.removeAttribute("x-sticky-active");
        }

        item.style.top = -((top - edge) + height) + "px";
      }

      if (!hasHolder) {
        var d = doc.createElement("div");

        d.setAttribute("x-sticky-placeholder", "");
        d.style.height = height + "px";
        d.style.width = width + "px";
        copyLayoutStyles(d, item);
        item.parentNode.insertBefore(d, item);
        d.appendChild(item);
      }
    } else {
      if (item.hasAttribute("x-sticky-active")) {
        item.removeAttribute("x-sticky-active");
      }

      item.style.top = "auto";

      if(hasHolder) {
        item = item.parentNode;
        item.parentNode.insertBefore(item.firstChild, item);
        item.parentNode.removeChild(item);
      }
    }
  }
}

function findNextInBoundary(arr, i, boundary) {
  i++;

  for (var item; item = arr[i]; i++) {
    if (getBoundary(item) == boundary) {
      return item;
    }
  }
}

function getBoundary(n) {
  while (n = n.parentNode) {
    if (n.hasAttribute("x-sticky-boundary")) {
      return n;
    }
  }

  return doc.body || doc.documentElement;
}

function copyLayoutStyles(to, from) {
  var props = {
    marginTop: 1,
    marginRight: 1,
    marginBottom: 1,
    marginLeft: 1
  };

  if (from.currentStyle) {
    props.styleFloat = 1;

    for (var s in props) {
      to.style[s] = from.currentStyle[s];
    }
  } else {
    props.cssFloat = 1;

    for (var s in props) {
      to.style[s] = getComputedStyle(from, null)[s];
    }
  }
}
})(document);
Conclusion
And there you have it! By marking an element with anx-sticky attribute, it scrolls with the page until it gets to the top, and it will linger until it meets the boundary edge where it then disappears up the page.
Frequently Asked Questions (FAQs) about Building a Box with Sticks Scroll
How can I customize the scroll-to-top button in CSS?
Customizing the scroll-to-top button in CSS is quite simple. You can change the color, size, shape, and position of the button. For instance, to change the color, you can use the ‘background-color’ property and specify the color you want. To change the size, you can adjust the ‘width’ and ‘height’ properties. To change the shape, you can use the ‘border-radius’ property. If you want a circular button, set the ‘border-radius’ to 50%. To change the position, you can use the ‘position’ property and set it to ‘fixed’, and then use the ‘bottom’ and ‘right’ properties to specify the position from the bottom and right of the page respectively.
Can I use JavaScript to create a scroll-to-top button?
Yes, you can use JavaScript to create a scroll-to-top button. JavaScript provides the ‘window.scrollTo()’ method, which can be used to scroll to a particular position on the page. You can use this method in combination with an event listener that listens for the ‘click’ event on the scroll-to-top button. When the button is clicked, the ‘window.scrollTo()’ method is called with the top position of the page as the argument, causing the page to scroll to the top.
How can I make the scroll-to-top button appear only when the user has scrolled down a certain amount?
You can use JavaScript to make the scroll-to-top button appear only when the user has scrolled down a certain amount. You can use the ‘window.scrollY’ property to get the current scroll position of the window. Then, you can use an ‘if’ statement to check if the scroll position is greater than a certain value. If it is, you can use the ‘style.display’ property to make the scroll-to-top button visible. If it’s not, you can use the ‘style.display’ property to hide the scroll-to-top button.
Can I animate the scroll-to-top button?
Yes, you can animate the scroll-to-top button using CSS transitions. CSS transitions allow you to change property values smoothly over a specified duration. You can use the ‘transition’ property to specify the properties to animate, the duration of the animation, and the timing function to use. For instance, you can animate the ‘opacity’ property to make the button fade in and out, or the ‘transform’ property to make the button move or scale.
How can I make the scroll-to-top button accessible?
Making the scroll-to-top button accessible involves ensuring that it can be used by all users, including those with disabilities. You can use the ‘aria-label’ attribute to provide a descriptive label for the button, which can be read by screen readers. You can also use the ‘tabindex’ attribute to ensure that the button can be focused using the keyboard. Additionally, you should ensure that the button has sufficient contrast with its background to be easily visible.
Can I use jQuery to create a scroll-to-top button?
Yes, you can use jQuery to create a scroll-to-top button. jQuery provides the ‘scrollTop()’ method, which can be used to get or set the scroll position of an element. You can use this method in combination with the ‘animate()’ method to create a smooth scrolling effect. When the scroll-to-top button is clicked, the ‘animate()’ method is called with the ‘scrollTop’ property set to 0, causing the page to scroll smoothly to the top.
How can I test the scroll-to-top button?
You can test the scroll-to-top button by scrolling down the page and clicking the button to see if it scrolls back to the top. You should also test it on different browsers and devices to ensure that it works correctly and looks good on all platforms. Additionally, you can use accessibility testing tools to check if the button is accessible.
Can I use a plugin to create a scroll-to-top button?
Yes, there are many plugins available that can help you create a scroll-to-top button. These plugins provide pre-designed buttons and options to customize the button’s appearance and behavior. They can be a good option if you want to save time or if you’re not comfortable with coding.
How can I add a hover effect to the scroll-to-top button?
You can add a hover effect to the scroll-to-top button using the ‘:hover’ pseudo-class in CSS. This pseudo-class selects the element when the mouse is over it. You can use it to change the appearance of the button when it’s hovered over. For instance, you can change the color, opacity, or scale of the button.
Can I use an icon for the scroll-to-top button?
Yes, you can use an icon for the scroll-to-top button. You can use an image or an icon font like Font Awesome. To use an image, you can set the ‘background-image’ property in CSS. To use an icon font, you can add the appropriate class to the button element.
 Dmitri Lau
Dmitri Lau is a freelance Ajax developer with a penchant for statistical analysis. When not improving a meta template engine's relative response yield, yawning uninterruptedly every night has become a norm which he hopes will soon be over when his Hong Kong based startup picks up.