Three Ways to Create Your Own WordPress Theme


It’s common for WordPress users to pick a ready-made theme. But you can also create a theme of your own. This article covers various ways to go about this.
Options range from making edits to an existing theme, to creating your own WordPress theme completely from scratch. In between these extremes are various other options that include duplicating and modifying themes, and using a range of tools to help you build your own theme.
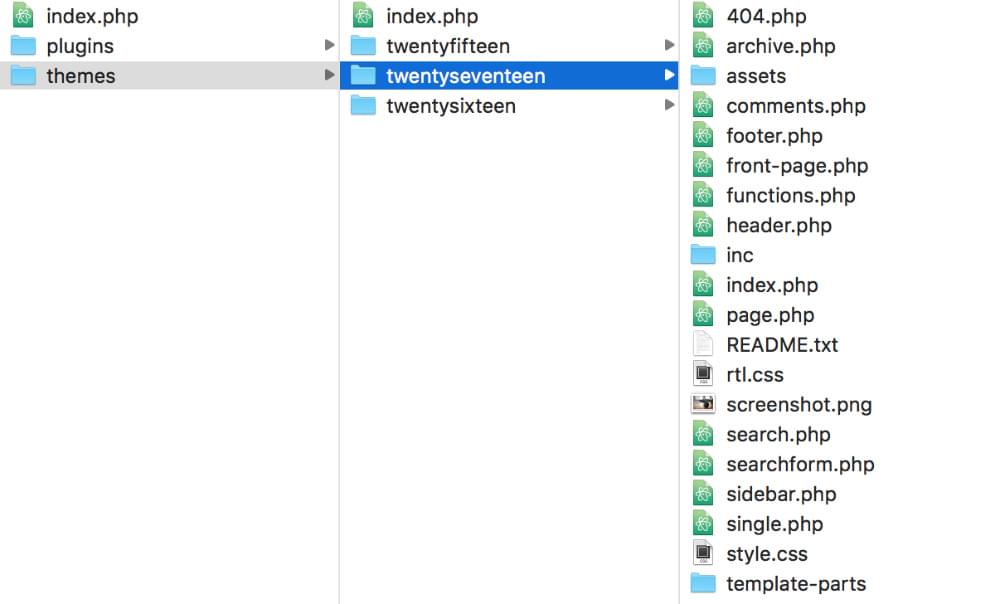
WordPress themes are made up of a collection of files, all contained within a single folder that lives within the /themes/ folder: wp-content/themes/.
Key Takeaways
- Users can create a unique WordPress theme by modifying an existing theme, adapting an existing theme, or building a theme from scratch. Each method offers different levels of customization and complexity.
- Modifying an existing theme often involves creating a child theme which references the parent theme and only changes specific elements. This is the easiest option and prevents updates to the parent theme from erasing your changes.
- Adapting an existing theme involves duplicating the theme and making more extensive changes to the code. This method allows for greater customization but requires a deeper understanding of WordPress code.
- Building a theme from scratch offers the greatest level of customization but is the most complex method. It can be simplified by using a starter theme or a WordPress theme framework, which provide a basic structure and tools to assist in theme development.
Option 1: Modify an Existing Theme
Modifying an existing theme is perhaps the easiest option. You may just want to make some minor changes, like colors, font sizes, or simple layout changes.
In this case your best option is to create a child theme. A child theme references an existing theme, just modifying the bits you want to change. Using a child theme has the advantage that, if the parent theme is updated when you update WordPress, your changes won’t be wiped away.
To create a child theme, create a new folder inside your /themes/ folder. A handy tip is to use the name of the parent theme with -child appended, as this makes it clear what the child theme is. So, if you’re creating a child theme of the Twenty Seventeen theme, your child theme folder might be called /twentyseventeen-child/.

In this child folder, you need at a minimum a style.css file and a functions.php file. In these files you need to add certain code to tell WordPress which is the parent theme, where the stylesheets are, and any other new functionality you want in your child theme.
The last step for getting your child theme up and running is to enter the WordPress admin panel and go to Appearance > Themes to activate your child theme.
For a complete guide to this process, visit the WordPress Codex. For help with setting up a child theme, you can also use the WordPress Child Theme Configurator utility.
Option 2: Adapt an Existing Theme
If you’re keen to dig into WordPress code a bit more, you can duplicate an existing theme and bend it to your will.
That might involve things like deleting all of the current styles and creating your own. You can also dig into the other theme files and remove elements you don’t need and add others. For example, you might want to alter the HTML structure of the theme. To do so, you’ll need to open various files such as header.php, index.php and footer.php and update the HTML parts with your own template elements.
Along the way, you might decide there are lots of features in the copied theme you no longer need, such as post comments and various sidebar elements such as categories and bookmarks. You’ll find PHP snippets for these elements in the various theme files, and you can simply delete them or move them around to other locations.
It can take a bit of searching around to work out which files contain the elements you want to delete or move, but it’s a good way to get familiar with your WordPress theme to dig in to the files like this.
Another option here, rather than duplicating an existing theme, is to start with a “starter theme”, which we look at below.
Option 3: Build a Theme from Scratch
A more daunting option — but more fun, too! — is to create your own theme completely from scratch. This is actually simpler than it sounds, because at a minimum you only need two files — style.css and index.php.

That, however, would result in a pretty limited theme! At a minimum, you’d probably want a functions.php file for custom functions, and perhaps several other template files for the various sections of the site, such as a 404.php template file for showing 404 pages.
In this example, we’ve created a folder in our themes directory called /scratch-theme/. (You’ll want to choose a spiffier name than that, of course.) The style.css file will serve as the main stylesheet of our WordPress theme. In that CSS file, we first need to add some header text. This is a basic example:
/*
Theme Name: My Scratch Theme
Theme URI: https://sitepoint.com
Author: Sufyan bin Uzayr
Author URI: http://sufyanism.com
Description: Just a fancy starter theme for SitePoint
Version: 1
License: GNU General Public License v2 or later
License URI: http://www.gnu.org/licenses/gpl-2.0.html
Tags: clean, starter
*/
You can now head to the WordPress admin Themes section, where we’ll see our now theme listed.
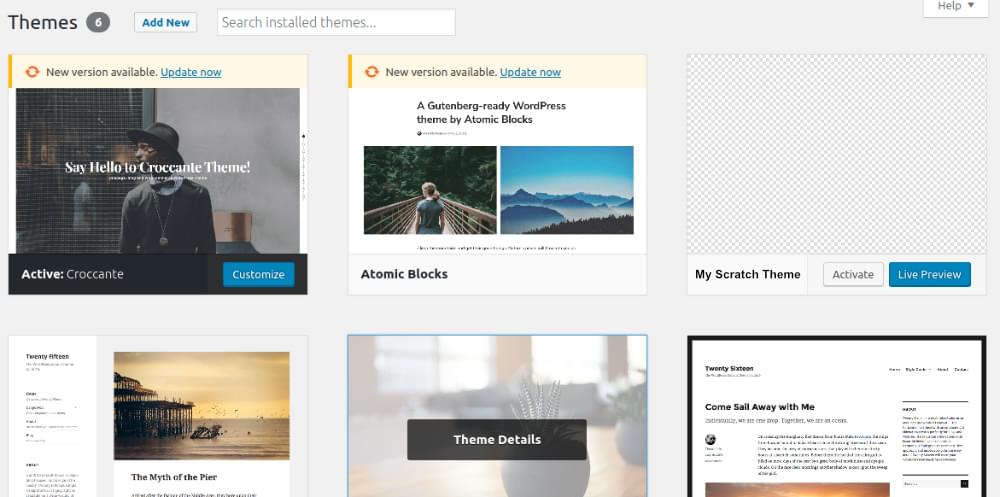
At this point, it doesn’t offer any custom styles and layouts, but can still be activated and used nonetheless. (You can add a thumbnail image for the theme by uploading an image file named “screenshot” to the theme’s root folder, preferably 880 x 660px.)
For more in-depth guidance of WordPress theme development, check out the WordPress Codex theme development guide.
It’s fairly straightforward to create a very basic WordPress theme from scratch, but going beyond that is more challenging. Before deciding this is a bit outside your wheelhouse, let’s check out some of the tools that are available to help you along.
Using a Starter Theme
A starter theme is a barebones or blank WordPress theme that includes just the basic minimum of structural code. This means a starter WordPress theme has some foundational functionality, but doesn’t offer any customizations or tweaks. It’s a very handy starting point on which to build your unique theme.
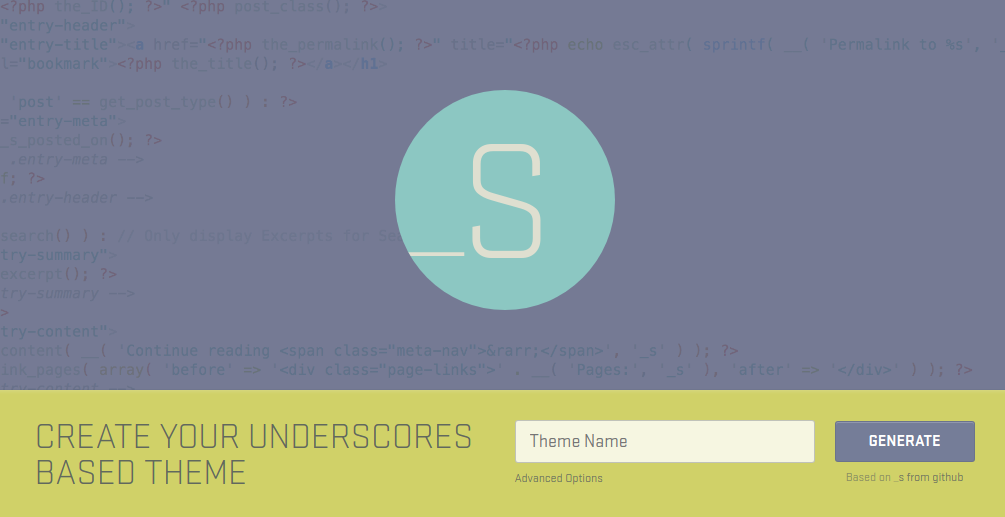
There are several choices when it comes to picking a starter theme for development, the most popular of which is Underscores. It’s maintained by Automattic, the creator of WordPress, and is the basis for the recent default themes put out by WordPress.
Other options include FoundationPress, maintained by ZURB.

Bones is another simple and easy-to-comprehend barebones WordPress theme that can function as a very good starting point for theme development.
HTML5 Blank is onother option that provides a reliable and well-documented code base for theme development.
Using Underscores in Theme Development
To get started with Underscores, enter your theme details on the Underscores home page.

You can opt to include WooCommerce boilerplate as well — useful if the target theme is likely to have WooCommerce support, such as custom layouts for Shopping Cart and Checkout pages, etc. Click Generate, and that’s it! Our theme will be generated and available for download. In the resulting ZIP file, we can locate our theme directory.
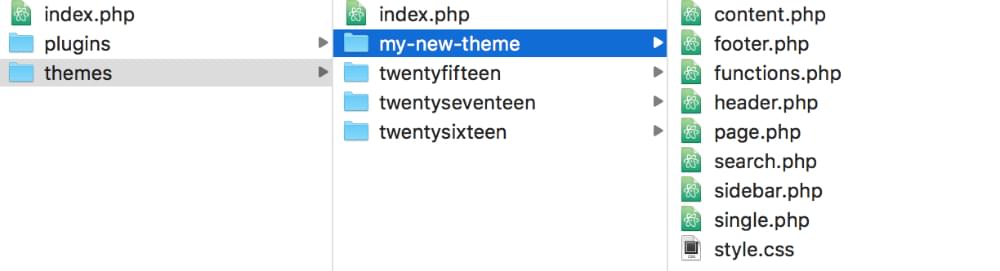
The Underscores-generated WordPress theme has quite a lot of templates as well as separate sections for custom layouts and JavaScript elements. This means our theme structure is ready for us, as are the template files, which come with minimal code in the form of PHP tags and comments. We can just get started straightaway by modifying whatever we need, and eliminating whatever we don’t need.
This is obviously a great timesaver, as we don’t need to create each template file manually.
Using a WordPress Theme Framework
Similar to frameworks for CSS, JavaScript and PHP, a theme framework provides a standardized set of tools that you, as a developer, can use in creating your own themes. Theme frameworks come with predefined conventions that can aid in theme development by saving time and efforts that would otherwise be spent in coding and building those very conventions.
Many WordPress theme frameworks nowadays come with features such as:
- custom hooks and filters
- custom functions to be used in the theme
- custom callbacks
- integration with or compatibility for custom libraries, such as jQuery, etc.
These WordPress theme frameworks come with several added advantages of their own as well. They obviously make the task of building a WordPress theme quicker and easier. Some also offer bespoke features and coding norms that can enable newer developers to code quickly and learn the ropes more efficiently. Of course, this also means you have less control than when building a theme from scratch, but depending on your requirements and level of expertise, a beginner-friendly theme framework can really prove useful.
Picking a WordPress Theme Framework
There are quite a few WordPress theme frameworks to choose from. One popular choice is Genesis framework, by StudioPress. Priced at $59.95, Genesis comes with features such as custom page templates, multiple customizable layout options as well as full support for Gutenberg, the upcoming WordPress editor.
Another worthy premium option is the Divi theme by Elegant Themes. Divi comes loaded with realtime design elements, customizable layouts and page templates, draggable and visually editable assets, etc. In other words, Divi is a page builder disguised as a theme framework that lets you export your developmental settings and quickly put together websites.
If you’re looking for something free, Gantry is well worth a look. This developer-friendly and robust theme framework isn’t solely for use with WordPress. Built by RocketTheme, Gantry is more of a conglomerate of custom extensions and template methodologies adopted from the likes of Joomla, WordPress and GravCMS.
Gantry lets coders build powerful frontend themes and templates atop it. It also has many custom pre-made templates and skins as well as visually editable interface to make life easier for non-coders as well.
There are lots of other worthy contenders in this field, as you’ll find with any online search for “WordPress theme builders” or similar.
Conclusion
This article has been a brief tour around the options for modifying or creating your own WordPress theme. We started with the simplest option of creating a child theme, which only contains a few files that modify aspects of an existing theme.
We next looked at digging in a bit deeper by duplicating and modifying an existing theme. That’s a fun way to dig into a WordPress theme, learn how it works and tailor it to your exact requirements, without having to reinvent the wheel and start from scratch.
A more ambitious option is to code an entire theme from scratch. We’ve only touched on that here, but we’ve prepared a series of articles to show how to do that in depth.
As a way to fast track building a theme from scratch, we looked at starter themes like Underscores and theme frameworks like Genesis. In a sense, this brings us full circle, as some of these offer drag-and-drop/WYSIWYG tools that don’t require a lot of technical knowledge and might be the most user-friendly option if you’d rather not dig into code.
Hopefully this brief introduction has given you a better sense of how to get started creating a WordPress theme that suits your requirements.
Frequently Asked Questions (FAQs) about Creating WordPress Themes
What are the basic components of a WordPress theme?
A WordPress theme is made up of several components, including the header, footer, sidebar, and content area. These components are created using PHP, HTML, CSS, and JavaScript. The header typically contains the site’s title and navigation menu, while the footer usually includes copyright information and additional links. The sidebar can contain widgets and other elements, and the content area is where your posts and pages appear.
How can I create a child theme in WordPress?
A child theme in WordPress is a sub-theme that inherits all the functionality, features, and style of its parent theme. Creating a child theme can be beneficial when you want to modify an existing WordPress theme without losing the ability to update that theme. To create a child theme, you need to create a new directory in your themes directory, create a style.css file, and import the style of the parent theme.
What is the role of functions.php in a WordPress theme?
The functions.php file in a WordPress theme is a template used to define functions, classes, actions, and filters to be used by other templates in the theme. It can be used to add features and extend the functionality of both the theme and the WordPress installation.
How can I make my WordPress theme responsive?
Making your WordPress theme responsive ensures that it looks good on all devices, including desktops, laptops, tablets, and smartphones. This can be achieved by using media queries in your CSS, which apply different styles depending on the size of the viewport.
How can I add a custom menu to my WordPress theme?
WordPress has a built-in system for creating and managing menus. To add a custom menu to your theme, you need to register it in your functions.php file and then call it in the appropriate template file. You can then manage the menu items through the WordPress admin interface.
How can I add widgets to my WordPress theme?
Widgets in WordPress allow you to add content and features to your sidebars. To add widgets to your theme, you need to register a widget area in your functions.php file and then call it in the appropriate template file. You can then add widgets to this area through the WordPress admin interface.
How can I customize the loop in my WordPress theme?
The loop in WordPress is used to display posts. By customizing the loop, you can control what content is displayed and how it is presented. This can be done by using various loop tags and conditional tags in your template files.
How can I add custom post types to my WordPress theme?
Custom post types in WordPress allow you to create different types of content, each with its own set of data. To add custom post types to your theme, you need to register them in your functions.php file using the register_post_type function.
How can I add a custom header image to my WordPress theme?
To add a custom header image to your WordPress theme, you need to add support for it in your functions.php file using the add_theme_support function. You can then upload the header image through the WordPress admin interface.
How can I add a custom background to my WordPress theme?
To add a custom background to your WordPress theme, you need to add support for it in your functions.php file using the add_theme_support function. You can then set the background color or image through the WordPress admin interface.
Sufyan bin Uzayr is a writer, web developer, educator and coffee-lover. He writes for multiple publications related to technology, programming and current affairs. Sufyan is a published author having written several books so far, including "Learning WordPress REST API" and "VuePress Quick Start Guide". You can learn more about his works at his website.