Manipulating Layers
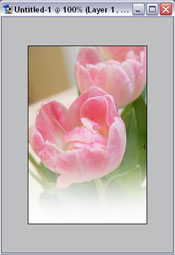
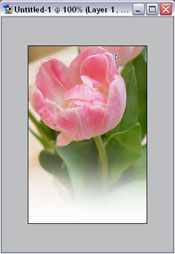
Now, as I look at the picture, I decide that I don’t like the way the fade “hides” part of that tulip. In fact, I want to somehow move the whole picture “up,” but leave the gradient the same. The beautiful thing about layer masks is that this is possible!
A quick word about the wrong way to achieve this effect: It would have been just as easy (and saved a few steps) to set the gradient tool to a white-to-transparent gradient, then add a white gradient to the bottom of the picture layer. The problem with this approach is that the white gradient becomes a permanent part of your picture. You can’t move the picture or the gradient around and, if you decide you don’t like the gradient several steps down the road, you can’t get rid of it without losing any other changes that you’ve made. All of this should convince you that layer masks are awesome!
Back to the how-to: in the Layers palette, you’ll see a little “link” icon that connects the picture to the layer mask. Click the link icon to “unlink” the picture and layer mask.
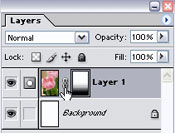
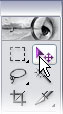
Click once on the picture in the Layers Palette so that you can be sure you’re working with the picture itself, not the layer mask. Then, choose the Move tool (or simply use the keyboard shortcut and type “v”).
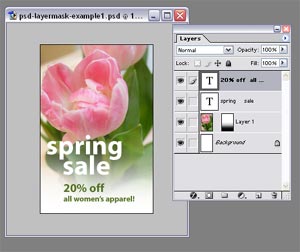
Click somewhere within the document, hold the mouse button down, and drag your mouse to move the layer around. I moved the tulip up to fill most of the picture.
Note that this step can only really happen if your picture is actually larger than the canvas size. Recall that the pasted-in picture was 300×400 pixels wide, while our actual document canvas size is 200×300 pixels.
Finally, add the text, select “save the picture for Web,” and email it to your supervisor.
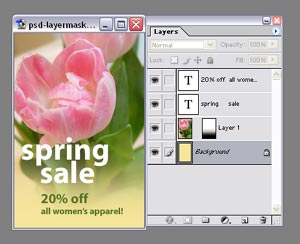
Here’s an extra tip. What if you want the image to blend into a site that has a different background color? The answer is simple — use the paint bucket to fill in the Background layer with your desired color. Another beautiful aspect of layer masks is that they change the actual transparency of parts of the image, so you can overlay the picture on any background! The picture below shows the colored Background layer, and our perfectly fading tulip and ad copy.
Brush Your Way To a Layer Mask
“I love it!” exclaims your supervisor. But, five minutes later, he’s back with a glum face. “The marketing department wants something with a person in it,” he says. “A happy person.”
“Not a problem,” you respond. “I have just the photo — and the layer mask know-how!”
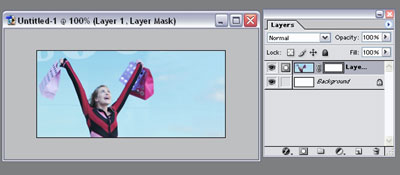
In this second project, you’ll learn how to use the airbrush tool on a layer mask for delectable results. The end-product will look something like this:

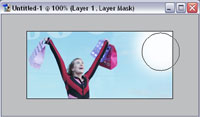
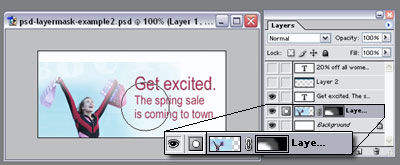
We start with a picture of an excited shopper on its own layer, with a layer mask already applied. I want to hide the faint lettering above her hands, and fade out the right side to make way for my great advertising copy. Because the shape of the woman and shopping bags doesn’t match well with a straight gradient, I decide to use the brush tool for a more organic fading effect.
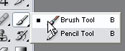
To start, select the brush tool from the tool palette. You may use the keyboard shortcut “b” to toggle between the brush and pencil tools.
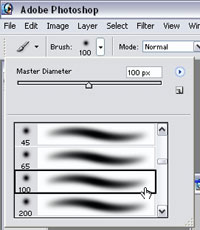
In the Brush toolbar, click on the brush type dropdown and choose a suitable soft-edged brush. I chose the 100-pixel diameter brush.
Then, start painting the edges of the picture’s layer mask — with a black foreground, of course — to “hide” part of the picture.
Manipulating the Picture
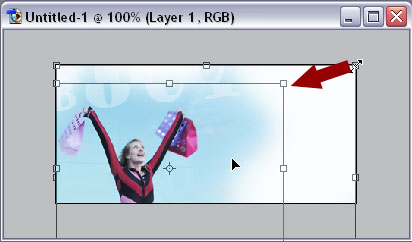
As I look at the result, I decide that the picture of the excited shopper is a little too big, as the final picture needs to have a bar of text across the top. To shrink the picture without shrinking the layer mask, first unlink the picture and layer mask by clicking on the link icon in the Layers Palette.

Click once on the picture in the Layers Palette to select it. Then, select the Move tool from the Tool Palette. Type Ctrl-T to “Transform” the image. Click on the corner of the picture, hold, and drag the corner down to resize the image. Hold the shift key while dragging to “constrain” the picture so that it resizes proportionately — the last thing you want is a squished shopper!
After you get the picture to the desired size, double-click inside the rectangle to apply the change.
The picture is now the right size, but I decide that I also want to “fade out” the shopping bags slightly so that the woman really stands out. I don’t want to hide the bags completely, so I choose a dark gray color (#4D4D4D) instead of black to paint on the layer mask. With the brush tool, I paint over the shopping bags on the layer mask, and also decide to let a little bit of the background show through. In the picture below, you can see the different shades of black, gray, and white on the layer mask.
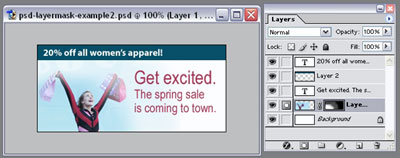
I touch up the edges of the layer mask with black paint and add my ad copy using the text tool. And, there’s the ad! I only hope the marketing department will be happy!
Ready, Set, Mask!
Congratulations! You now know how to use the gradient tool and the brush tool on layer masks to create fantastic Web graphics. And you’re only at the beginning of a huge range of possibilities. Here are a few suggestions as to how you might further apply your layer-masking power:
- Create a collage of almost seamless pictures.
- Photoshop a picture of yourself into a beautiful landscape or any object onto your desired background
- Hide unsightly background objects from photos.
 Corrie Haffly
Corrie is the lead designer and developer for PixelMill. This would-be triathlete has a mathematics degree but wishes she had double-majored in computer science and art instead. Maybe next time...