Awhile back, I published an article on how to mimic CoDrops’ Morphing Menu Button demo. I then wrote a quick follow-up showing how to expand on the original demo to provide some additional JavaScript-like overlay functionality.
That was kind of the start of it all…
I wanted to go further with CSS-only solutions to see how far I could take interfaces devoid of JavaScript.
Please keep in mind: some of these demos are purely meant to show how powerful CSS has become. I will talk more about why some of these demos should actually be converted over to a JavaScript solution.
One more thing: To keep things simple, I’m going to provide only the absolute necessary HTML and CSS in the demos. So don’t expect copy and pasting to get the exact results I outline here. However, if you want to see the source code for each example, you can check that out on CodePen and I will provide a link to the source files at the end of the article.
A Simple Form Example
I recently wrote an article demonstrating two no-JavaScript examples of providing user feedback while filling out forms.
As a pretty straight forward intro, I thought I’d provide another simple form example.
See the Pen Display Form Label on Focus with CSS by SitePoint (@SitePoint) on CodePen.
Here we have three text inputs that are using placeholders as their labels. This is really a UX no-no, but I’ve run into many situations where the “designer in charge” has fought tooth-and-nail to block the addition of visible labels.
Gross.
My solution to get around this ridiculous problem was to provide the labels as “tool tip reminders” when a user focuses in on an input:
<div class="form-row">
  <input type="email" class="input-text" id="name2" placeholder="Your Email" />
  <label class="label-helper" for="name2">Your Email</label>
</div>
As you can see, nothing too fancy going on with the HTML there. The only thing that’s a little out of the ordinary is that the <label> comes after the input.
Now here’s the CSS needed to get this working:
.form-row {
  position: relative;
}

.input-text {
  background-color: #fff;
  border: 1px solid #ccc;
  margin-bottom: 8px;
  padding: 8px 4px;
  position: relative;
  width: 100%;
  z-index: 3;
}

.label-helper {
  bottom: 0;
  left: 0;
  opacity: 0;
  position: absolute;
  transition: .2s bottom, .2s opacity;
  z-index: 1;
}
This first chunk of CSS is the default styling for the form elements. The .form-row styles keeps the absolutely positioned .label-helper near the appropriate input.
The .input-text element has a relative position and z-index applied to it because we don’t want the label to transition in front of the input when it’s focused.
Now here’s the CSS that handles the labels showing on focus:
.input-text:focus + .label-helper,
.input-text:invalid + .label-helper {
  bottom: 95%; /* magic number, boo */
  font-family: arial;
  font-size: 14px;
  line-height: 1;
  opacity: 1;
  padding: 4px;
}

.input-text:invalid {
  border-left: 10px solid #f00;
}

.input-text:invalid + .label-helper:after {
  color: #f00;
  content: "X";
  font-family: arial;
  font-size: 14px;
  line-height: 1;
  padding-left: 12px;
}
The important piece here is the use of :focus and the adjacent sibling selector: +. (sibling selectors are a big part of all the demos we’ll be looking at).
This is why we needed to place the labels after the inputs, as the sibling selector doesn’t work in reverse.
Basically, when an input is focused, the sibling (label) then gets full opacity and is repositioned to be above the input, providing context to the input that no longer has its placeholder label.
As a bit extra, I also threw in an invalid state for the email input. Since inputs don’t support pseudo-elements, the error ‘x’ is applied to the label.
Now switching gears…
Some More Complex Use Cases
The above example is actually becoming pretty common as of late. As I know I’m not the first, nor the last, that has done up an input with a label or tool tip reveal example.
So let’s move on to some more ‘out there’ examples of what you can do with some specially formed mark-up and CSS.
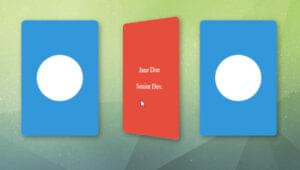
Single Page Layout Transitions
Codrops published a full screen layout with page transitions demo in April of 2013. I always thought it was really cool and wanted to see if I could recreate it, or something like it, without JavaScript.
Turns out I could:
See the Pen Page Layout transitions with Pure CSS by SitePoint (@SitePoint) on CodePen.
Here’s the HTML:
<input type="radio" class="radio" name="pages" id="exit" checked />

<div class="page demo2">

  <input type="radio" class="radio" name="pages" id="page_1" />
  <section class="section-container section-one">
    <label for="exit" class="check-label exit-label">
      X
    </label>
    <label for="page_1" class="page-label check-label">
      <span>Page X</span>
    </label>
    <header class="section-header">
      <div class="section-content">
        <h1>
          Title of Section X
        </h1>
      </div>
    </header>
    <div class="section-info">
      <div class="section-content">
        <p>
          ...
        </p>
      </div>
    </div>
  </section>

  <!-- repeat this 3 more times, with IDs of
       "page_2, page_3, and page_4" -->

</div>
You’ll notice the use of <input type="radio"> elements before each section. We’ll be utilizing these heavily in the CSS, as we need to rely again on the adjacent sibling selector (+) to make these transitions work.
Basically we’re going to be using the :checked state of radio buttons, activated by clicking the associated label, and the sibling selector, to change the layout through just CSS.
Now here’s the CSS:
.radio,
.exit-label {
  display: none;
  height: 0;
  visibility: hidden;
}

.exit-label {
  border: 1px solid #333;
  color: #444;
  display: inline-block;
  padding: 4px 12px;
  text-decoration: none;
}

.page-label {
  height: 100%;
  left: 0;
  position: absolute;
  text-align: center;
  top: 0;
  width: 100%;
}

.page-label span {
  position: relative;
  top: 50%;
}
The above CSS takes care of the styling of our “buttons” and hiding the radio buttons from being viewed / directly interacted with.
The .page-label and .page-label span are for the big panel ‘buttons’, while the .exit-label class styles the close ‘button’ when each of the panels is opened (again, labels styled to look like buttons).
.section-container {
  border: 0px solid;
  height: 50%;
  overflow: hidden;
  position: fixed;
  transform-origin: center center;
  transition: 0.4s all;
  width: 50%;
  z-index: 1;
}

.section-content {
  margin: auto;
  max-width: 800px;
  opacity: 0;
  padding: 20px;
  transition: 0.66s all;
  visibility: hidden;
}

.section-one {
  transform: translate(0%, 0%);
}

.section-two {
  transform: translate(0%, 100%);
}

.section-three {
  transform: translate(100%, 0%);
}

.section-four {
  transform: translate(100%, 100%);
}
Above we have the initial setup for the containers of the panels (sections) and their content. The containers are set to 50% height and width to mimic the grid-like layout of the Codrops example.
The sections are positioned using transform: translate instead of using top, left, bottom, or right positioning. This is because transforming is better for performance as it doesn’t require as intense re-painting as changing the positioning of an element does.
:checked + .section-container {
  height: 100%;
  overflow: auto;
  transform: translate(0%, 0%);
  width: 100%;
  z-index: 5;
}

:checked + .section-container .exit-label {
  display: inline-block;
  visibility: visible;
}

:checked + .section-container .page-label {
  display: none;
}

:checked + .section-container .section-content {
  opacity: 1;
  visibility: visible;
}

#exit:checked + .page .section-container {
  border: none;
  opacity: 1;
}

.page :not(:checked) + .section-container {
  border: 40px solid;
}
And here’s the fun part where we check to see if a radio button has been selected, and if so:
- The
.section-containeris converted to full height, width, and transformed to the top-left position of the browser window - The ‘exit button’ and content for the chosen section are made visible
- The label that was clicked to open the section that was picked is hidden, so that it is no longer clickable / positioned on top of the content that has just become visible
- The sections that were not picked have a border that increases to 40px, simulating them ‘shrinking’ behind the section that is animating to full screen.
Alternative Layout Transitions
Using very similar mark-up modified CSS, here are two more examples that follow the same concepts laid out above.
See the Pen Alternative Layout Transitions with Pure CSS by SitePoint (@SitePoint) on CodePen.
See the Pen Pure CSS Slide Nav by SitePoint (@SitePoint) on CodePen.
The problem with these demos is that while they boast how much you can do with CSS to make some pretty neat transitioned interfaces, they’re kinda horrible for accessibility reasons.
They are all using radio buttons and labels to skirt around the need for using semantically correct buttons, and JavaScript to control those buttons. For sighted users browsing the web with a mouse or a touch screen, there is nothing out of the ordinary usability-wise. However, if we wanted anyone using assistive technology or keyboard controls to use these demos, we’d need to implement gobs of JavaScript to negate the semantic value and hide much of our markup. Then we’d have to write more JavaScript to make sure we’re applying the correct ARIA attributes and keyboard commands needed to get these elements to behave like their semantically correct counterparts.
Honestly, I took a stab at doing just that with the first example here, and I ended up having to write more JavaScript to get it to comply with accessibility standards than I would have had to write if I used semantically appropriate elements and JavaScript in the first place.
With that in mind, let’s move on to the next and final example which is far more accessible than the above examples, but allows us to obtain similar results.
Layout Changes with :target
By modifying the CSS and mark-up a bit, we can basically recreate any of these radio button navigation examples by using IDs and the CSS :target pseudo class instead:
See the Pen Layout Changes with :target by SitePoint (@SitePoint) on CodePen.
Let’s check out what the updated markup looks like:
<section class="section-container section-one" id="page_1">
  <a href="#exit" class="btn btn-exit">
    X
  </a>
  <a href="#page_1" class="btn btn-page">
    <span>Page 1</span>
  </a>
  <header class="section-header">
    <div class="section-content">
      <h1>
        Title of Section X
      </h1>
    </div>
  </header>
  <div class="section-info">
    <div class="section-content">
      <p>
        ...
      </p>
    </div>
  </div>
</section>

<!-- this is again repeated for id="page_2", etc -->
Instead of using the radio buttons and the adjacent sibling selector, an ID is now being used on each of the containing section elements. The ‘buttons’ have also been changed from labels to anchor tags, which is much more semantically correct than before.
The CSS is where the bigger changes take place:
.btn-exit {
  display: none;
  visibility: hidden;
}

#page_1:target .btn-exit,
#page_2:target .btn-exit,
#page_3:target .btn-exit,
#page_4:target .btn-exit {
  border: 1px solid #333;
  display: inline-block;
  padding: 4px 12px;
  text-decoration: none;
  visibility: visible;
}

.btn-page {
  height: 100%;
  left: 0;
  position: absolute;
  text-align: center;
  top: 0;
  width: 100%;
}

.btn-page span {
  position: relative;
  top: 50%;
}

#page_1:target,
#page_2:target,
#page_3:target,
#page_4:target {
  transform: translate(0%, 0%);
  width: 100%;
  height: 100%;
  z-index: 5;
  overflow: auto;
}

#page_1:target .btn-exit,
#page_2:target .btn-exit,
#page_3:target .btn-exit,
#page_4:target .btn-exit {
  display: inline-block;
  visibility: visible;
}

#page_1:target .btn-page,
#page_2:target .btn-page,
#page_3:target .btn-page,
#page_4:target .btn-page {
  display: none;
}

#page_1:target .section-content,
#page_2:target .section-content,
#page_3:target .section-content,
#page_4:target .section-content {
  border: 0;
  opacity: 1;
  visibility: visible;
}

#exit:target .page .section-container {
  border: none;
  opacity: 1;
}
I’ve included only the CSS that changed the most drastically and if you compare it to the original CSS example, you’ll see that it’s really just the selectors that were changed.
The selectors for the labels have been updated to use the href attribute as opposed to the for attribute, and again, we were able to remove any reference to radio buttons.
Since we are now using :target to… well… target our different sections, all the :checked + selectors have been replaced by the appropriate :target selectors. Whereas before we could have a single :checked + selector for these rules, the way :target works requires us to duplicate our selector for each different :target URI.
Having to write so many more selectors is really the biggest strike against using this technique than the radio button version. But again, staying in line with proper semantics far outweighs that con.
With that being said, if we truly want to make this demo accessible to all, there are some additional ARIA features that should be applied to the various click areas, which are visually designed to look like buttons, but are actually links (that does actually matter for accessibility reasons, everyone). And just adding the ARIA features won’t be enough, as on state change, attributes like aria-hidden would need to be updated, and element focusing should shift between the last active element and the newly active screen, which requires JavaScript. Still, there would be much less JavaScript needed than with the original version of this example.
An additional pro, or con, with this example is that if someone knows, or bookmarks the URI used to update the layout, they can bypass the normal state of our page. Again, that may be a pro or con depending on your UX goals. But it’s something to keep in mind.
In Closing…
CSS is powerful and can do A LOT of stuff we used to need to rely heavily on JavaScript or jQuery for. But we should be wary of creating accessibility nightmares if we lean too much on CSS. I hope these examples show that there are many practical experiments we can do with just CSS, and get you to think of different use cases for creating awesome user experiences.
But one last time, just be sure that you don’t potentially make it more difficult for someone to use your web app or website because you’re being clever with CSS. And in the case of web apps, you’re likely better off continuing to use JavaScript for calling your screen transitions. Again, these examples are to inspire, not necessarily to replicate.
And as promised here’s a zip of all the source files to the demos in this article. Enjoy!
Frequently Asked Questions (FAQs) about CSS
What are some unique CSS properties that can enhance my website’s design?
CSS offers a plethora of properties that can significantly enhance your website’s design. For instance, the ‘clip-path’ property allows you to clip an element to a basic shape or an SVG source. The ‘filter’ property lets you apply graphical effects like blurring or color shifting to an element. The ‘transform’ property enables you to rotate, scale, skew, or translate an element. The ‘transition’ property makes a change from one style to another, like changing the background color when a user hovers over an element, appear smoothly over a specified duration.
How can I create animations using CSS?
CSS animations are created with the ‘@keyframes’ rule which controls the intermediate steps in a CSS animation sequence by defining styles for keyframes (or waypoints) along the animation sequence. This gives more control over the intermediate steps of the animation sequence than transitions. You can change as many style properties you want, as many times you want.
Can I create responsive designs using CSS?
Yes, CSS offers several techniques to create responsive designs. Media queries allow you to apply different styles for different devices based on characteristics like screen resolution, orientation, and color. The ‘flexbox’ layout module provides a more efficient way to align, distribute space, and accommodate different screen sizes and display devices. The ‘grid’ layout system offers a new way of creating website layouts, allowing for more flexible and creative design possibilities.
How can I use CSS to improve my website’s performance?
CSS can significantly improve your website’s performance. Minifying CSS, which involves removing unnecessary characters from your CSS code without changing its functionality, can reduce the size of your CSS files and make your website load faster. Using shorthand properties can also reduce the size of your CSS code. Additionally, using CSS sprites can reduce the number of HTTP requests made for images.
Can I use CSS to create 3D transformations?
Yes, CSS allows you to create 3D transformations using the ‘transform’ property. This property can take several values, including ‘rotateX()’, ‘rotateY()’, and ‘rotateZ()’, which rotate the element around the X, Y, and Z axes, respectively. The ‘perspective’ property can also be used to create a 3D effect by making distant elements appear smaller than closer ones.
How can I use CSS to create a parallax scrolling effect?
The parallax scrolling effect, where background images move slower than foreground images, creating an illusion of depth, can be achieved using CSS. This can be done by using the ‘background-attachment’ property with the value ‘fixed’, which makes the background image fixed in the viewport.
Can I use CSS to create a dark mode for my website?
Yes, you can use CSS to create a dark mode for your website. This can be achieved by using CSS variables and the ‘prefers-color-scheme’ media feature, which detects if the user has requested the system use a light or dark color theme.
How can I use CSS to improve the accessibility of my website?
CSS can be used to improve the accessibility of your website in several ways. For instance, you can use the ‘:focus’ pseudo-class to change the appearance of an element when it has focus, making it easier for users who navigate with a keyboard or assistive technology. You can also use CSS to hide content that should be accessible to screen readers but not visually displayed.
Can I use CSS to create complex shapes?
Yes, CSS allows you to create complex shapes using properties like ‘clip-path’, ‘shape-outside’, and ‘border-radius’. The ‘clip-path’ property can be used to clip an element to a basic shape or an SVG source. The ‘shape-outside’ property can be used to wrap text around a shape.
How can I use CSS to create a print-friendly version of my website?
You can use CSS to create a print-friendly version of your website by using media queries. By specifying a media type of ‘print’ in your media query, you can apply styles that will only be applied when the page is printed, such as hiding certain elements, changing font sizes and colors, and removing backgrounds.
 Scott O`Hara
Scott O'Hara is a UX designer & developer based out of Boston Massachusetts. He loves pushing the limits of CSS, designing for everyone, writing about what he knows & what he's learning and developing wonderful product experiences.