Editing and processing your images can definitely be a chore when you have a lot of them. Photoshop is clearly the flagship program for editing images, but what if you want a more focused way of polishing your images? If you want to focus more on correction and details, then Camera Raw may be just what you’re looking for.
“Camera Raw” is the method of bringing in your raw images directly from your camera in order to pre-process them. Raw images contain more information within them than a normal JPEG does, so most professional photographers prefer to take each image in a raw format, bring it into Camera Raw and Photoshop, and then output as a JPEG. Even if your photos are already in compressed form, you can still open up a JPEG image in Camera Raw, which gives you access to a lot of great tools and adjustments that can streamline your image editing workflow.
Some would argue that Camera Raw has the same settings and adjustments as Photoshop. For the most part, they’re correct, but the way that the interface is set up, it takes all of the frills out of the adjustment process, allowing you to focus entirely on making your images bold, bright, and sharp. Here are some key features that Camera Raw has to offer:
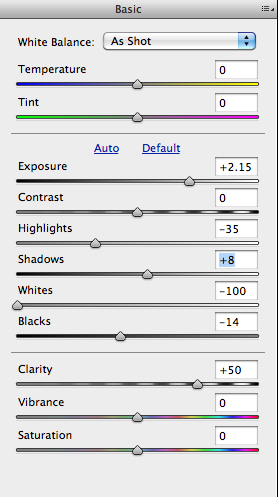
- Recovery – This adjustment provides the ability to bring details back into the highlight areas of your images. This is especially handy when you have details that have been lost due to blown out, overexposed areas.
- Fill Light – Fill light brings details back into the darker, shadowy areas of your image. This is one of my favorite features.
- Blacks – This darkens the black portions of your images and adds definition to those areas. I usually combine this with fill light, which really helps to better define the darker areas of my images while lightening the details, so that the viewer can enjoy a sharper, more detailed image.
- Clarity – This is one of the best sharpening type tools available. There are very few photos that I adjust without using the clarity slider. It works roughly like an optimized unsharp mask.
- Vibrance – This is one of the most interesting ways to add color to your images. Vibrance acts like Hue/Saturation, except it adds color to areas that have little or no color at all. Notice in the examples below that the grey areas with clouds get punched up with a lot of color thanks to vibrance.
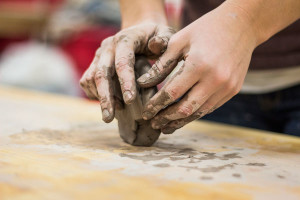
After making the adjustments above, you can see the difference a few sliders can make. There are more details in the shadow areas, more details in the highlights areas, blown out areas are remedied, and your colors look more lively.
Before:

After:

Sharpening and Noise Reduction
This set of functions is found within the Details section, and — not surprisingly — it can make your images look more crisp and detailed. Under Detail, you have a variety of sharpening options that work much like the sharpening filter in Photoshop. They are: Amount, Radius, Detail, and Masking.
Directly under the Sharpening tools are the Noise Reduction tools. They is great for removing grain and noise from your images. You can control luminance and color detail, which affords you different options than what you would find in Photoshop. You gain a little more control of what noise you are actually reducing, and best of all, it is done simply by adjusting a few sliders. Below are both the Sharpening and Noise Reduction panels:

Here is the image after applying sharpening and noise reduction:

If you look at the difference between our previous image (with just the clarity and exposure enhancements), and compare it to the one directly above, you can see a huge difference. The sharpening and details that were added back in really help provide the washed out areas with sharp definition.
HSL/Grayscale
HSL/Grayscale is really handy, because you can tweak your image’s color options quickly and easily. You can control the hue, saturation, and luminance of different colors. Even when you convert your image to grayscale, you can still adjust the different tones to get just the look for your grayscale images that you want, despite the total absence of color.

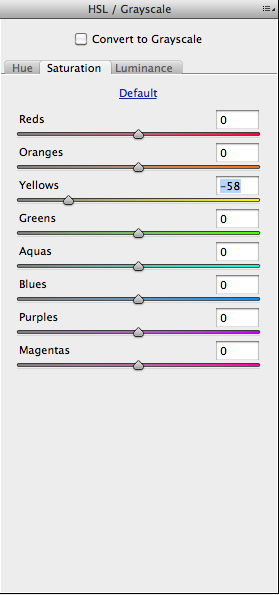

You can see in the example above, I removed the over-saturation of the stone railing on the left. This was fairly simple to do with the HSL sliders, and I lowered the saturation level of the unwanted yellow tones in the image.
For grayscale images, you can do the same thing. You can control over each tonal range, giving you the ability to easily adjust your grayscale images to perfection. In the example below, the foliage was too dark, so I adjusted the green slider and brought highlights back into the foliage.
Before:

After:

Split Toning
Split toning is another great option. It offers control over how your shadows and highlights are toned, and enables you to control the balance between the two. You can set your image to have its highlights as one hue and its shadows as another, and you can even control the ratio in which they are applied. For example, if you have one color such as dark blue overpowering the shadows, and a light yellow for the highlights, you can set it so that each color is adjusted separately but simultaneously. For the best results, you may want to use contrasting colors that work well with each other, such as yellow and purple. In the example below, I use split toning to apply a vintage look to the photograph.


Lens Profile
This is a great tool for correcting lens distortion in your images. Camera Raw has gone so far as to let you choose the make and model of your camera, correct lens distortion, and add or remove vignetting. I’d highly recommend selecting the make and model of your camera; it will yield surprisingly good results.

Adjustment Brush
The adjustment brush in Camera Raw is fantastic. This brush allows you to set a point in your image and correct it separately from the rest of the image. The best part is that you have the full range of correction tools available, so if you only have one spot in your image that you need to adjust (or if you need to make multiple adjustments within distinct areas), you can do it quickly and easily with a few sliders. This done more quickly than in Photoshop, where you would have to make a different adjustment layer and a different mask for each distinct area that you want to alter. In Camera Raw, you click, adjust, and move on.
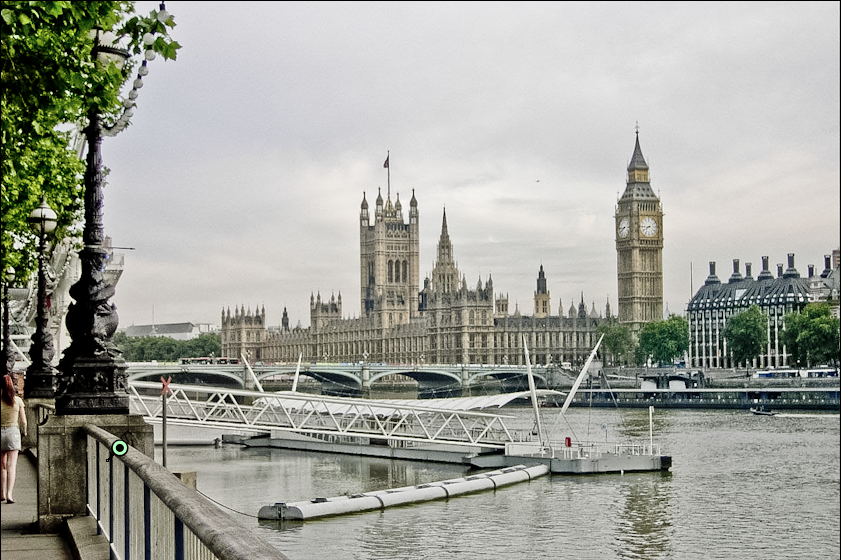
In the example below, I adjusted the saturation of the yellow tones solely on the stone railing found on the left side of the image. Earlier, I had applied an image-wide blanket adjustment that lowered the saturation of yellows in the entire image, washing out the famous “Big Ben” clock. With the adjustment brush, we can apply the same adjustment, but only within the area where we need it. This gives us much better results.
The Targeted Adjustment Tool
The Targeted Adjustment Tool lets you target one hue within an image and adjust that same hue everywhere it’s found within the image. In the example below, I clicked on the foliage on the left and pulled the mouse to the right to increase the luminance value for the greens in the image. Then, I clicked on the clouds above Big Ben and increased the luminance value for that area as well, which happens to be in the yellow tonal range.
Before:

After:

Snapshots
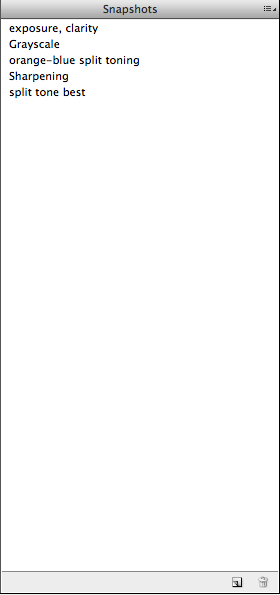
Snapshots is a terrific feature. Let’s say that you have made a few adjustments, but you can’t decide if you would like this image better in color or in grayscale. You can go to the snapshots panel and save the color one as a snapshot. You do this by clicking the icon that looks like the New Layer icon is Photoshop. Then, you can convert your image to grayscale, tweak it with the aforementioned HSL settings, and save it as its own snapshot. When you are ready to compare the two, simply go to the snapshots tab, and you can toggle back and forth to compare the two. Handy, quick, and easy! In the example below, I have the 5 different snapshots that I used for this article. Clicking on any of them allows you to easily make a careful visual comparison.
Conclusion
When we are perfecting our images, it helps to know all of the options that we have available. Camera Raw has its own set of strengths and tools, as well as a quick, easy process to compare revisions. Using the adjustment brush for pinpoint adjustments saves lots of time that would otherwise be spent repeatedly making masks and adjustment layers in Photoshop. Similarly, comparing your end results using Snapshots saves additional time and lets you easily compare adjustments. Depending on your needs, Camera Raw could be an excellent tool in your workflow and a huge time saver.
 James George
James George is a professional web developer and graphic designer. James is an expert in design, and a professional web developer, with a special interest in WordPress. Founder of Design Crawl, James has been a professional designer since 2005.