- Step 1: Bring Your Image Into Photoshop
- Step 2: Unlock your background layer
- Step 3: Position Your Image
- Step 4: Add a New Layer Below Your Image
- Step 5: Sample a Color From Your Image
- Step 6: Blend Your Image
- Step 7: Add Some Type
- Step 8: Create a Crisp Shadow
- Frequently Asked Questions (FAQs) about Photoshop Fade Layer Mask
It doesn’t matter if you are a photographer or a graphic designer, chances are that you have come across the need to fade or blend images in Photoshop. There are many different methods and techniques that will help you to blend images together. One of them is called a layer mask. Even with layer masks there are different techniques for blending one layer with another. One method is to create a layer mask on a layer, and then use the brush tool to paint over the areas that you want to mask or blend with black. Any positive value other than white will allow you to implement a soft mask. The lightest grey will blend the edge of a mask. The other method is to use the gradient tool to blend an image in a uniform manner. The key phrase to remember is that black conceals and white reveals. This means that anywhere that you paint on the layer mask with black will fade the image on that layer. If you have faded or blended an image too much, simply switch your brush color to white. White will bring back the image for that layer.
Step 1: Bring Your Image Into Photoshop
Open your image in Photoshop. Depending on your desired orientation, you will set up your file to mask part of the image out. I downloaded an image of a woman doing yoga. You can download it here.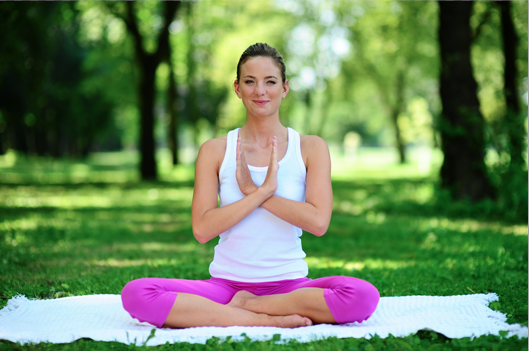
Step 2: Unlock your background layer
Double-click the background layer to unlock it. This will allow you to move it around as you please. When the layer is locked, you can’t move the image on that layer. Photoshop will display a popup message reminding you that a layer is locked.Step 3: Position Your Image
Position your image layer in the document as you wish. This may mean that you have to crop your image, or move it around. If you move it so that part of it goes off of the canvas that is okay. This part of the image won’t be printed and won’t show up in a flattened file. I moved our yoga image to the left, so that a good portion of the left side goes off of the screen. This opens up space on the right side to place text.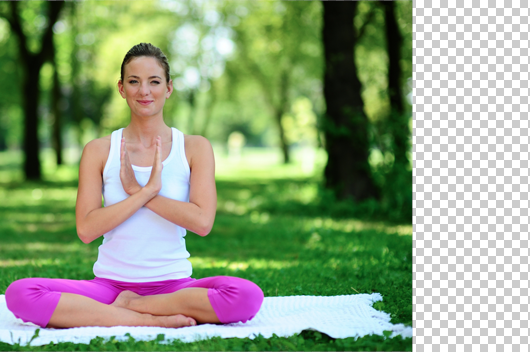
Step 4: Add a New Layer Below Your Image
Create a new layer below your photo. We are going to fill this layer with a solid color, and blend the photo to ease the transition between the photo and the solid color.Step 5: Sample a Color From Your Image
When using this technique, it is usually a good idea to choose a color from your photo. This technique adds a sense of uniformity to your work. I sampled a darker shade of hot pink from the woman’s pants. I filled the blank layer below our photo with this color by holding option/alt and hitting the delete key.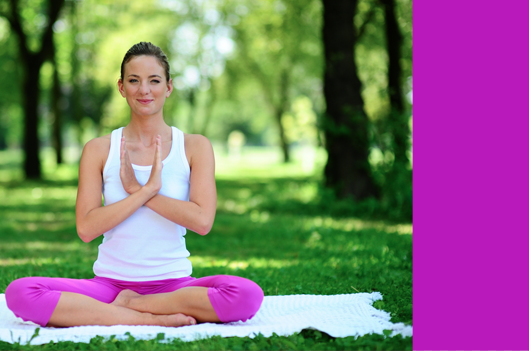
Step 6: Blend Your Image
In the Layers Panel, make sure the layer with your photo is selected, and click the Layer Mask icon. This will create a blank mask for your photo. You know that a mask is active, when there is a black outline around the layer mask icon. Select the gradient tool, and draw a black to white gradient from the right edge of the photo, to the left. Don’t go past a 4th or 5th of the right portion of the photo. If the mask is too much or not enough, hold command/ctrl and hit the Z key to undo your gradient and try again.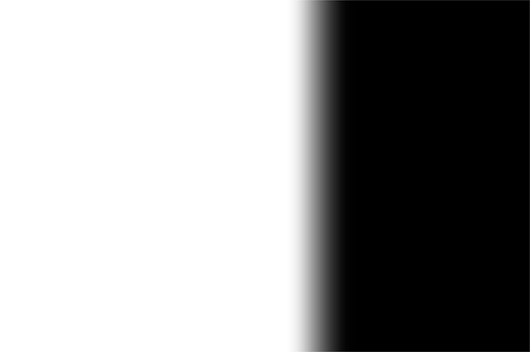

Step 7: Add Some Type
Select your text tool and type out your text. I sampled a yellow color from the leaves in the background, as this will help to further unify our design, and yellow works very well on pink/purple.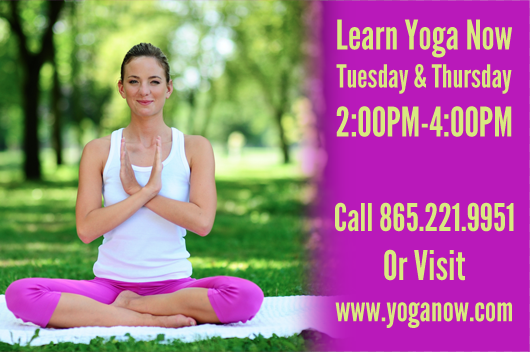
Step 8: Create a Crisp Shadow
Duplicate the text layer, and for the bottom text layer, double-click the “T” icon to select all of the text in that layer. Click the foreground color swatch in the Toolbox to bring up the color picker. You automatically get the eyedropper tool when you hover over your file. With the eyedropper tool, select a darker green color for the bottom text layer. Select the move tool and while using your arrow keys, hit the left arrow twice and the down arrow twice. This adds a nice shadow effect to your type, all while using colors found in your photo.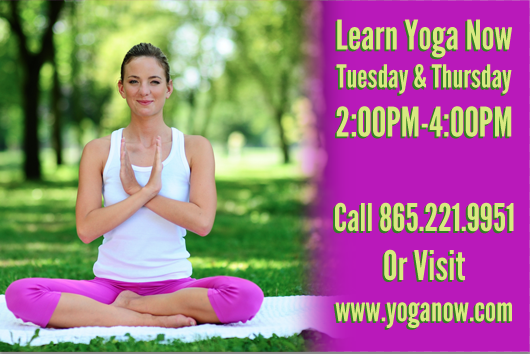 If you enjoyed reading this post, you’ll love Learnable; the place to learn fresh skills and techniques from the masters. Members get instant access to all of SitePoint’s ebooks and interactive online courses, like Foundations of Photoshop.
Comments on this article are closed. Have a question about Photoshop? Why not ask it on our forums?
If you enjoyed reading this post, you’ll love Learnable; the place to learn fresh skills and techniques from the masters. Members get instant access to all of SitePoint’s ebooks and interactive online courses, like Foundations of Photoshop.
Comments on this article are closed. Have a question about Photoshop? Why not ask it on our forums?
Frequently Asked Questions (FAQs) about Photoshop Fade Layer Mask
What is the purpose of using a fade layer mask in Photoshop?
A fade layer mask in Photoshop is a powerful tool that allows you to control the transparency of specific areas in your image. It is used to blend images or colors together, create smooth transitions, and add depth and dimension to your designs. The fade layer mask is non-destructive, meaning it doesn’t permanently alter the original image. Instead, it creates a separate layer that can be adjusted, edited, or removed without affecting the original image.
How can I create a smooth transition using a fade layer mask?
To create a smooth transition using a fade layer mask, you need to use the gradient tool. First, select the layer mask in the layers panel. Then, choose the gradient tool from the toolbar. In the options bar, select the black to white gradient. Click and drag across the layer mask to create a gradient. The direction and length of your drag will determine the direction and smoothness of the transition.
Can I use a fade layer mask to blend two images together?
Yes, you can use a fade layer mask to blend two images together. To do this, you need to have both images on separate layers. Then, add a layer mask to the top layer. Use the gradient tool on the layer mask to create a fade effect. The top image will gradually fade into the bottom image, creating a seamless blend.
How can I adjust the intensity of the fade effect?
The intensity of the fade effect can be adjusted by changing the opacity of the layer mask. In the layers panel, select the layer mask. Then, adjust the opacity slider to increase or decrease the intensity of the fade. The lower the opacity, the more transparent the layer mask will be, and the more the underlying layer will show through.
Can I use a fade layer mask with different colors?
Yes, you can use a fade layer mask with different colors. You can create a fade effect from one color to another by using the gradient tool. First, create a new layer and fill it with your desired color. Then, add a layer mask to this layer. Use the gradient tool on the layer mask to create a fade effect from the color to transparent.
How can I remove a fade layer mask?
To remove a fade layer mask, simply right-click on the layer mask in the layers panel and select ‘Delete Layer Mask’. This will remove the layer mask but leave the original layer intact.
Can I use a fade layer mask to create a vignette effect?
Yes, you can use a fade layer mask to create a vignette effect. To do this, add a layer mask to your image. Then, use the elliptical marquee tool to create a selection in the shape of a vignette. Fill this selection with black on the layer mask. Then, use the Gaussian blur filter to blur the edges of the vignette.
Can I use a fade layer mask with text?
Yes, you can use a fade layer mask with text. To do this, create your text layer and then add a layer mask to it. Use the gradient tool on the layer mask to create a fade effect. The text will gradually fade out, creating a unique and interesting effect.
Can I use a fade layer mask to create a double exposure effect?
Yes, you can use a fade layer mask to create a double exposure effect. To do this, you need two images on separate layers. Add a layer mask to the top layer and use the gradient tool to create a fade effect. The top image will gradually fade into the bottom image, creating a double exposure effect.
Can I use a fade layer mask with shapes?
Yes, you can use a fade layer mask with shapes. To do this, create your shape layer and then add a layer mask to it. Use the gradient tool on the layer mask to create a fade effect. The shape will gradually fade out, creating a unique and interesting effect.
 James George
James George is a professional web developer and graphic designer. James is an expert in design, and a professional web developer, with a special interest in WordPress. Founder of Design Crawl, James has been a professional designer since 2005.