In prior articles, we’ve used Adobe Business Catalyst to build and extend an online business using it’s web-based tools. You can build templates, create pages, manage content, build marketing campaigns, build an online store, collect data with forms, and build data-driven apps. Web-based tools give you the flexibility of working on your online business wherever you have access to the web.
In this article, we’re going to look at how you can use Adobe Dreamweaver as a fully integrated development environment synched to your templates, files, content in your Business Catalyst account.
In this article, we’re going to assume that our fictional client, the dance school, wants to respond to student requests for content on the site about exercises they can do at home. We’ll use both Dreamweaver and Business Catalyst to build a new Web App and integrate it into the site.
First thing to do is to get set up and then plan out the enhancements to the site.
Set Up
If you don’t already have Dreamweaver, this tutorial should be a good introduction to the basic capabilities that an integrated development environment can provide. Aside from the code editor there are tools to sync your local files with the remote server via FTP, template management tools, and support for the CSS and JavaScript you’ll need to manage layout, presentation and interactive functionality.
Download a full functional trial version of Dreamweaver here. After you’ve registered and installed Dreamweaver, let’s hook it up to your Adobe Business Catalyst account.
Adobe has written an extension for Dreamweaver CS4 and CS5 to connect to Business Catalyst. First download the extension here.
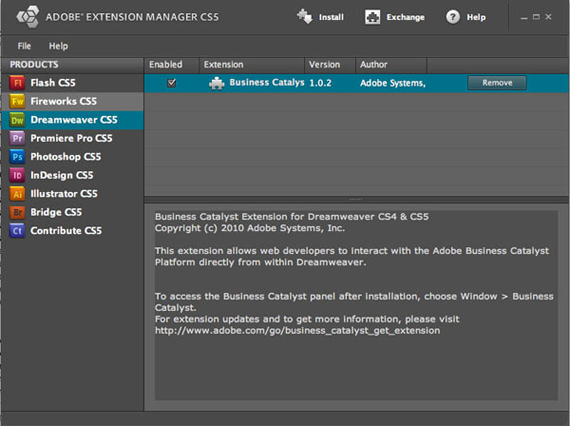
Save the file locally, and double click on the file to launch Adobe’s extension manager utility. Accept the disclaimer and the Adobe extension manager will show that Business Catalyst has been installed successfully.
Quit the extension manager and launch Dreamweaver, if it isn’t open by default, go to Window > Business Catalyst to open the panel on the right side.
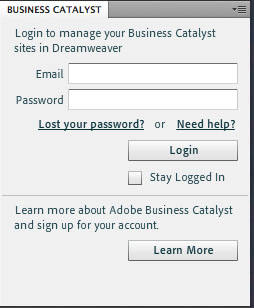
Enter your credentials for your Business Catalyst account and login. The panel will change to display the sites linked to your account.

The first time you select a site, you’ll be asked to define it so that your local environment can be synched to the server. Assets and files will be downloaded to your local environment and ftp settings will be set up so that as you make changes to your site, you can upload them from Dreamweaver.
Follow the prompts to provide your login information and the local root folder you want to work with and then you’ll be asked to confirm that you want to download the entire site—click OK and you’ll see the assets downloading.
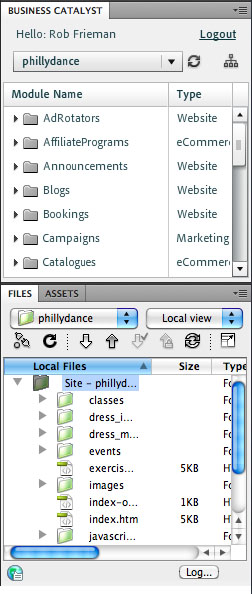
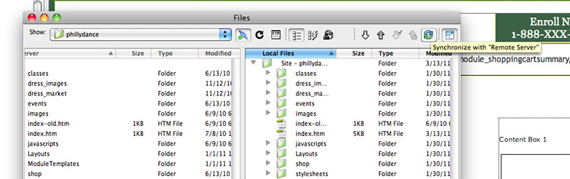
Once all of the site assets have downloaded, you’ll see your modules in the Business Catalyst panel and your files and assets in the Files panel:
Now that the extension is installed and configured to work with your remote site, let’s cover some of the tasks you can perform from within Dreamweaver.
Plan your enhancements
OK, now that the tools are set up, let’s think about what we want to do. I always believe in starting with the end in mind, so let’s simply state what we want: Students should be able to view content about exercises they can do at home; the content should be accessible from anywhere on the site and can be extended and maintained by us or by our client (so that means no static html pages).
This project will break down into a few components:
- Changes to the template to add a new content section to the navigation
- Creating pages to hold the list of exercises
- Creating the Web App to manage the content and design the presentation
- Adding the Web App module to the new page
Adobe Dreamweaver and Business Catalyst together will reduce some of the effort it might otherwise take to execute on this project. Most importantly it means we won’t need to have custom application code written or make any database changes directly – we can let the tools handle the plumbing and we can focus on delivering value for our client.
Managing Templates
The first thing we’ll look at are templates. If you’ve used Dreamweaver before, you’ll know that it provides strong support for managing templates for your website. The Business Catalyst extension let’s you work with existing templates or create new ones through Dreamweaver, test them locally and upload them to publish them to your site.
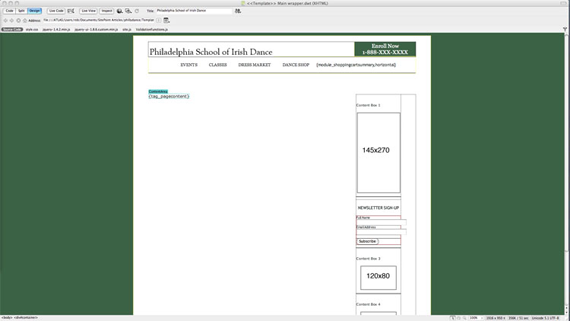
If you navigate in the Business Catalyst pane to the Templates directory and double click on one of your templates, by default you can see your template in Design view which is a rendered view of the page, showing your template content as well as any module or content tags.
When you click on the Split tab at the top of the window, you’ll see the code on the left and the rendered view on the right.
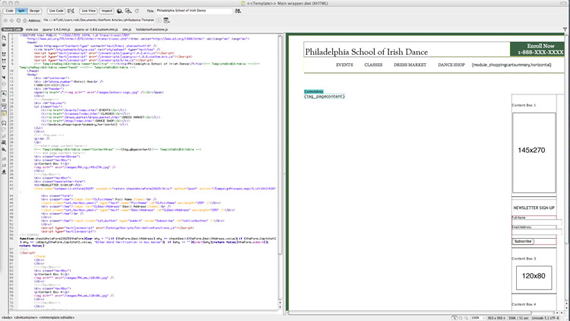
Double click on an area of the rendered page, and the cursor will jump to that spot on the page making it easy to edit the template. When you are editing a template, any part of the page can be altered, as you’ll see later, pages that use templates have some handy restrictions to be sure you only change the editable section of the page.
We’ve already decided that the first task will be to extend the common navigation to access the new section. So I’m going to make the change to the set of links in the top nav to add my new section called simply “Exercises”.
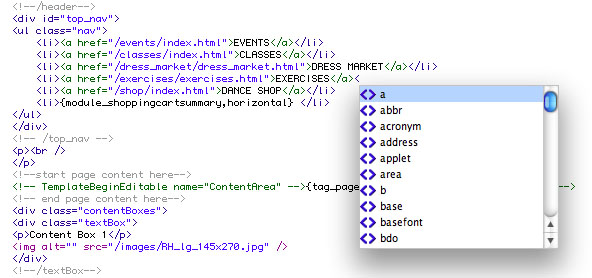
Dreamweaver by default speeds up development by prompting you with code hints as you type. The behavior can be tuned according to your preferences. I’ll add a new link to the template and save the changes. When I save, the system prompts me to see if I want to update the files that use this template.
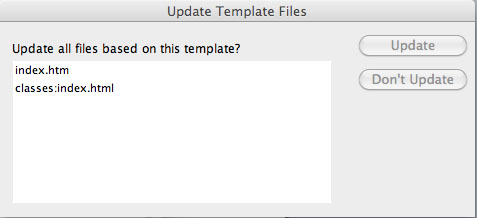
I’ll click Update and the system will let me know it’s complete the tasks successfully.
OK, so let’s review: I installed the extension enabling Dreamweaver to integrate with my Business Catalyst account, I synched the local environment to the remote files on the server, opened up one of my templates, added a new navigation element and saved the changes.
When I look on the remote site, none of the changes have been applied yet.
How do I get those changes out to the server? I’ve already configured the FTP settings, now I just need to synchronize the files on the remote server with the local changes.
In this view, I’ve undocked my Files pane and opened it up to show both the local and the remote file systems.
Use the ![]() button to sync the two environments.
button to sync the two environments.
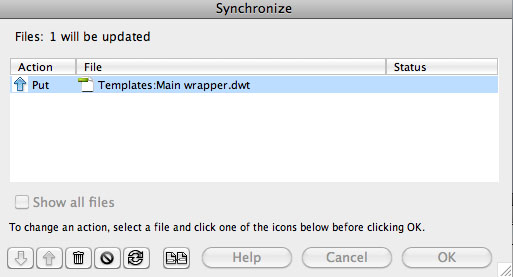
To be safe, after you click the button, use the Preview feature and Dreamweaver will show you the files that will be affected.
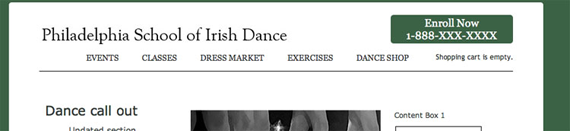
If I go out to the site, I can see the changes have been applied to the template used on the main part of the site.
Create a new page
One of the big benefits of using a development environment like Dreamweaver is that you can quickly create new content. You can easily create a new page based on a template, add content, preview the look of the page and upload it to Business Catalyst.
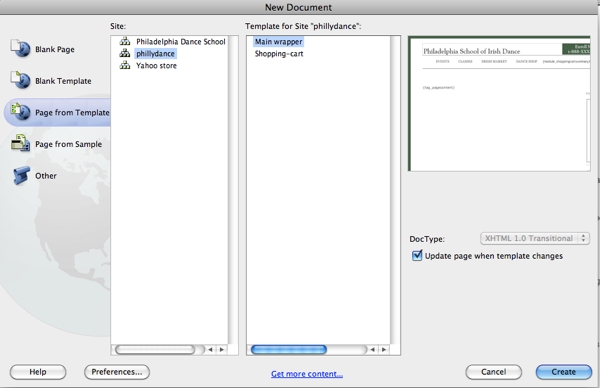
Go to File > New and then select Page from Template, select your Business Catalyst site in the list, and select the template use. The modal shows you a preview of the template so you can be sure it’s the one you want. Click Create.
When you toggle to Split view, you can see your code in the left hand Code pane and the editable rendered view in the Design pane. Your template from Business Catalyst already had an editable Content Area defined and Dreamweaver constrains you to only edit content in that section of the code.
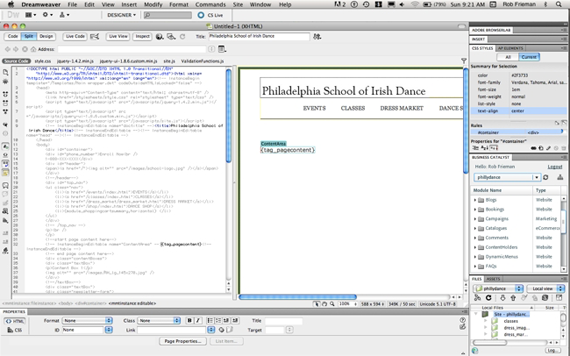
You’ll see in the code view that the Content Area you designated in your template is indicated on the new file within the comments <!--InstanceBeginEditable name=”ContentArea” --> and <!--InstanceEndEditable-->.
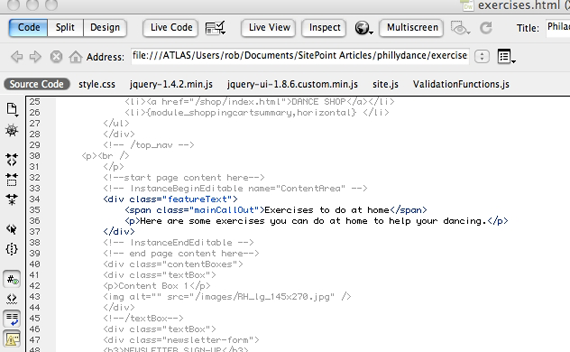
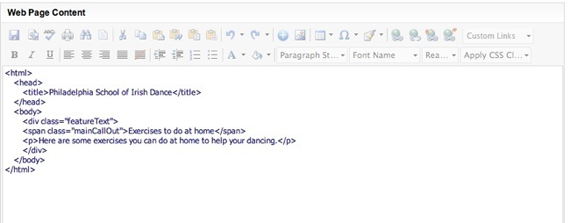
Dreamweaver shows the full page as if the template rendered with the content, but writes just the content area in the file that is transferred to Business Catalyst. I’m going to add a headline and some text to create a simple page using existing CSS calls.
As you create the content in the code view, the Design view updates automatically. You can also work directly in the Design view to add content. In the Design mode you can Command +Option +Click on a section of the rendered page and see the code that rendered that part of the screen – the CSS rules and HTML template.
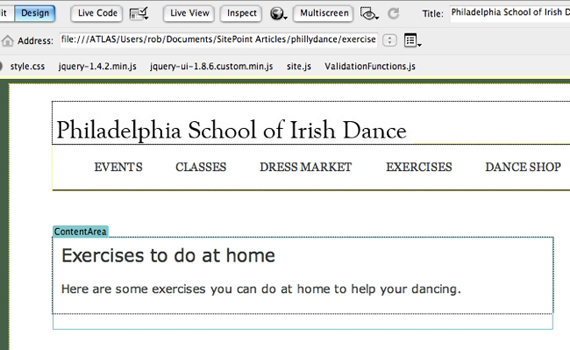
You can click over to Live view mode to see the page rendered using webkit. This is a helpful step to give your changes another review before synching with the remote server.
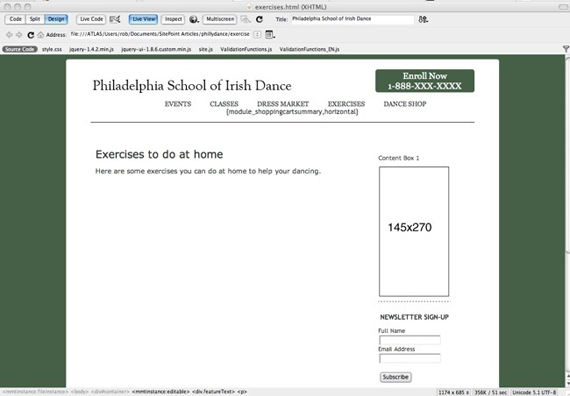
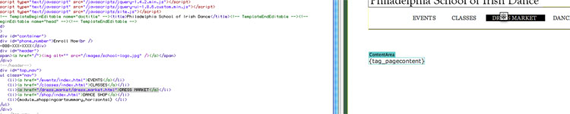
When you’re done adding content, save the file and then sync to the remote server. If you pull up the page in the web-based version of Business Catalyst by going to Web Pages, you’ll see that just the portion of the page that would render into the {tag_pagecontent} tag is presented. You can make and save further edits online and then sync the files with Dreamweaver again for your local environment.
OK, so now we have a new section and a page in that section. I want to add a new Web App to my site that will allow me or my client to update a set of content around exercises that the dancers can do at home.
Create a New Web App
If you recall from the other articles, Web Apps are data driven applications that let you define the fields of data you collect and then control all of the details of presenting a listing of the records and the detail pages for the content you’ve designed. Web Apps are created quickly and easily using Business Catalyst and don’t require coding on your part, but they give you very fine-grained control over the data elements and the final, rendered look and feel.
Creating Web Apps was covered in some detail in the last article but we’ll run through the basics here. We’ll use Business Catalyst to create the Web App and then we’ll use Dreamweaver to add the module to the page we just created.
Like everything else we do, a Web App starts with a plan. We want to have a section on the site that shows a list of exercises. We one of our students clicks on a link in the list, they should see a page that includes images and text explaining the exercise. They can go back to the list of exercises and click other links to learn other exercises. We’ve already created the section and the landing page, but we need to create Listing and Details pages for this to work.
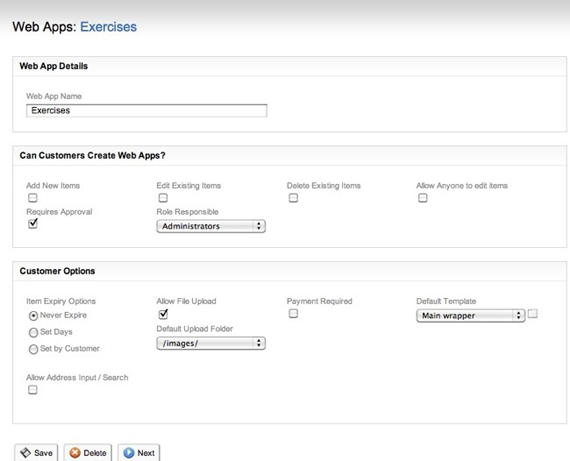
In Business Catalyst, go to Modules > Web Apps and create a new Web App.
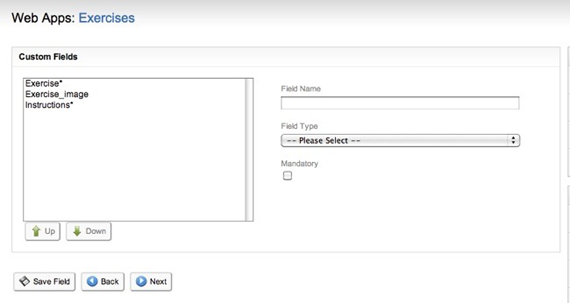
The first thing you’ll do is define the fields you want – in this case I’ll keep it simple and add a field for the Exercise, the Image and Instructions.
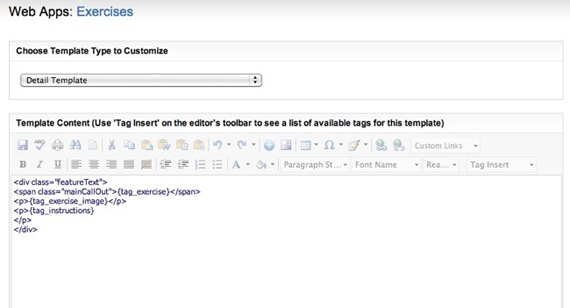
Remember that Business Catalyst already has the underlying capabilities to handle user-generated content including image uploads and that you can define what users are able to create new pages in your Web App. We won’t go into all of that detail in this article. The main steps I care about for this demo is that once the fields are defined, I need to define what the Listings and the Details page templates look like.
In the Details code, I’ll wrap the web app tags with divs and invoke CSS styles that will present the content. That finishes the work we need to do to set up the structure and the look and feel of the web app. I’m not going to review it in this article, but we can also use Business Catalyst to set up the data entry pages and restrict access to specific user roles. For our purposes, I simply created some content in the web app directly using the scaffolds in the Admin screens.
Add Web App module to the page
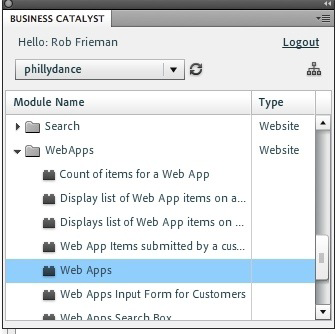
Now that we have the Web App defined, let’s go back to Dreamweaver and open the exercises.html file and add the module to the page. In the Business Catalyst pane, scroll down to the WebApps section. Click on the arrow to expand the listings, then double-click on the Web Apps module.
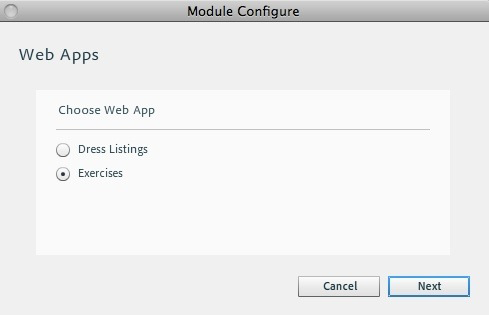
You’ll be prompted to select the App you want to add to the page. You’ll see the Web App you created – in this case, you can see the Dress Listings we created in the last tutorial, and the new Exercises app. Select your app and click Next.
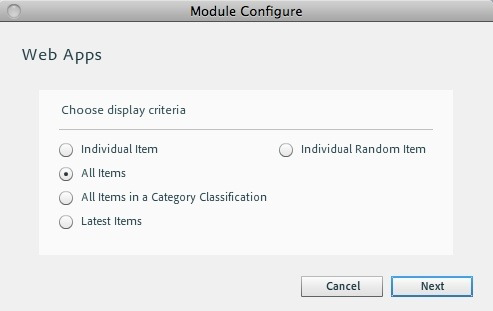
Select the type of module you want to add to the page. Since I want a listing of all of the records, I’ll select All Items and click Next.
The final step is to click Insert and the module tag will be inserted on your page.
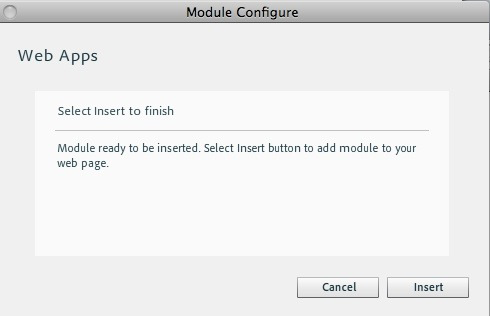
You can see the {module_webapps,...} tag in your HTML and you can wrap it in any styles that you want.

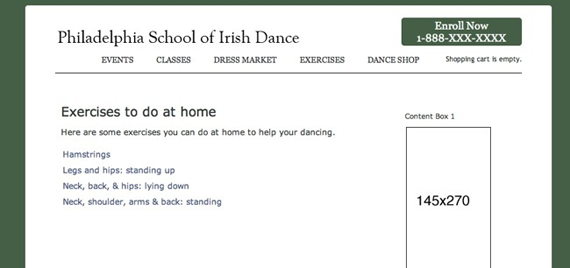
Save the changes to your file and sync it with the remote server. When you go to the published site, you can see the new page with the listings:
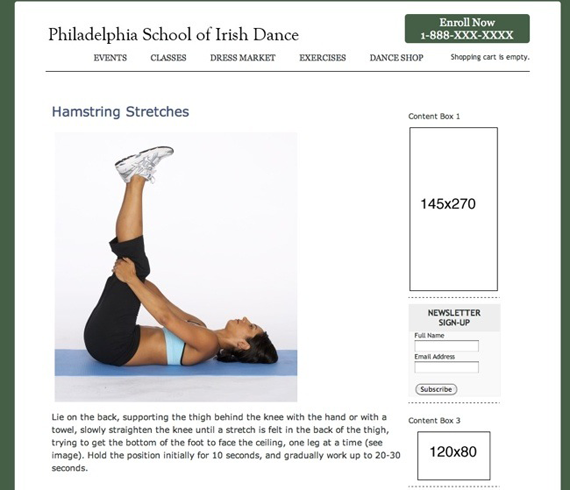
By clicking on the link, you can go to the Details page:
Summary
Let’s review some of the underlying functionality that Business Catalyst and Dreamweaver bring to the table: all you have to do is provide your design skills and imagination to the table, and these tools give you very fine grained control over the underlying field structure and front end design of a data-driven app.
Simply by adding the module to the page we created, the links are built on your pages, the pages render using the templates you designed, and the content is based on the structure you and your client want.
Adobe Dreamweaver is a very robust integrated development environment for authoring web sites and web applications, we’ve only scratched the surface of what you can do with this product. Adobe Business Catalyst let’s you build and extend an online business without having to incur the expense and effort of application and database development.
Together they can empower your design shop to deliver great solutions for your clients.
Let me know what you think!
Now you can tackle the short quiz we’ve compiled to see how much you’ve absorbed from this article.
This tutorial has been made possible by the support of Adobe. In cooperation with Adobe and independently written by SitePoint, we strive to work together to develop the content that’s most useful and relevant to you.
 Rob Frieman
Rob Frieman has been building web sites and applications for over 15 years. He currently leads web application development for a large financial services company.