So far you’ve seen samples for authenticating and working with Facebook, Twitter and Live Id, covering OAuth 1 and 2. In this post you’ll see how easily we can take the existing code and get it to work against LinkedIn.
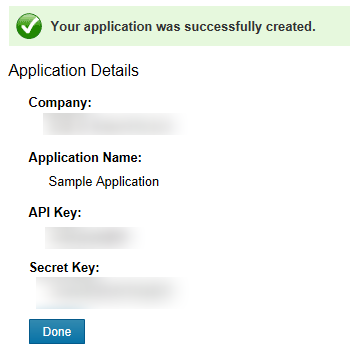
We’ll start with the code you saw in my earlier post on Twitter Authentication. However, before you do any coding you will of course have to go and register an application with LinkedIn. Go to the LinkedIn Developer’s page and sign in using the account that you want to register the application to. In the top right corner you should see the account name with a drop down arrow. Hover your mouse over the arrow and select the API Keys menu item. This will take you to a list of your existing applications, which may be empty initially. Click the ‘Add New Application’ link and complete the application form for your new application. When you’re done you should see confirmation that your account has been successfully created, similar to Figure 1, and more importantly the API and Secret Keys, which you’ll need to access the LinkedIn APIs.


If you haven’t already gone through my previous post on Twitter authentication, you should do now as you’ll need that code going forward. We’ll start by modifying the URL constants that are used as part of the authentication process, as well as adding in RedirectUrl and ReauthenticateUrl.
private const string RequestUrl = "https://api.linkedin.com/uas/oauth/requestToken";
private const string AuthorizeUrl ="https://www.linkedin.com/uas/oauth/authorize";
private const string AccessUrl = "https://api.linkedin.com/uas/oauth/accessToken";
private const string RedirectUrl = "https://www.linkedin.com/uas/oauth/authorize/submit";
private const string ReauthenticateUrl = "https://www.linkedin.com/uas/oauth/authorize/oob";
You’ll also need to update the ConsumerKey and ConsumerSecret constants to the API and Secret Keys you were assigned for your LinkedIn application. Replace and (including the angled brackets) with your keys.
private const string ConsumerKey ="<LinkedIn API Key>";
private const string ConsumerSecret ="<LinkedIn Secret Key>";
After the user has been authenticated and they have authorized your application to access their account, the web browser will be redirected back to the URL specified in the RedirectUrl (or ReauthenticateUrl) constant and the Verifier Pin, as discussed in the Twitter Auth post, is displayed on the screen. The page that LinkedIn displays has a slightly different layout, so you’ll need to adjust the regular expression used to extract the pin. The whole BrowserNavigated method has been included here as there is also a minor change to the third line that checks for the RedirectUrl or ReauthenticateUrl.
private void BrowserNavigated(object sender, NavigationEventArgs e) {
    if (AuthenticationBrowser.Visibility == Visibility.Collapsed) {
        AuthenticationBrowser.Visibility = Visibility.Visible;
    }
    if (e.Uri.AbsoluteUri.ToLower().StartsWith(RedirectUrl) ||
        e.Uri.AbsoluteUri.ToLower().StartsWith(ReauthenticateUrl))
        var htmlString = AuthenticationBrowser.SaveToString();
        var pinFinder = new Regex(@"<div class=""access-code"">(?<pin>[A-Za-z0-9_]+)</div>", RegexOptions.IgnoreCase);
        var match = pinFinder.Match(htmlString);
        if (match.Length > 0) {
            var group = match.Groups["pin"];
            if (group.Length > 0) {
                pin = group.Captures[0].Value;
                if (!string.IsNullOrEmpty(pin)) {
                    RetrieveAccessToken();
                }
            }
        }
        if (string.IsNullOrEmpty(pin)) {
            Dispatcher.BeginInvoke(() => MessageBox.Show("Authorization denied by user"));
        }
        // Make sure pin is reset to null
        pin = null;

        AuthenticationBrowser.Visibility = Visibility.Collapsed;
    }
}
The other difference to Twitter authentication is that at the end of the process LinkedIn doesn’t return any information about the authenticated user. Instead you have to query the profile API in order to access that information. The following code illustrates how to do a HTTP GET to the profile URL.
private void RetrieveProfile() {
    var profileUrl = "http://api.linkedin.com/v1/people/~";
    var request = CreateRequest("GET", profileUrl);

    request.BeginGetResponse(result => {
                        try {
                            var req = result.AsyncState as HttpWebRequest;
                            if (req == null) throw new ArgumentNullException("result", "Request parameter is null");
                            using (var resp = req.EndGetResponse(result))
                            using (var strm = resp.GetResponseStream())
                            {
                                var xml = XElement.Load(strm);
                                var first_name = xml.Element("first-name").Value;
                                var last_name = xml.Element("last-name").Value;

                                Dispatcher.BeginInvoke(() => {
                                    UserNameText.Text = first_name + " " + last_name;
                                    MessageBox.Show("Profile retrieved");
                                });
                            }
                        }
                        Catch {
                            Dispatcher.BeginInvoke(() => MessageBox.Show("Unable to access profile"));
                        }
                    }, request);
}
Lastly this coverage wouldn’t be complete if we didn’t illustrate how to post a status update to LinkedIn (LinkedIn refer to this as a “share”).
private void TweetClick(object sender, RoutedEventArgs e) {
    var share = @"<?xml version=""1.0"" encoding=""UTF-8""?>" +
                             "<share>" +
                                 "<comment>Comment to share with the world</comment>" +
                                 "<visibility>" +
                                     "<code>anyone</code>" +
                                 "</visibility>" +
                             "</share>";
    var postUrl ="http://api.linkedin.com/v1/people/~/shares";
    var request = CreateRequest("POST", postUrl);

    request.BeginGetRequestStream(reqresult => {
        var req = reqresult.AsyncState as HttpWebRequest;
        using (var strm = req.EndGetRequestStream(reqresult))
        using (var writer = new StreamWriter(strm)) {
            writer.Write(share);
        }
        req.BeginGetResponse(result => {
            try {
                var req2 = result.AsyncState as HttpWebRequest;
                if (req2 == null) throw new ArgumentNullException("result", "Request parameter is null");
                using (var resp = req.EndGetResponse(result)) {
                    Dispatcher.BeginInvoke(() => MessageBox.Show("Tweeted!"));
                }
            }
            catch {
                Dispatcher.BeginInvoke(() => MessageBox.Show("Unable to tweet"));
            }
        }, req);
    }, request);
}
So there you have it – the nuts and bolts of authentication, authorizing and posting to LinkedIn from within your Windows Phone application.
Nick is a software architect and developer with experience across a range of technologies, and has a particular interest in the future of rich client and mobile device applications. Nick is a speaker, author, a Microsoft MVP and owner of Built To Roam.

