
This article was peer reviewed by Younes Rafie and Wern Ancheta. Thanks to all of SitePoint’s peer reviewers for making SitePoint content the best it can be!
Subscriptions to services online are something extremely common – from subscribing to music streaming services to tutorial sites to access premium content.
With Laravel 5, we saw the introduction of Laravel Cashier, an official Laravel package to help developers manage Stripe’s and Braintree’s subscription billing services without writing most of the boilerplate subscription billing code.
Stripe and Braintree are payment platforms that make it easy to accept payments in your app or website.
In this tutorial, we will be building a dummy Courses site with Braintree subscriptions. In the process, we will learn how to use the various methods offered by Cashier.
![]()
In the first part of this extensive two-part series, we are going to:
- Set up Laravel Cashier
- Sign up to the Braintree sandbox (For production apps we use the main Braintree service)
- Create plans on Braintree
- Create an artisan command to sync the online plans with our database
- Allow users to subscribe to a plan
In part two, we will:
- Add the ability to swap plans
- Create middleware to protect some routes based on the subscription status
- Protect premium courses from users with basic subscription
- Learn how to cancel and resume subscriptions
- Add Braintree notifications to a variety of the application’s events via webhooks
The complete code for part one can be found here.
Creating the Application
We will start with a fresh Laravel installation.
composer create-project laravel/laravel lara-billable
Preparing the Database
Next, we have to set up the database before running any migrations. Let’s use MySQL – it’s easy to use, easy to configure, and included in a well-built development environment like Homestead Improved. After setting up the database, I have my .env file looking like this:
DB_HOST=localhost
DB_DATABASE=homestead
DB_USERNAME=homestead
DB_PASSWORD=secret
Scaffolding Auth
The next step is adding authentication to our application.
Laravel introduced a built in Authentication module in version 5.2 which made this extremely easy.
php artisan make:auth
By running the command, everything related to authentication will be generated for us i.e. the views, controllers and the routes mapping to the controller actions.
To be able to sign up and log in, we need to have tables to hold the user data. If we look inside database/migrations, we’ll notice that the generated Laravel app came with migrations for creating the users and password_resets tables. Let’s run these migrations:
php artisan migrate
If we navigate to /register, we can now sign up new users. Links for signing up and logging in are also present in the navbar.
Setting up Cashier
With the users table in place, we can now add Cashier. Since we’ll be using Braintree for this tutorial, let’s require the braintree-cashier package:
composer require laravel/cashier-braintree
Then, we register the Laravel\Cashier\CashierServiceProvider in our config/app.php:
'providers' => [
    // Other service providers...
    Laravel\Cashier\CashierServiceProvider::class,
],
Next, we have to pull in the Billable trait in the User model so as to be able to call the various cashier methods on a user:
[...]
use Laravel\Cashier\Billable;
[...]
class User extends Authenticatable
{
    use Billable;
    [...]
}
Then we add extra columns to the users table for billing purposes. We will also create a subscriptions table to handle all of our subscriptions:
php artisan make:migration add_billable_columns_to_users_table --table=users
Open the newly generated migration and change the up method to this:
public function up()
    {
        Schema::table('users', function (Blueprint $table) {
            $table->string('braintree_id')->nullable();
            $table->string('paypal_email')->nullable();
            $table->string('card_brand')->nullable();
            $table->string('card_last_four')->nullable();
            $table->timestamp('trial_ends_at')->nullable();
        });
    }
Let’s now create the subscription model and migration:
php artisan make:model Subscription -m
Open the migration and tweak the up method to this:
public function up()
{
    Schema::table('subscriptions', function (Blueprint $table) {
        $table->increments('id');
        $table->integer('user_id'); // A subscription belongs to a user
        $table->string('name');  // The name of the subscription
        $table->string('braintree_id'); //id for the subscription
        $table->string('braintree_plan'); // The name of the plan
        $table->integer('quantity');
        $table->timestamp('trial_ends_at')->nullable();
        $table->timestamp('ends_at')->nullable();
        $table->timestamps();
  });
}
With this set up, run the migrate Artisan command to create the subscriptions table and add the extra columns to the users table:
php artisan migrate
At this point, we have our Laravel side set up. Time to wire things up on the Braintree end. We will be using the Braintree Sandbox since this is not a production app. For those who don’t have a Sandbox account, sign up here, then log in.
Once inside the dashboard, generate a new API key in order to be able to use Braintree’s API in our app:
After generating the key, we also get the Public Key, Environment Key and Merchant ID. With these in place, we need to set up configuration in our Laravel App so we can communicate with the Braintree API. Open your .env file and set the keys alongside their corresponding values. I have my .env file looking like this:
BRAINTREE_ENV=sandbox
BRAINTREE_MERCHANT_ID=xxxxxxxxxxxxxx
BRAINTREE_PUBLIC_KEY=xxxxxxxxxxxxxx
BRAINTREE_PRIVATE_KEY=xxxxxxxxxxxxxx
Then we add the Braintree configuration to our config/services.php file:
'braintree' => [
        'model' => App\User::class, //model used to processs subscriptions
        'environment' => env('BRAINTREE_ENV'),
        'merchant_id' => env('BRAINTREE_MERCHANT_ID'),
        'public_key' => env('BRAINTREE_PUBLIC_KEY'),
        'private_key' => env('BRAINTREE_PRIVATE_KEY'),
],
As the final step before communicating with Braintree’s API, let’s add the following Braintree SDK calls to our AppServiceProvider service provider’s boot method. We will use the env helper to pull in the values we set in our .env file. Note that we also have to import the Braintree_Configuration class into our AppServiceProvider, else we won’t be able to call the various methods from the Braintree_Configuration class:
[...]
use Braintree_Configuration;
[...]
public function boot()
{
    Braintree_Configuration::environment(env('BRAINTREE_ENV'));
    Braintree_Configuration::merchantId(env('BRAINTREE_MERCHANT_ID'));
    Braintree_Configuration::publicKey(env('BRAINTREE_PUBLIC_KEY'));
    Braintree_Configuration::privateKey(env('BRAINTREE_PRIVATE_KEY'));
    // Cashier::useCurrency('eur', '€');
}
The default Cashier currency is United States Dollars (USD). We can change the default currency by calling the Cashier::useCurrency method from within the boot method of one of the service providers. The useCurrency method accepts two string parameters: the currency and the currency’s symbol. In this tutorial, we will just stick to USD. I have a commented out line of code illustrating how to change to Euros for example.
I must admit that setting up Cashier took a while but once done with this, we find ourselves in a position to start processing payments and manage subscriptions.
Creating Plans and Syncing Them to Our Database
Our next step is creating the plans. For this tutorial, we will be creating two: a Basic and a Premium plan. Let’s head over to the Braintree dashboard and do that. Note the trial period is optional but I set mine to 14 days:
Continuation:
Repeat the same process to create a premium plan but set the amount to 20 USD for a subscription.
When done creating the plans on Braintree, we can then create a plans table to store the plans locally. Let’s generate a Plan model and a migration:
php artisan make:model Plan -m
Update the up method in your migration to this:
[...]
public function up()
    {
        Schema::create('plans', function (Blueprint $table) {
            $table->increments('id');
            $table->string('name');
            $table->string('slug')->unique(); //name used to identify plan in the URL
            $table->string('braintree_plan');
            $table->float('cost');
            $table->text('description')->nullable();
            $table->timestamps();
        });
    }
[...]
Create the plans table by running the migration:
php artisan migrate
Syncing Plans
Next, we want to populate the Plans table with the data we set on Braintree. Hard coding the plans into our table is allowed but I find it a bit tedious, especially when the plan information online keeps changing. To simplify the process, we will create an artisan command to sync with the plans online and update our database:
php artisan make:command SyncPlans
For those not on Laravel 5.3+ run:
php artisan make:console SyncPlans
In app/Console/Commands/SyncPlans.php, we need to change the signature value and also add a description for the command:
[...]
protected $signature = 'braintree:sync-plans';
protected $description = 'Sync with online plans on Braintree';
[...]
We then register the command to the kernel so as to be able to run it from the terminal:
class Kernel extends ConsoleKernel
{
    [...]
    protected $commands = [
        Commands\SyncPlans::class,
    ];
    [...]
}
If we now run php artisan, the plan-syncing command will be visible from the list of available commands:

Then the big question, what should happen after running this command? The command is supposed to clear the data in the plans table, then populate the table with the Plan data available online. This logic should be placed in the handle method inside app/Console/Commands/SyncPlans.php:
[...]
use Braintree_Plan;
use App\Plan;
[...]
class SyncBraintreePlans extends Command
{
    [...]
    public function handle()
    {
        // Empty table
        Plan::truncate();

        // Get plans from Braintree
        $braintreePlans = Braintree_Plan::all();

        // uncomment the line below to dump the plans when running the command
        // var_dump($braintreePlans);

        // Iterate through the plans while populating our table with the plan data
        foreach ($braintreePlans as $braintreePlan) {
            Plan::create([
                'name' => $braintreePlan->name,
                'slug' => str_slug($braintreePlan->name),
                'braintree_plan' => $braintreePlan->id,
                'cost' => $braintreePlan->price,
                'description' => $braintreePlan->description,
            ]);
        }
    }
}
Note we have to pull in the Braintree_Plan and App\Plan namespaces so as to be able to call methods statically from these classes.
We should then navigate to the Plan model and add the name, slug, braintree_plan, cost and description to the list of mass assignable attributes. If we don’t do this, we will get a MassAssignmentException when trying to update the attributes:
class Plan extends Model
{
    [...]
    protected $fillable = ['name', 'slug', 'braintree_plan', 'cost', 'description'];
    [...]
}
We can then run our command to see if everything is working as expected:
php artisan braintree:sync-plans
For those planning to push the app to production, it’s always a good idea to set the site to maintenance mode before syncing plans then bring the site up once the syncing process is over. In this case I would have done something like this:
php artisan down
php artisan braintree:sync-plans
php artisan up
Displaying Plans
Let’s now display the plans on a page. We will start by creating a route:
routes/web.php
[...]
Route::get('/plans', 'PlansController@index');
Then, we create a PlansController and add an index action:
php artisan make:controller PlansController
The index action should return a view listing all the plans:
app/Http/Controllers/PlansController.php
[...]
use App\Plan;
[...]
class PlansController extends Controller
{
    public function index()
    {
        return view('plans.index')->with(['plans' => Plan::get()]);
    }
}
Now let’s set up the view. Create a plans folder before creating the index view:
mkdir resources/views/plans
touch resources/views/plans/index.blade.php
In the view, paste the following code:
resources/views/plans/index.blade.php
@extends('layouts.app')

@section('content')
<div class="container">
    <div class="row">
        <div class="col-md-8 col-md-offset-2">
            <div class="panel panel-default">
                <div class="panel-heading">Choose your plan</div>

                <div class="panel-body">
                    <ul class="list-group">
                        @foreach ($plans as $plan)
                            <li class="list-group-item clearfix">
                                <div class="pull-left">
                                    <h4>{{ $plan->name }}</h4>
                                    <h4>${{ number_format($plan->cost, 2) }} monthly</h4>
                                    @if ($plan->description)
                                        <p>{{ $plan->description }}</p>
                                    @endif
                                </div>

                                <a href="#" class="btn btn-default pull-right">Choose Plan</a>

                            </li>
                        @endforeach
                    </ul>
                </div>
            </div>
        </div>
    </div>
</div>
@endsection
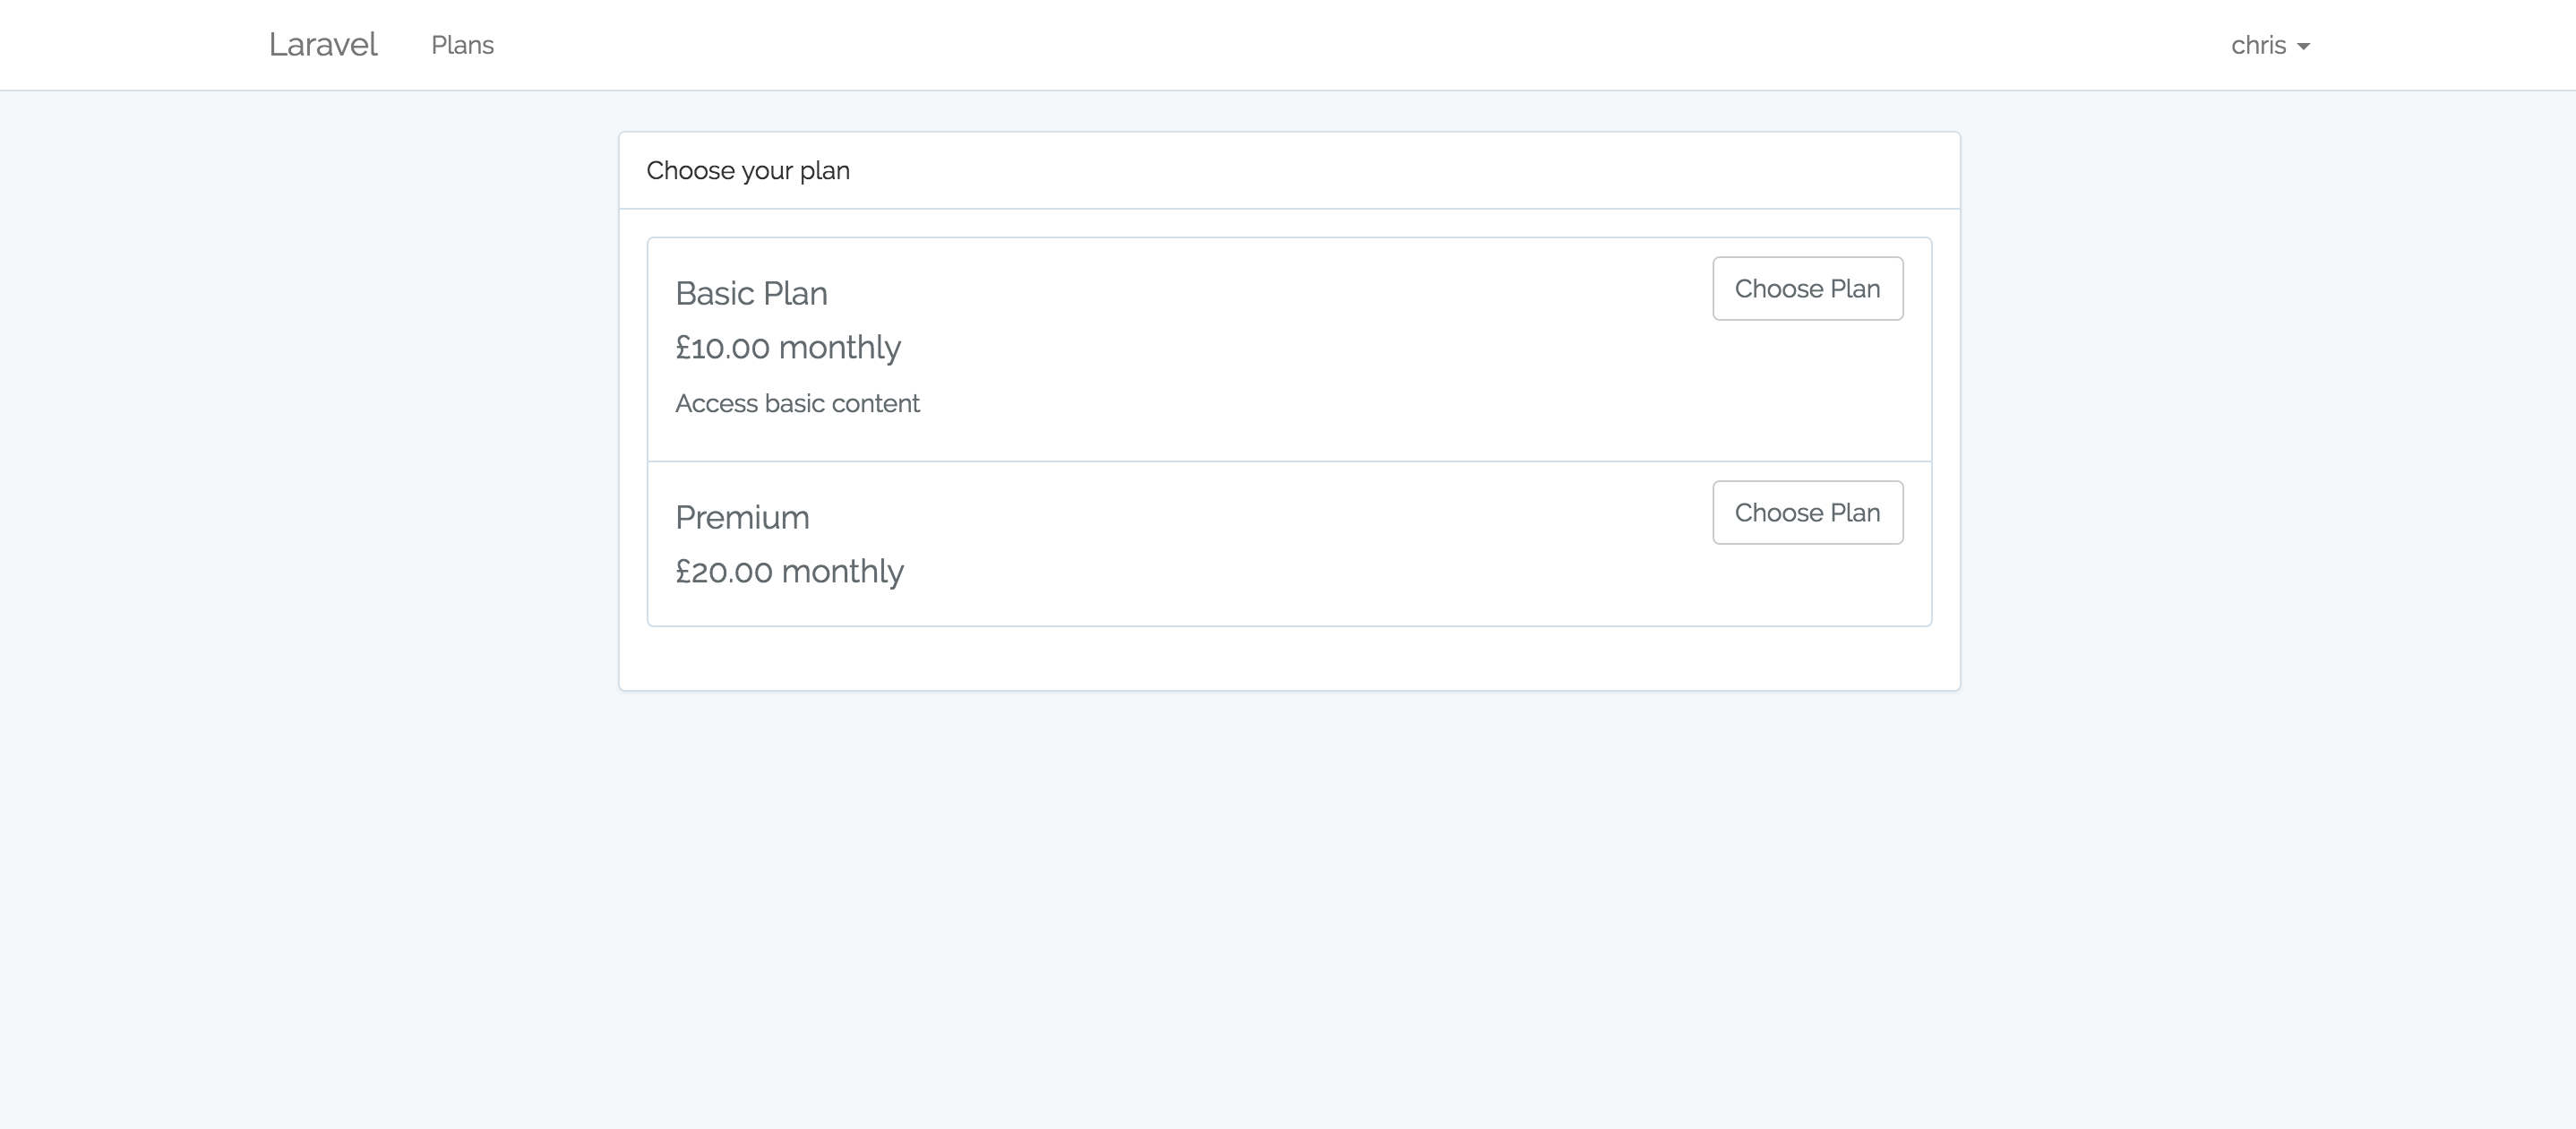
We’ve used the number_format helper to help us display the amount to two decimal places. As it stands, the Choose Plan button does not lead anywhere, but we’ll fix that in a moment. If we now visit /plans, all the plans will be displayed. Update the navbar to include a link pointing to the plans:
resoursces/views/layouts/app.blade.php
[...]
<ul class="nav navbar-nav navbar-left">
    <li><a href="{{ url('/plans') }}">Plans</a></li>
</ul>
<div class="collapse navbar-collapse" id="app-navbar-collapse">
[...]
Your view should now look like this:
Our next step is creating the payment form where users will fill in their credit card details before subscribing to a plan.
Card Payment Form
We are going to use Braintree’s Drop-in UI for this. More documentation on how to customize the Drop-in UI can be found here.
First things first, we create a route pointing to the view. We also want to make it such that only authenticated users can perform operations involving subscriptions. Let’s create a route group and add the auth middleware. It is in this group where all routes pointing to subscription related activities will fall:
routes/web.php
[...]
Route::group(['middleware' => 'auth'], function () {
    Route::get('/plan/{plan}', 'PlansController@show');
});
Then create the show action inside our PlansController:
class PlansController extends Controller
{
    [...]
    public function show(Plan $plan)
    {
        return view('plans.show')->with(['plan' => $plan]);
    }
}
Since we want to pass in the slug value in the URL instead of the Plan ID, we have to override the getRouteKeyName method on the Eloquent model. By default, when using Route Model Binding in Laravel, it’s the id that is returned. Let’s change that so we can have the slug value returned instead:
app/Plan.php
public function getRouteKeyName()
{
  return 'slug';
}
The “show” URL should now be in this format: /plan/{slug}. Time we created the view holding the payment form:
resources/views/plans/show.blade.php
@extends('layouts.app')

@section('content')
  <div class="container">
    <div class="row">
      <div class="col-md-8 col-md-offset-2">
        <div class="panel panel-default">
          <div class="panel-heading">{{ $plan->name }}</div>
          <div class="panel-body">
            ....
          </div>
        </div>
      </div>
    </div>
  </div>
@endsection
We can test things out by visiting /plan/premium or /plan/basic, depending on the plan name. Let’s also make the button in the plans index page point to the show view:
resources/views/plans/index.blade.php
[...]
<a href="{{ url('/plan', $plan->slug) }}" class="btn btn-default pull-right">Choose Plan</a>
[...]
At this point, the view is very basic and does not allow customers to enter credit card details. To load Braintree’s Drop-in UI, let’s require braintree.js after the content section:
resources/views/plans/show.blade.php
@section('braintree')
    <script src="https://js.braintreegateway.com/js/braintree-2.30.0.min.js"></script>
@endsection
Then make sure the script is loaded in the app:
resources/views/plans/layouts/app.blade.php
[...]
<!-- Scripts -->
<script src="/js/app.js"></script>
@yield('braintree')
[...]
Update the show view to include a form. The CLIENT-TOKEN-FROM-SERVER is required for this to work but we’ll handle that later:
resources/views/plans/show.blade.php
@extends('layouts.app')

@section('content')
  <div class="container">
    <div class="row">
      <div class="col-md-8 col-md-offset-2">
        <div class="panel panel-default">
          <div class="panel-heading">{{ $plan->name }}</div>
          <div class="panel-body">
            <form>
              <div id="dropin-container"></div>
              <hr>

              <button id="payment-button" class="btn btn-primary btn-flat" type="submit">Pay now</button>
            </form>
          </div>
        </div>
      </div>
    </div>
  </div>
@endsection

@section('braintree')
    <script src="https://js.braintreegateway.com/js/braintree-2.30.0.min.js"></script>

    <script>
  braintree.setup('CLIENT-TOKEN-FROM-SERVER', 'dropin', {
    container: 'dropin-container'
  });
    </script>
@endsection
If we visit /plans/{slug-value} or click on the Choose Plan button in the plans listing page, we should be taken to a view that looks like this:

We don’t, however, want the Pay Now button to be present when the payment form has not yet loaded. To achieve this, we are going to add a hidden class to the button, then remove the hidden class once the payment form shows up:
resources/views/plans/show.blade.php
<form>
     [...]
     <button id="payment-button" class="btn btn-primary btn-flat hidden" type="submit">Pay now</button>
     [...]
</form>
Let’s now create a new controller responsible for generating the token. We will then use ajax to set the generated token as the CLIENT-TOKEN-FROM-SERVER value. Note that braintree.js needs a client token generated by the Braintree server SDK for the payment form to be loaded:
php artisan make:controller BraintreeTokenController
Then, inside the controller, we create a token action which returns a JSON response containing the token:
app/Http/Controllers/BraintreeTokenController.php
[...]
use Braintree_ClientToken;
[...]
class BraintreeTokenController extends Controller
{
    public function token()
    {
        return response()->json([
            'data' => [
                'token' => Braintree_ClientToken::generate(),
            ]
        ]);
    }
}
Don’t forget to pull the Braintree_ClientToken namespace into this controller; otherwise, the generate method responsible for creating the token will error.
We then update our routes making it such that we can access a URL containing the JSON response from the token method:
routes/web.php
Route::group(['middleware' => 'auth'], function () {
    Route::get('/plan/{plan}', 'PlansController@show');
    Route::get('/braintree/token', 'BraintreeTokenController@token');
});
Try visiting /braintree/token and a token value will be displayed on the page. Our next step is pulling in this token value using AJAX into the show view. Update the code in the braintree section:
resources/views/plans/show.blade.php
@section('braintree')
    <script src="https://js.braintreegateway.com/js/braintree-2.30.0.min.js"></script>

    <script>
        $.ajax({
            url: '{{ url('braintree/token') }}'
        }).done(function (response) {
            braintree.setup(response.data.token, 'dropin', {
                container: 'dropin-container',
                onReady: function () {
                    $('#payment-button').removeClass('hidden');
                }
            });
        });
    </script>
@endsection
In the code block above, we are making a request to the braintree/token URL in order to obtain a JSON response containing the token. This token is what we then set as the CLIENT-TOKEN-VALUE. Once the payment form loads, we remove the hidden class from our Pay Now button making it visible to our customers.
With this in place, we can try reloading the page and we should see a payment form that looks like this:
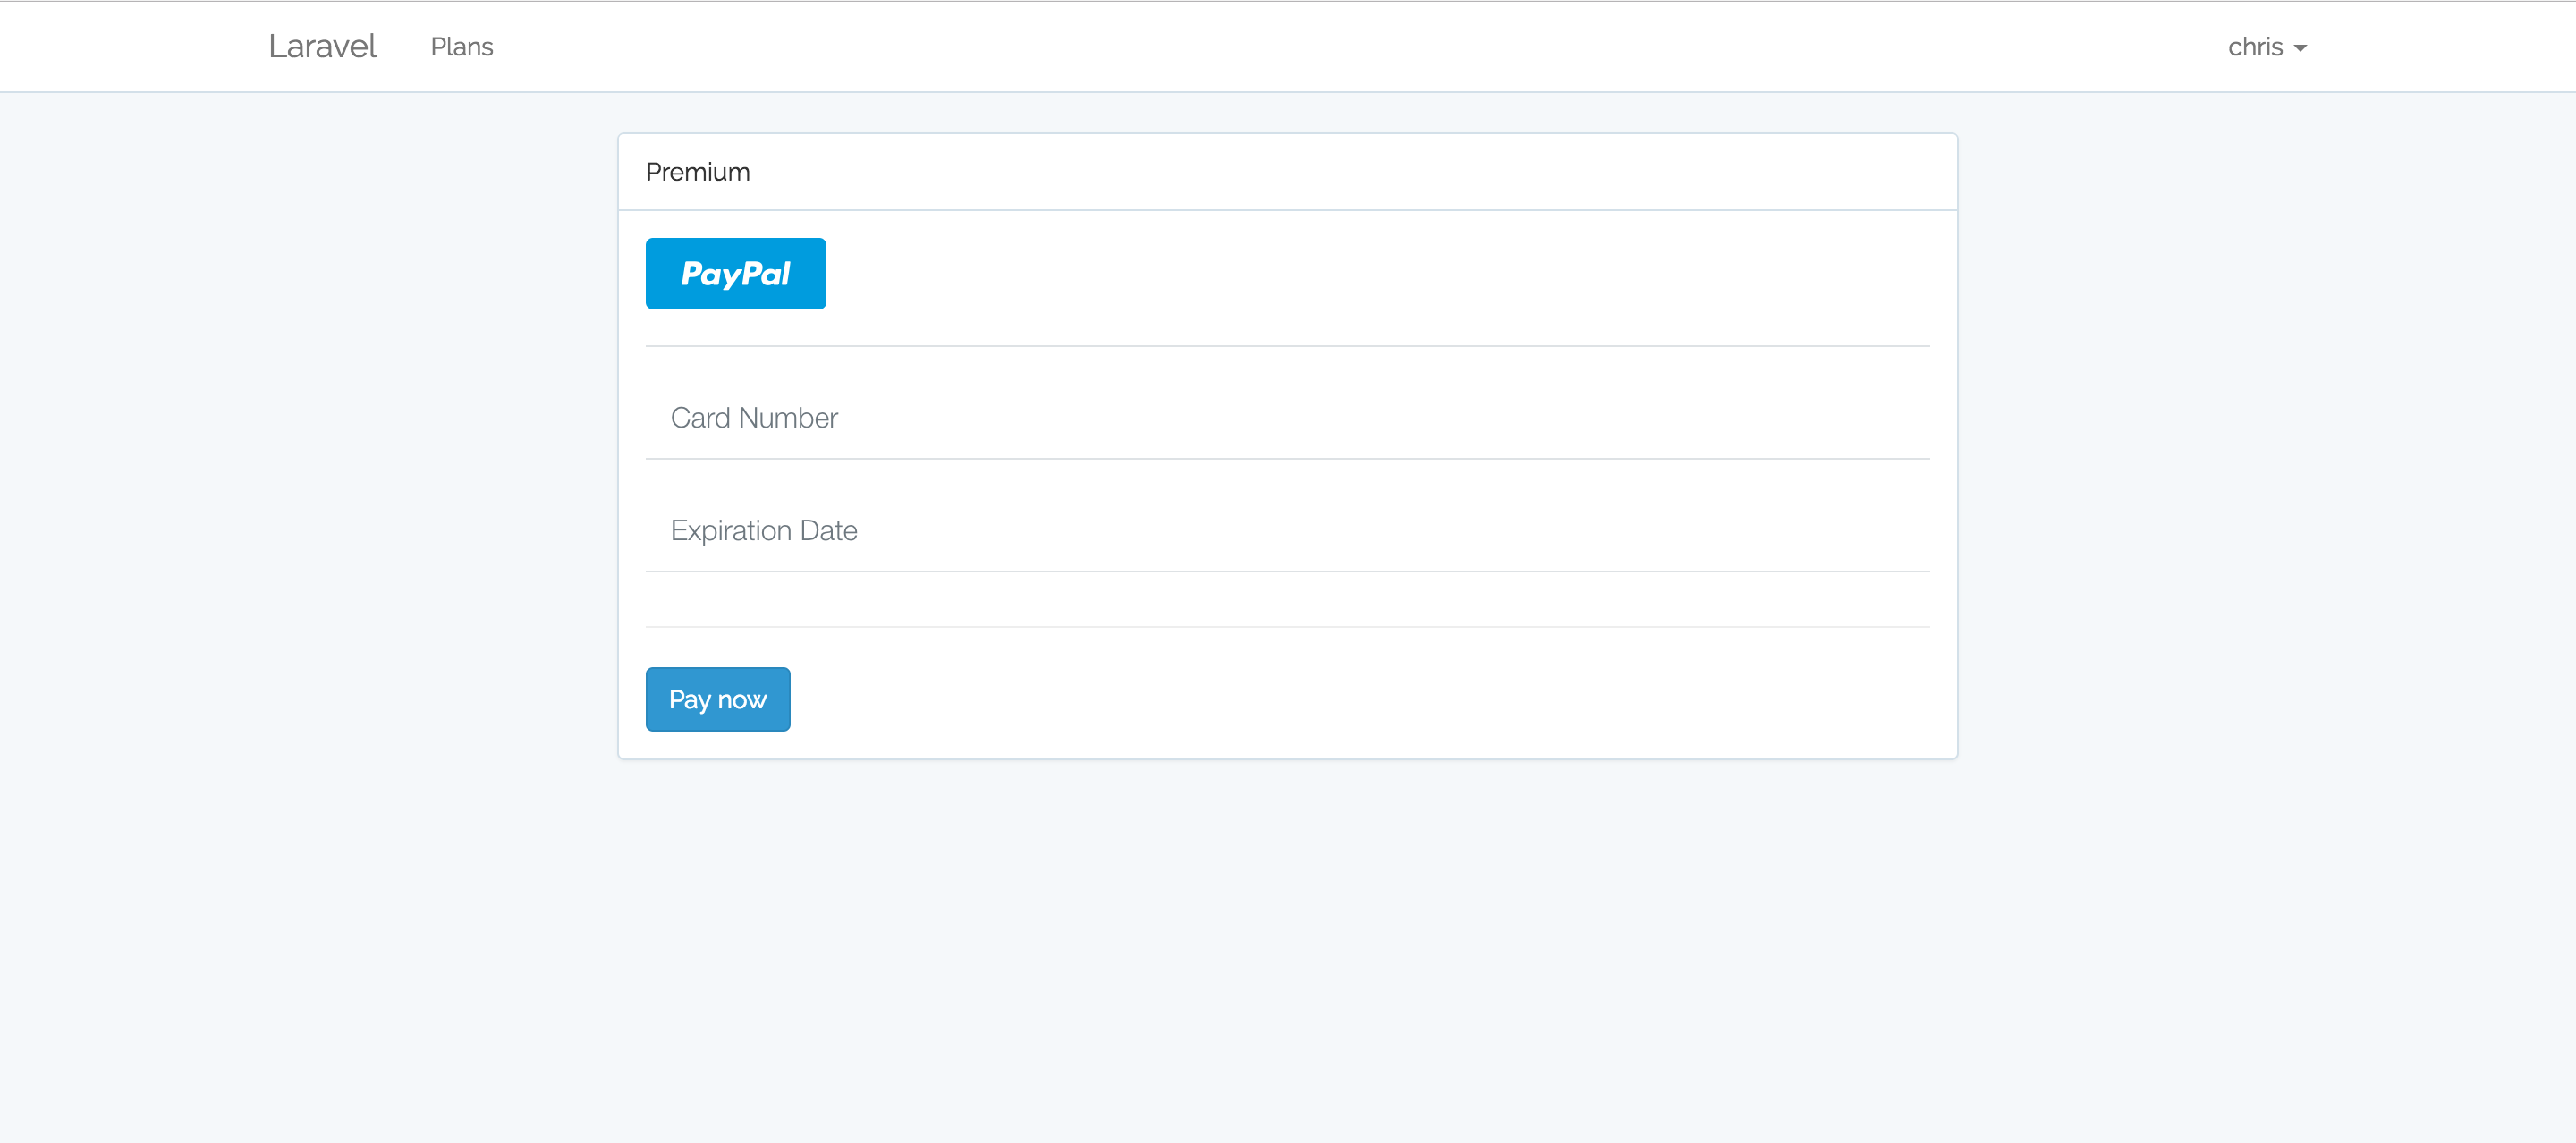
It’s time we made the form come to life so users can subscribe to a plan. Let’s update our form:
app/resources/views/plans/show.blade.php
[...]
<form action="{{ url('/subscribe') }}" method="post">
  <div id="dropin-container"></div>
  <input type="hidden" name="plan" value="{{ $plan->id }}">
  {{ csrf_field() }}
  <hr>
  <button id="payment-button" class="btn btn-primary btn-flat hidden" type="submit">Pay now</button>
</form>
[...]
The form will make a POST request to the /subscribe URL – we are yet to create a route and a controller action to handle that. We also added a hidden input to our form. This will help the SubscriptionsController know the plan we are subscribing to. Then, to protect users against Cross-Site Request Forgery when submitting the form, we’ve used Laravel’s csrf_field helper to generate a CSRF token.
Let’s create the route and controller responsible for subscribing users:
Route::group(['middleware' => 'auth'], function () {
    [...]
    Route::post('/subscribe', 'SubscriptionsController@store');
});
php artisan make:controller SubscriptionsController
Inside the controller, add a store action. This is the action responsible for creating and adding new subscriptions to the database:
app/Http/Controllers/SubscriptionsController.php
[...]
use App\Plan;
[...]
class SubscriptionController extends Controller
{
    public function store(Request $request)
    {
          // get the plan after submitting the form
          $plan = Plan::findOrFail($request->plan);

          // subscribe the user
          $request->user()->newSubscription('main', $plan->braintree_plan)->create($request->payment_method_nonce);

          // redirect to home after a successful subscription
          return redirect('home');
    }
}
What we are doing inside the method is getting the plan from the value we passed in the hidden input. Once we get the plan, we call the newSubscription method on the currently logged in user. This method came with the Billable trait that we required in the User model. The first argument passed to the newSubscription method should be the name of the subscription. For this app, we only offer monthly subscriptions and thus called our subscription main. The second argument is the specific Braintree plan the user is subscribing to.
The create method accepts the payment_method_nonce that we generate from Braintree as its argument. It’s the create method that will begin the subscription as well as update our database with the customer ID and other relevant billing information.
After subscribing the user, we redirect them to the homepage. We will implement basic flash messaging for notifications later.
We can now confirm that things are working by filling in the form with a test card, then navigating to the Braintree dashboard to see if the card was billed. For the card number, use 4242 4242 4242 4242 and set the date to a future date. Something like this:
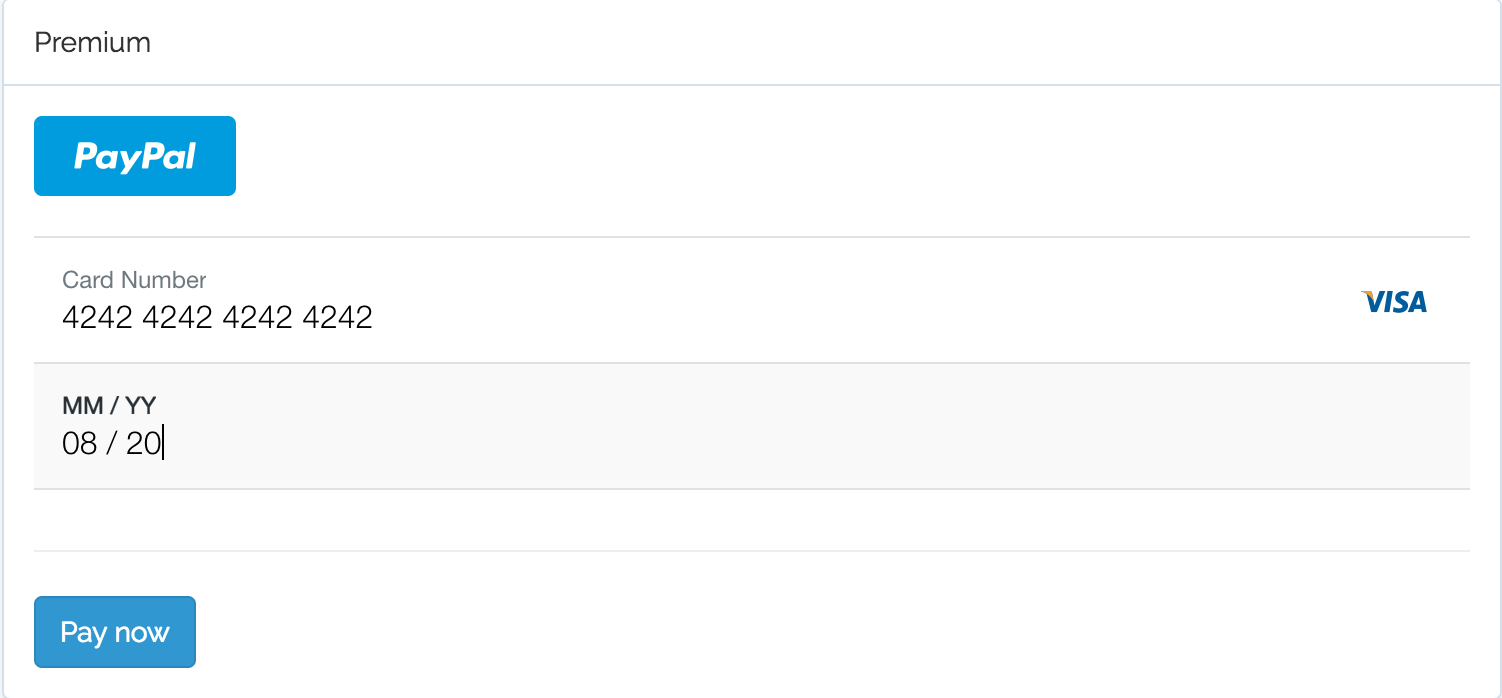
If everything went as expected, a new payment should be reflected in your braintree dashboard. A new record will also be added to the subscriptions table.
Conclusion
We’ve come a long way to get to this point but users now have the ability to subscribe to a plan. We covered basic Braintree integration with Laravel, plan creation, building of commands for syncing and fetching the token, and more – everything you need to get started with Braintree subscriptions.
In the next part, we’ll prevent users from signing up to the same plan twice, amongst other things. Stay tuned.
Frequently Asked Questions (FAQs) about Laravel and Braintree Integration
What is Braintree and how does it integrate with Laravel?
Braintree is a full-stack payment platform that makes it easy to accept payments in your app or website. Its features include PayPal, Venmo (in the US), credit and debit cards, and popular digital wallets like Apple Pay and Google Pay. When it comes to Laravel, a popular PHP framework, Braintree provides a seamless integration. Laravel’s expressive, elegant syntax coupled with Braintree’s comprehensive payment solutions can help developers build secure, efficient, and scalable e-commerce applications.
How can I set up Braintree in my Laravel application?
Setting up Braintree in Laravel involves a few steps. First, you need to install the Braintree PHP SDK via Composer. Then, you need to configure your Braintree environment, merchant ID, public key, and private key in your Laravel application’s environment file. Once these steps are completed, you can use Braintree’s services in your Laravel application.
How can I handle payments in Laravel using Braintree?
Handling payments in Laravel using Braintree involves creating a payment form, sending a payment request to Braintree, and handling the response from Braintree. The payment form collects payment details from the user, while the payment request sends these details to Braintree. The response from Braintree will indicate whether the payment was successful or not.
How can I create a hierarchical structure in Laravel?
Creating a hierarchical structure in Laravel can be achieved using the Eloquent ORM’s relationships. For example, you can create a ‘parent-child’ relationship between two models to represent a hierarchical structure. There are also several Laravel packages available that provide additional functionality for working with hierarchical data.
What is the Braintree badge and how can I use it in my Laravel application?
The Braintree badge is a logo that you can display on your website to let your customers know that you use Braintree for payments. Displaying the Braintree badge can help build trust with your customers. You can add the Braintree badge to your Laravel application by including it in your website’s HTML.
How can I handle errors when using Braintree in Laravel?
Handling errors when using Braintree in Laravel involves catching exceptions thrown by the Braintree PHP SDK. These exceptions can be caught and handled in your Laravel application to provide appropriate feedback to the user.
How can I test my Braintree integration in Laravel?
Testing your Braintree integration in Laravel can be done using Braintree’s sandbox environment. The sandbox environment allows you to test your integration without making real transactions.
How can I handle subscriptions with Braintree in Laravel?
Handling subscriptions with Braintree in Laravel involves creating a subscription plan in your Braintree account, and then using the Braintree PHP SDK to create, update, and cancel subscriptions in your Laravel application.
How can I secure my Braintree integration in Laravel?
Securing your Braintree integration in Laravel involves following best practices for handling sensitive payment data, such as using HTTPS, storing your Braintree credentials securely, and not storing sensitive payment data in your application.
How can I optimize my Braintree integration in Laravel?
Optimizing your Braintree integration in Laravel can involve several strategies, such as caching payment data to reduce the number of requests to Braintree, using Braintree’s advanced features like webhooks to automate tasks, and regularly reviewing and updating your integration to take advantage of new features and improvements in the Braintree PHP SDK and Laravel.
 Christopher Vundi
Chris is a software developer at Andela. He has worked with both Rails and Laravel and blogs to share a few tips. Chris also loves traveling.