This article was sponsored by Telerik. Thank you for supporting the sponsors who make SitePoint possible.
Building native or hybrid mobile applications can be a notoriously difficult task. Unlike building for the web, each operating system requires an understanding of a unique set of languages and tools before development can begin.
While some may be able to hire an agency and spend several thousand dollars to have their application built, others simply do not have that ability due to time, resource or financial constraints.
Thankfully, Telerik Platform will help you build your own application without the hassle of external agencies and large development costs.
The Platform
Telerik Platform exists to simplify application development for both hybrid and native mobile apps. This idea is so heavily woven into Telerik’s product philosophy that getting started doesn’t even require downloading an SDK.
This is because building on Telerik Platform takes place within its in-browser IDE. In your application design phase, you can make use of Telerik’s built-in design themes to see how your application will look and feel, all while running live data. Since Telerik leverages Phonegap/Cordova, you can build your application with HTML, CSS, and JavaScript, while still deploying to multiple platforms.
Telerik provides project templates so that commonly used components won’t need to be built from scratch. Take, for example, this calendar widget, which can be added to any Telerik app builder project at the click of a button. After all of your code is written, you can test, deploy, and gather analytics on your application, without ever having to leave Telerik Platform.
Building an Application
Let’s build a sample to-do list application to quickly get an idea of how Telerik Platform works. After signing up for a free trial, start by selecting a blank hybrid app template in your dashboard.
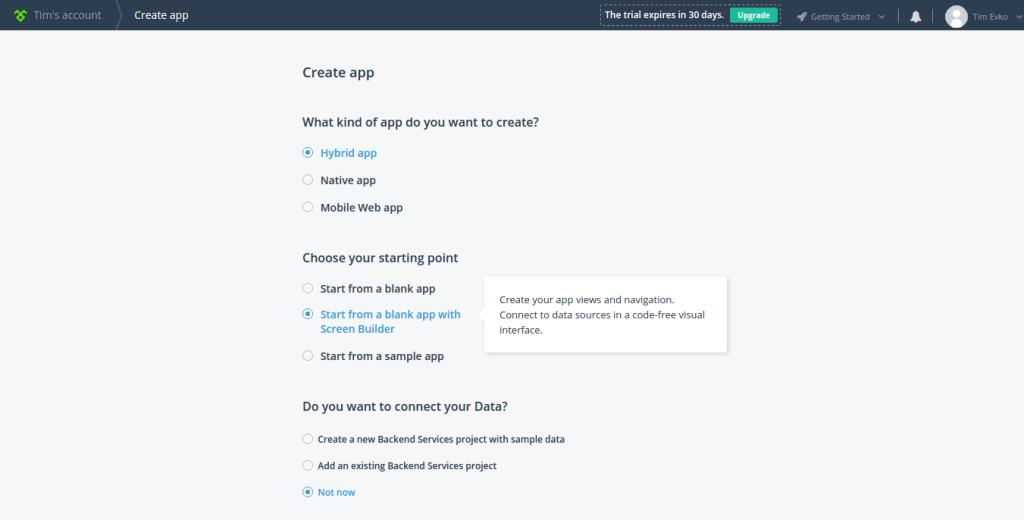
After submitting your initial app description and template settings, you’ll be taken to a dashboard where you can begin customizing the application.
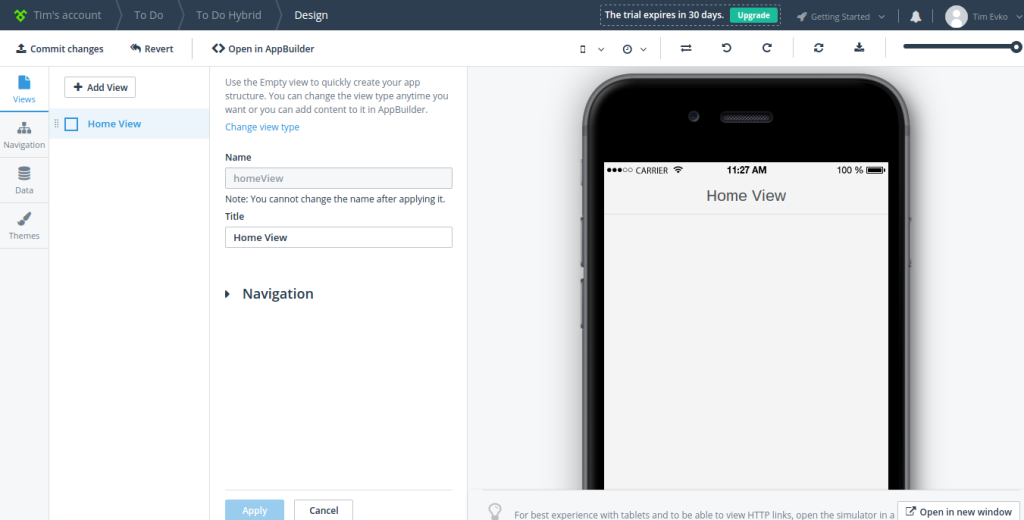
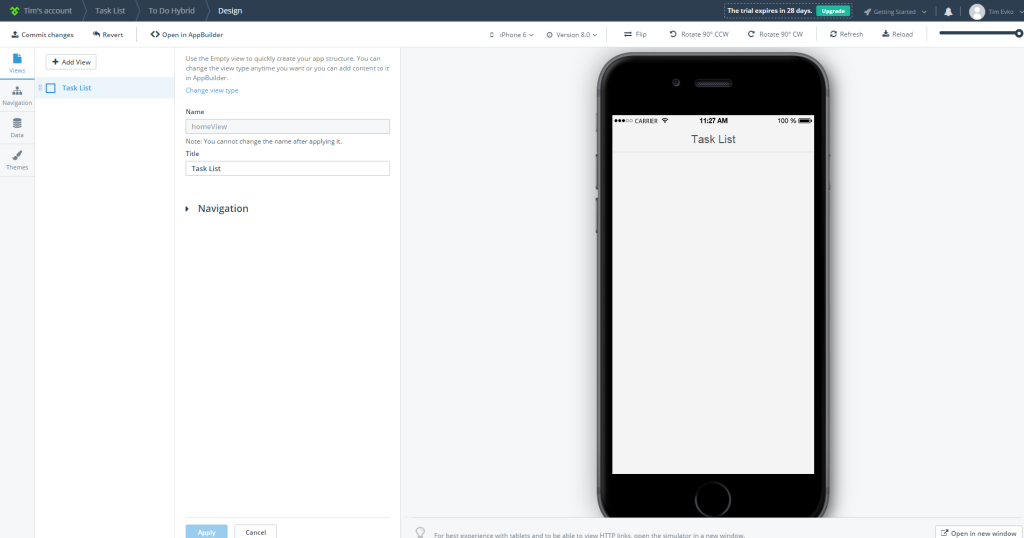
Since this is a simple to-do list application, you’ll only need one view. In Telerik Platform, a view is a unique section of your application. A to-do list only really needs one unique section, since it only provides one feature. Title this view “Task List”.
This also means that you don’t need any sort of navigation, since opening the application should take you directly to the only feature the application has to offer.
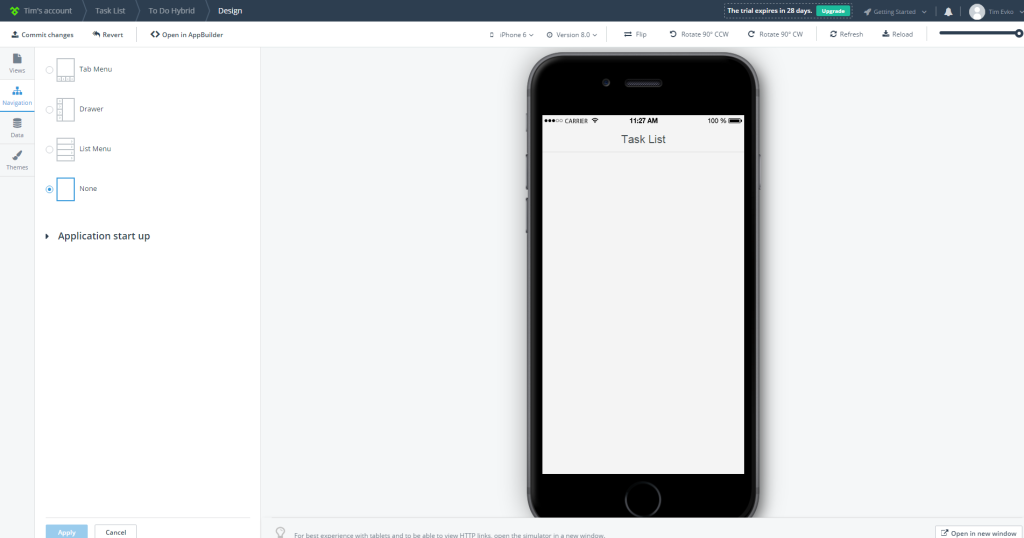
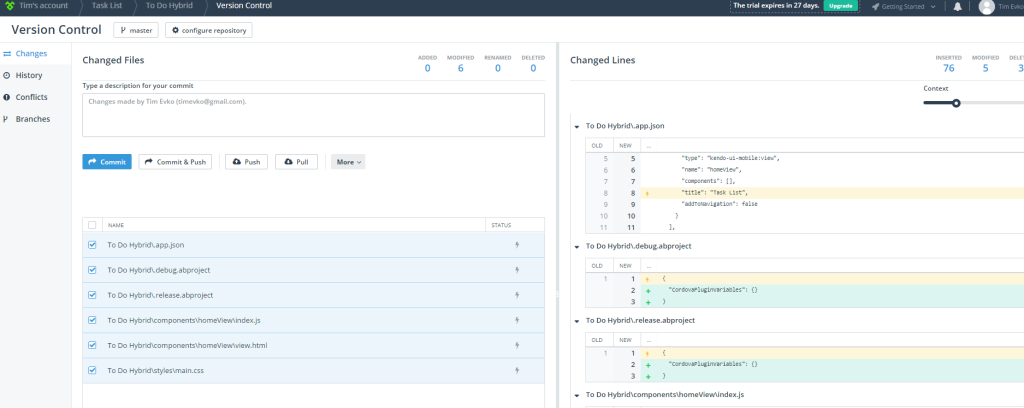
After adjusting the view and navigation settings for the application, we can skip data and move right to the themes setting of our dashboard, since the application won’t need a data source. For this sample application, we’re going to stick with the flat design theme. We’re ready to move on to the next stage of application development, but first, take a moment to commit changes to the app builder source control.
We’re ready to write some code, so go ahead and move from the screen builder (where we add views, navigation, and theme settings) to the app builder, where you’ll write the logic for the application.
In the screenshot below, I’ve enabled the split view so that the application preview and the code I’ll be editing can be visible at the same time.
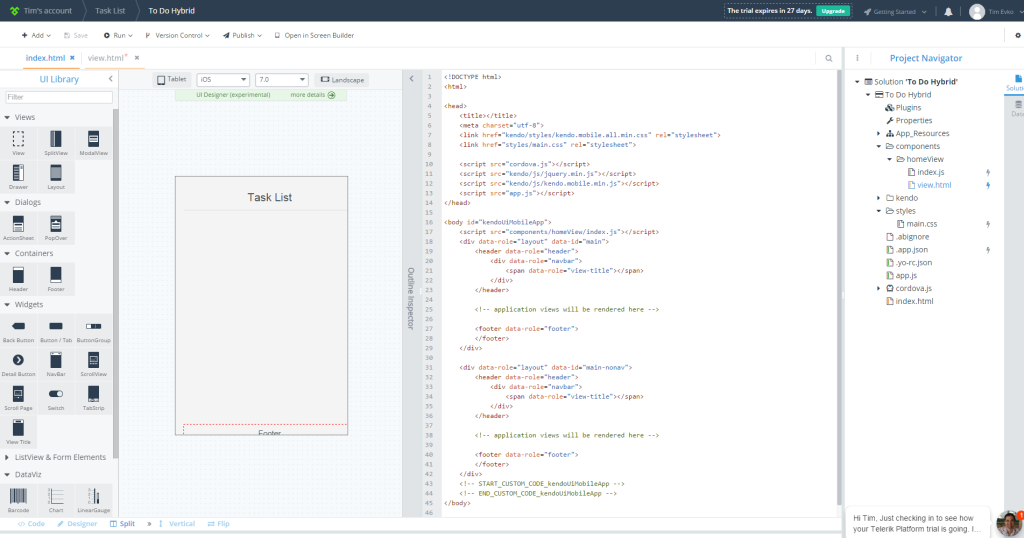
We’ll be writing some HTML in the view.html file to start building out the to-do list scaffold. This file can be found at components/homeView/view.html in the navigator. After adding the initial HTML, the view.html file should look like this:
<div data-role=“view” data-title=“Task List” data-layout=“main-nonav” data-model=“app.homeView” data-show=“app.homeView.onShow” data-after-show=“app.homeView.afterShow”>
	<!— START_CUSTOM_CODE_homeView —>
	<h1>
		Tasks
	</h1>
	<ul>

	</ul>
	<button>
		Add a task
	</button>

	<!— END_CUSTOM_CODE_homeView —>
</div>
At this stage you should see something like this when you preview the application:
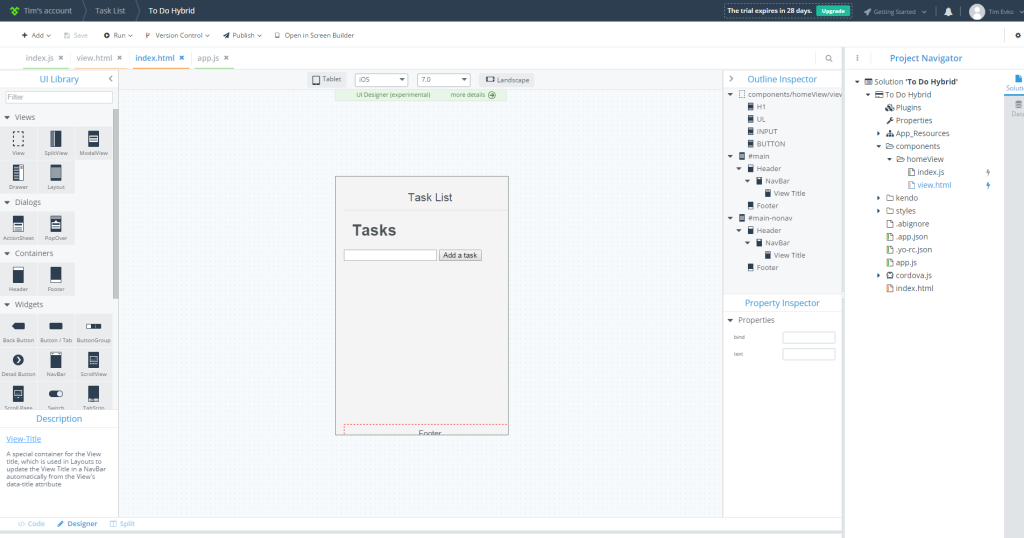
Next, you’ll need to add some JavaScript to the project so that users can add, edit, and delete to-do list items. Open the index.js file, which is in the same folder as the view file. Since this is a sample application, you’ll be using jQuery, which comes as a dependency in the platform.
It’s important to remember that Telerik Platform makes use of the Kendo UI library, so our code will follow some of its conventions. Here’s what the index.js file looks like before any adjustments are made:
'use strict';
app.homeView = kendo.observable({
  onShow: function() {},
  afterShow: function() {}
});
// START_CUSTOM_CODE_homeView
// END_CUSTOM_CODE_homeView
You’ll be adding the custom code to the onShow method, which means the code will fire as soon as the main view becomes visible.
Here’s what index.js should look like after you’ve added the JavaScript that allows us to add, complete and delete to-do list items:
'use strict';
app.homeView = kendo.observable({
  onShow: function() {
    //adding a to do list item
    $('button').click(function() {
      var text = $('.toDoListInput').val();
      if (text === '') {
        return
      }
      else {
        $('.toDoListContainer').append( ' ' + text + 'delete item complete item' );
        $('.toDoListInput').val('');
      }
    });

    //checking off a to do list item
    $('.toDoListContainer').on('click', '.toDoListItem', function() {
      $(this).find('.delete').toggle();
      $(this).find('.complete').toggle();
    });

    $('.toDoListContainer').on('click', '.complete', function(e) {
      $(this).parents('.toDoListItem').addClass('completed');
      $(this).toggle();
      $(this).siblings('.delete').toggle();
      e.stopPropagation();
    });

    $('.toDoListContainer').on('click', '.delete', function() {
      $(this).parents('.toDoListItem').remove();
    });
  },
  afterShow: function() {}
});
With the JavaScript in place, the app needs some CSS so that it looks usable. Open the main.css file in the styles folder. Enable the device simulator by clicking the Run button in the toolbar and selecting the iPhone simulator. This will allow you to see changes to the layout as you’re making them in the CSS file.
Once the CSS is added, your app is almost finished. All we have left to do is test! Don’t forget to run through the device simulator and test your application across all of the available devices. In our case, we’re building a simple to-do list application with jQuery, so nothing is out of order. This may not be the case for more complex applications.
Deploying the Application
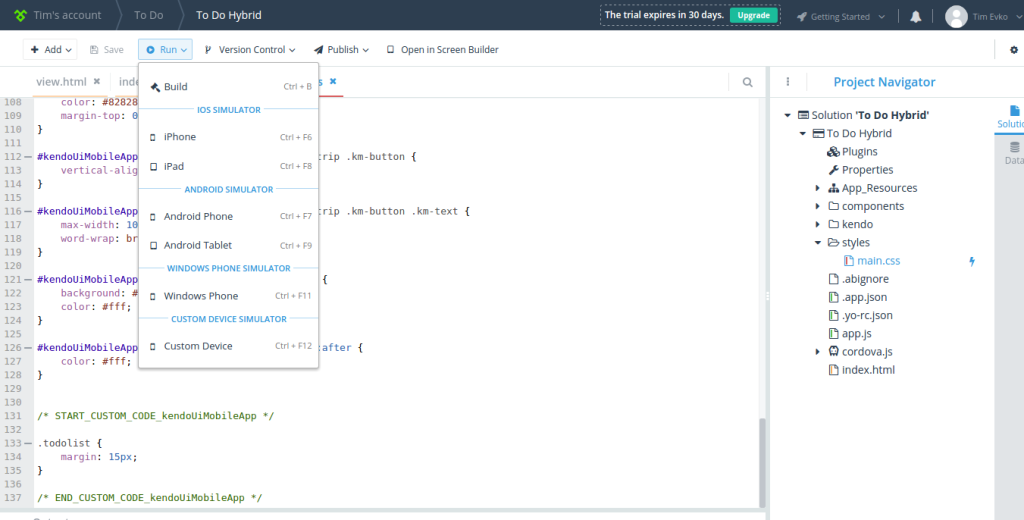
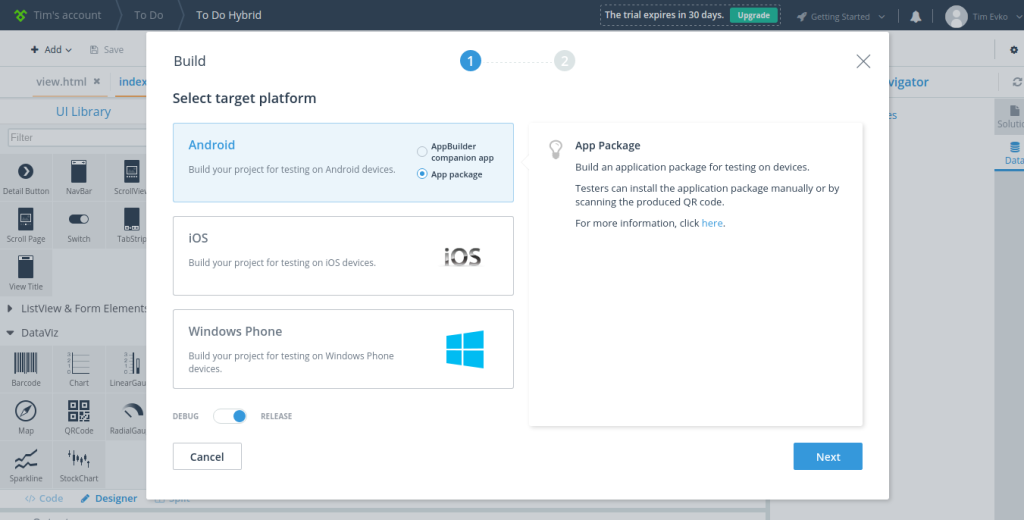
Now that the app is built, you can try it on a physical device! Click on the Run button in the toolbar again, but this time select Build. You’ll be presented with the option of compiling to various environments.
I’ve selected Android since I’m going to be testing the application on an Android device.
After the build has completed, you’ll be presented with a link you can go to on your mobile device’s browser, where the installation process will take place.
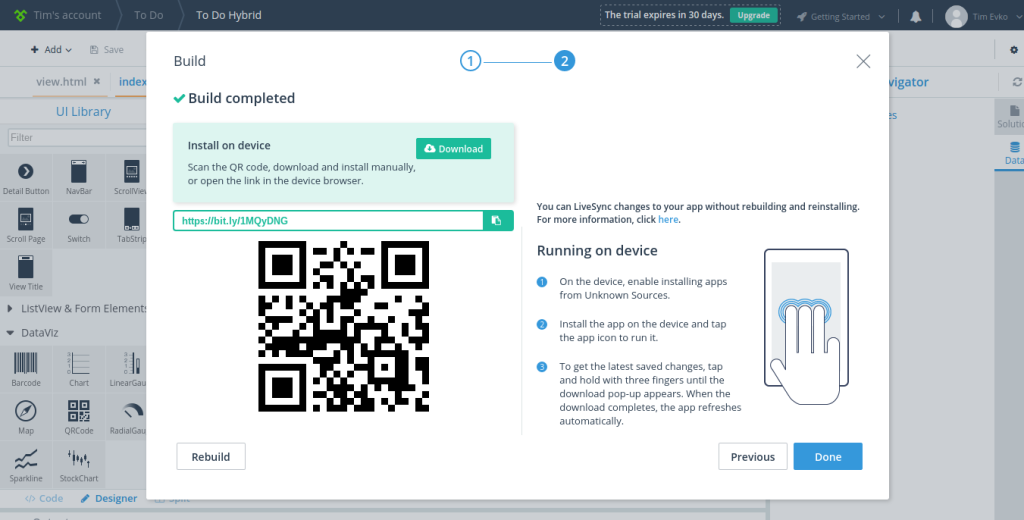
It’s important to ensure that your device settings allow you to install applications from unknown sources, otherwise you will not be able to install the test application.
When you’re ready to publish your application for use by the public, Telerik will help you submit the application to the iOS, Android and Windows Phone app stores.
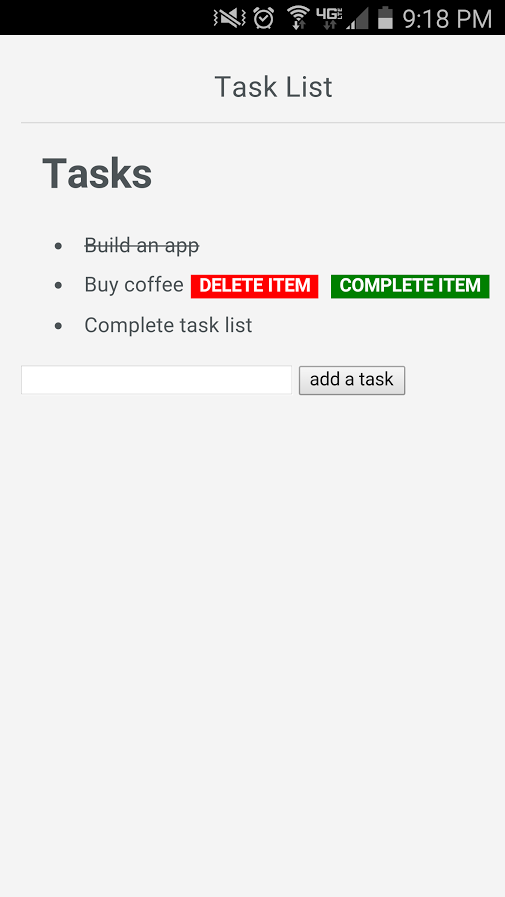
Success!
Conclusion
We’ve only briefly touched on some of the things you can do with Telerik Platform. Creating a native or hybrid mobile application is now easier than ever. Not only can Telerik Platform help you save time, money, and a few headaches, you can create applications that deploy to a variety of app stores without ever having to write anything other than HTML, CSS and JavaScript.
 Tim Evko
Tim Evko is a front end web developer from New York, with a passion for responsive web development, Sass, and JavaScript. He lives on coffee, CodePen demos and flannel shirts.