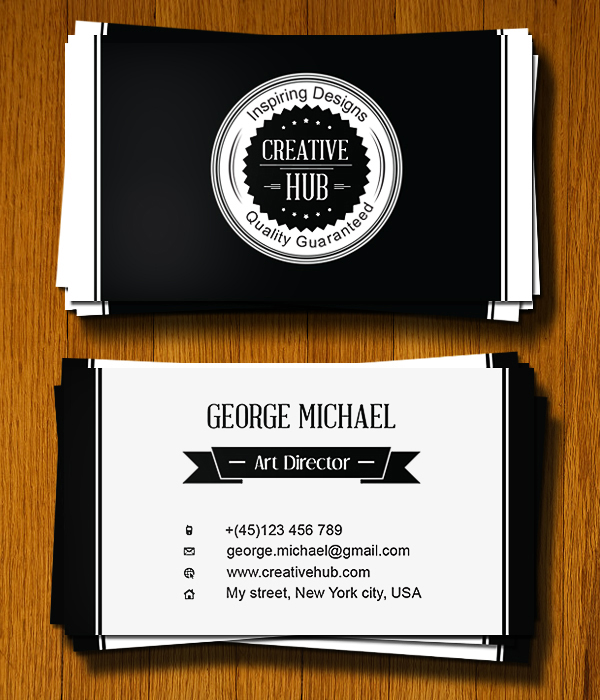
Illustrator is great for creating print designs. It has a ton of handy tools that can help you to achieve a crisp design outcome. It has everything you need to design flyers, brochures, business card, or any other printed media. Designing sharp, stylish printed media in black and white is a great way to save on printing costs without compromising your aesthetics. Today, I’ll walk you through the process of designing a clean, colorless business card in Illustrator. We’ll design both the front and rear sides of the card, and I’ll guide you quickly through the business card basics along the way. So, let’s get started! Resources: AbrahamLincoln font Wood Texture By Bittbox Final result: (Click here to download the completed Illustrator file.)
Step 1
Create a new document in Illustrator. I am going to design an 89 by 51mm business card today, but sizes vary across different printing firms. You can enter the dimensions according to your printer. We are using a 3mm bleed size. Bleeds are the segments of your designs that will be cut after print. We will use CMYK color mode to get a sharp print. We’ll design both sides of the card, so keep the number of artboards 2.
Step 2
Now, we’ll set the guides over the artboards. You can see red outlines around each artboard, which are the bleeds. Now press Ctrl + “R” to view the Rulers, drag the guides from the horizontal and vertical rulers, and position them around the black borders surrounding both artboards as shown below.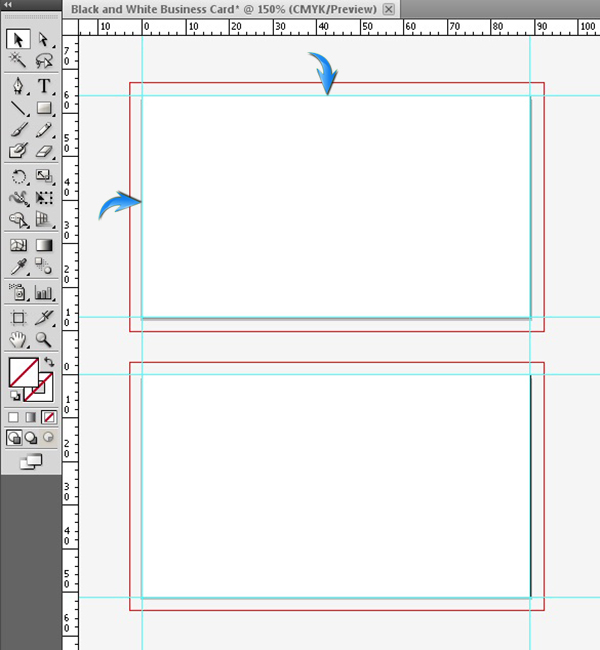
Step 3
Next, we’ll move these guides 5mm inside from the borders to define the margins. Margins are used for safety purpose to make sure all the important content is some distance from the edges. To do so, select the left vertical guide and the two bottom horizontal guides by pressing the “Shift” key. Once the three guides are selected, press “Enter” to open the “Move” window. Use 5mm for the fields, choose a 45⁰ angle, and click “OK.”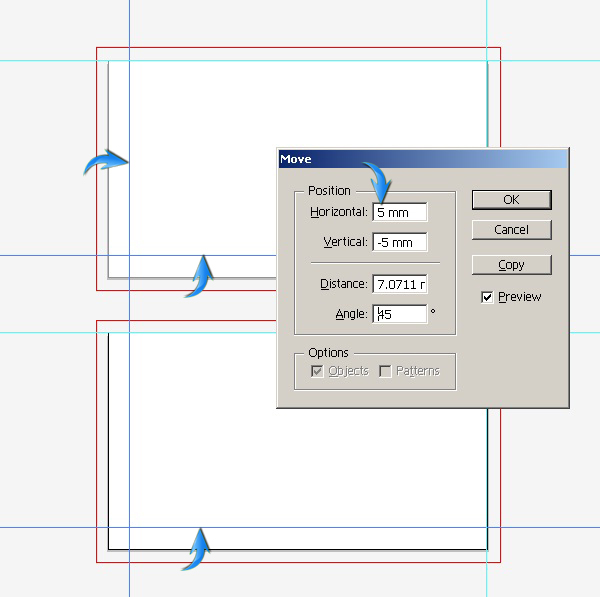 Now, select the remaining guides and open the “Move” window. Put -5mm in the horizontal field and 5mm in the vertical with a -135⁰ angle. Now, right-click and select “Lock Guides.”

Step 4
Draw a black rectangle covering the first artboard completely within the red bleeds. Draw a white rectangle over the second artboard.
Step 5
Next, we’ll make side borders for both the front and back of card. Draw two white rectangles along the left border of the first artboard, as shown below. The larger rectangle should be touching the safety margin and the thin rectangle with a slight gap.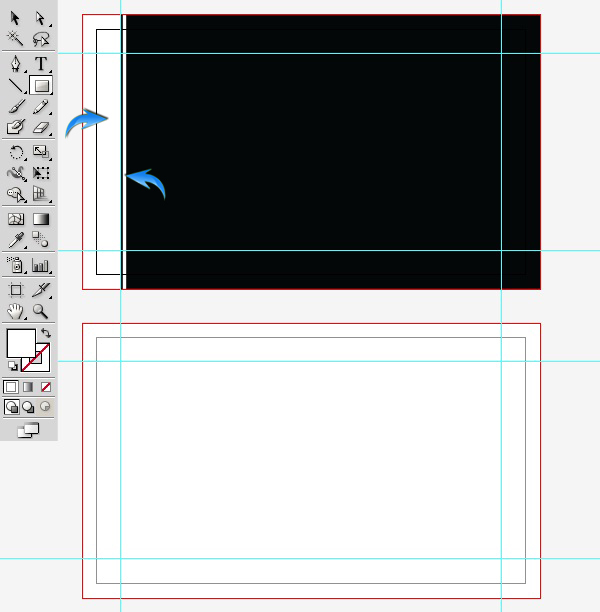 Select both of these rectangle layers, click on the options square (which is present at the top-right corner of the layers panel), and choose “Collect in New layer.” Now, duplicate this layer; click on the ring-shaped target in front of the duplicated layer. Finally, right-click the document and select “Transform” > “Reflect.” Flip it vertically 90⁰ to form the right border.
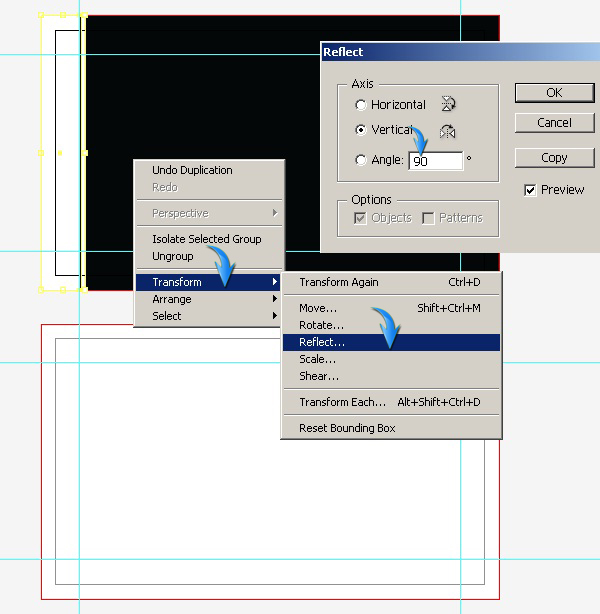 Position these rectangles along the right border. Collect both rectangles into a new layer, duplicate, and drag it along the second artboard to from the borders for the backside. For the backside, change their color to black.

Step 6
Now, we’ll focus on the front side of our card. Draw a white ellipse in the center.
Step 7
Draw another ellipse inside the previous one, but this time set the fill color to none and choose a 0.5pt stroke of black, as shown below. Make two more similar strokes inside the previous one. Keep the stroke weight of the second ellipse at 1pt, and use a stroke weight of 0.5pt for the third.

Step 8
Select the star tool and right-click on the document to open the star window. Use the following settings to build our star.
Step 9
Next, we’ll add title text in the center. I am using the “Abraham Lincoln” font (15pt) here.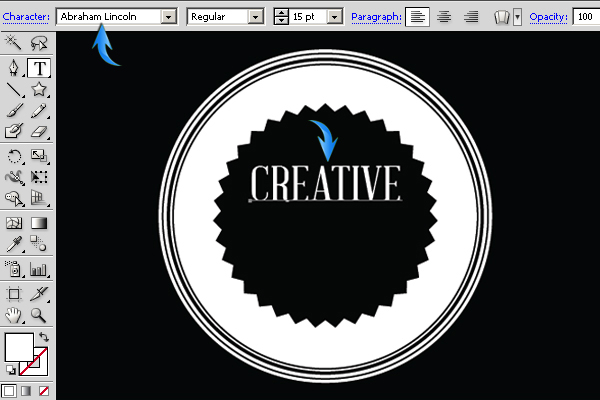 Draw two lines with a 0.25pt weight using the line tool or the pen tool as a text divider, and type additional text below these new lines.

Step 10
Draw a few more lines with a 0.25pt weight to fill the vacant space within the black star. These may vary depending on your text.
Step 11
Draw additional stars as shown below.
Step 12
Now, I’ll show you how to add text in a circle in illustrator. For the top arched text, draw a properly-sized ellipse using the ellipse tool. Now, select the “Type on a Path” tool, press Ctrl + Alt + “T” to open the paragraph window, select “Align center,” and click on the bottom center of the circle. This will automatically position the type cursor at the top center of the circle as you type.
Step 13
To add text within the lower arch, select the previous text path, press Ctrl + “C” to copy it, and then press Ctrl + “F” to paste it in front. Now, go to “Type” > “Type on a path” >“Type on a path options.” Use the following settings here.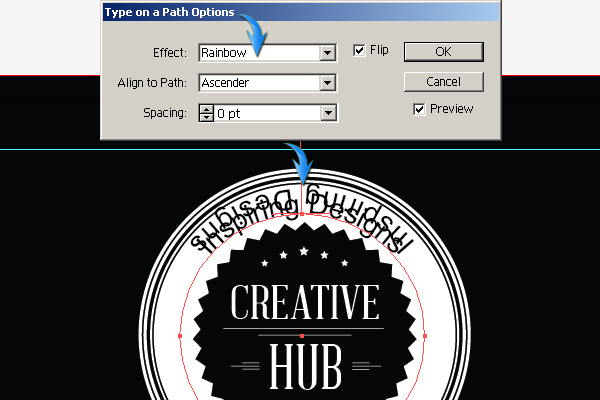 Replace the duplicated text with new text. I am going to use same font and settings here that I used for the similar top-arched text. Choose the selection tool (“V”); you will notice a handle in the center of the text, click and drag it towards the bottom center of the circle using the selection tool. Make sure not to drag it inside the circle.

Step 14
Draw a curved line using the pen tool with a 1pt stroke. Change its width profile to the one with pointed ends, as shown below.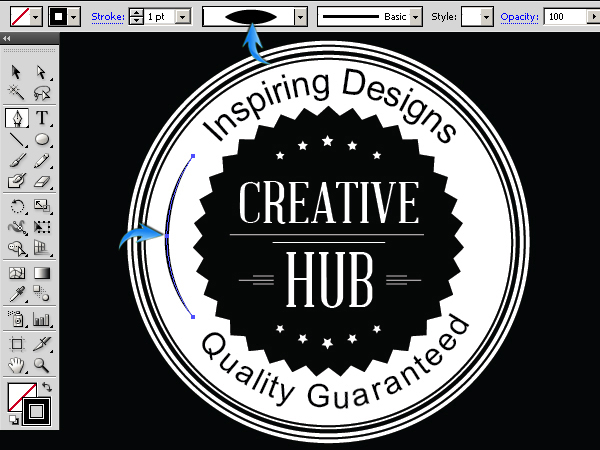 Make another curved line (0.5pt) next to the newly-drawn shape. Duplicate these two lines and flip them to make equivalent lines for the right side.

Step 15
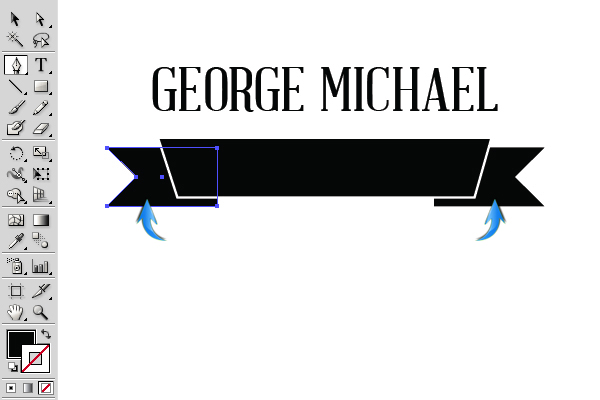
Coming back to the backside of the business card, we’ll add the title text.
Step 16
Now we’ll make a ribbon. Select the pen tool to draw the shape shown below, set your fill color to black, and use a 0.75pt white stroke. Complete the ribbon by making its sides. Draw one side using the pen tool, duplicate it, and flip it horizontally to build the other side.
Step 17
Add a subtitle inside the new ribbon. Also, you can draw lines at the sides of the text if your subtitle allows it.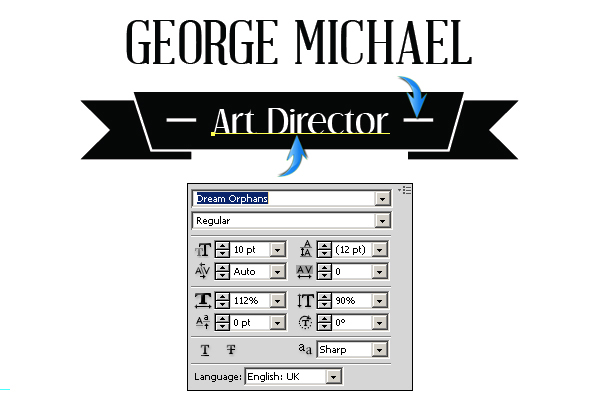
Step 18
Now, to add contact details, you can use bullets, icons, or whatever you like. We’ll use icons that are present within Illustrator. Select “Window” > “Symbols” to open the symbols window. Now, click on the symbol libraries menu present at the bottom-left corner of the symbol window, and choose web icons from there. I’ve selected few of them and dragged them onto separate new layers. Resize them accordingly.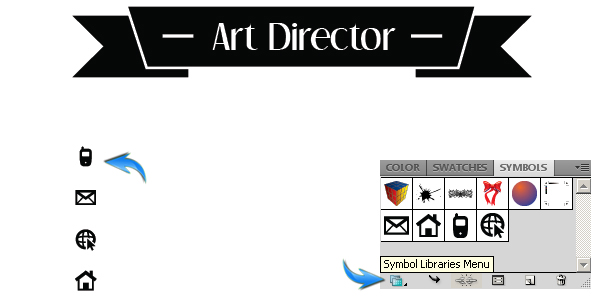
Step 19
Now we’ll add contact details. I’ve used “Arial” font for this.
Step 20
We are done with the designing of our clean, colorless business card. Now it’s time to save it for printing. Press Ctrl + “A” to select every design element and go to “Type” > “Create Outlines.” This is to avoid any font-related problems. Now, save this file as an adobe PDF with the following settings, and your file is ready to be sent for printing.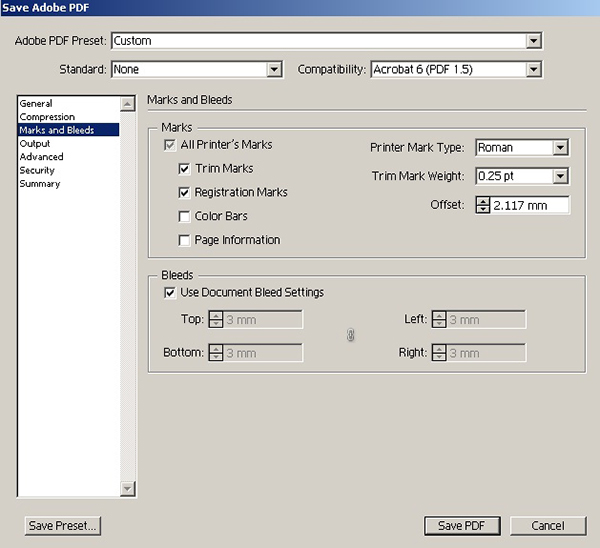
 That’s it guys. I hope you enjoyed the tutorial and learned something useful. Do share your thoughts!
Frequently Asked Questions about Designing a Print-Ready Black and White Business Card in Illustrator
How can I ensure my business card design is print-ready?
To ensure your business card design is print-ready, you need to set up your document correctly in Adobe Illustrator. Start by creating a new document and setting the size to the standard business card size (3.5 x 2 inches). Make sure to add a bleed of 0.125 inches on all sides to allow for any slight shifts during the printing process. Use CMYK color mode for printing and set the resolution to 300 dpi for high-quality prints. Lastly, save your design as a PDF with the ‘Preserve Illustrator Editing Capabilities’ option checked to keep your design editable.
What is the importance of using bleed in my business card design?
Bleed is an extra space added to your design that extends beyond the cut lines of your card. It’s crucial because it ensures that your cards will not have any unprinted edges or borders after they are cut. If your design extends all the way to the edge of your card, you should add a bleed to prevent any white edges from showing up after the card is cut.
How can I create a black and white design in Illustrator?
To create a black and white design in Illustrator, you can start by setting your color mode to Grayscale. This will ensure that no color information is included in your design. You can then use the various tools in Illustrator, such as the Pen tool, Shape tools, and Type tool, to create your design. Remember to use different shades of black and white to add depth and contrast to your design.
How can I add text to my business card design in Illustrator?
To add text to your business card design in Illustrator, you can use the Type tool. Simply select the Type tool from the toolbar, click on your document where you want to add text, and start typing. You can adjust the font, size, and alignment of your text using the options in the Character panel.
How can I save my business card design for printing?
To save your business card design for printing, go to File > Save As and choose Adobe PDF as the file format. In the Adobe PDF options, select ‘High Quality Print’ from the Adobe PDF Preset dropdown. Make sure to check the ‘Preserve Illustrator Editing Capabilities’ option to keep your design editable. Also, check the ‘Use Document Bleed Settings’ option to include the bleed in your print file.
What is the standard size for a business card?
The standard size for a business card in the United States is 3.5 x 2 inches. However, the size can vary depending on the country and the printing company. It’s always a good idea to check the preferred size with your printing company before you start designing your card.
How can I add a logo to my business card design in Illustrator?
To add a logo to your business card design in Illustrator, you can use the Place command. Go to File > Place, locate your logo file, and click Place. Then, click on your document where you want to place the logo. You can resize and reposition the logo using the Selection tool.
Can I use Illustrator to design a double-sided business card?
Yes, you can use Illustrator to design a double-sided business card. To do this, you need to create a two-page document. When setting up your new document, simply enter ‘2’ in the Number of Artboards field. You can then design the front of your card on the first artboard and the back of your card on the second artboard.
How can I ensure that my text is legible on my business card?
To ensure that your text is legible on your business card, you should use a font size of at least 8 points. Avoid using light-colored text on a light background or dark-colored text on a dark background, as this can make your text hard to read. Also, choose a font that is easy to read and avoid using too many different fonts in your design.
Can I use images in my business card design?
Yes, you can use images in your business card design. However, you should ensure that any images you use are high-resolution to prevent them from appearing pixelated when printed. You can add images to your design in Illustrator using the Place command, just like you would add a logo.
 Anum Khan
Anum is Web and Graphic designer. Addicted to Photoshop and crazy for pixel perfection. She is also an active blogger, sharing her passions, skills and creative details on her blog Websoulz. She loves to connect with the community, sharing the latest design gossips and rolling her eyes on boring trends.